How Can You Tell Your Leather Type and Care for It Right?
Published on: June 9, 2026 | Last Updated: June 9, 2026
Written By: Harriet Nicholson
Hello Tannery Talk. That moment of hesitation with a cleaner in hand, worried you might harm your favorite piece, is all too familiar.
This article will walk you through the core leather types like full-grain and suede, how to identify them by their grain and feel, the specific cleaning each one needs, and clear restoration steps for common wear.
My advice comes from the bench, learned by conditioning and repairing daily companions like my deep chestnut saddle Mason.
How to Identify Leather Types with Simple, Hands-On Tests
You don’t need a lab. Your eyes and fingers are the best tools you have. Start by finding an inconspicuous spot, like an inside seam or the back of a flap.
The Look and Feel Test: Smooth, Suede, or Something Else?
Run your fingers across the surface. Close your eyes and focus on the texture.
Is it perfectly smooth, almost plastic-like? That’s often corrected grain leather, which has been sanded and given an artificial coating.
Do you feel a consistent, tight pattern with subtle variations? That’s the natural grain of the hide. You might feel tiny pores, wrinkles, or even light scars. This is the hallmark of quality full-grain or top-grain leather.
Is it soft and fuzzy on both sides? You’re holding suede. It has a velvety nap because it’s made from the inner layer of the hide.
If one side is smooth and the other is fuzzy like a soft felt, that’s nubuck. It’s like the suede’s more refined cousin, made by lightly sanding the top grain.
Inspecting the Edges and Underside for Truth
Now, look at the parts most people ignore. Flip the item over and examine the back.
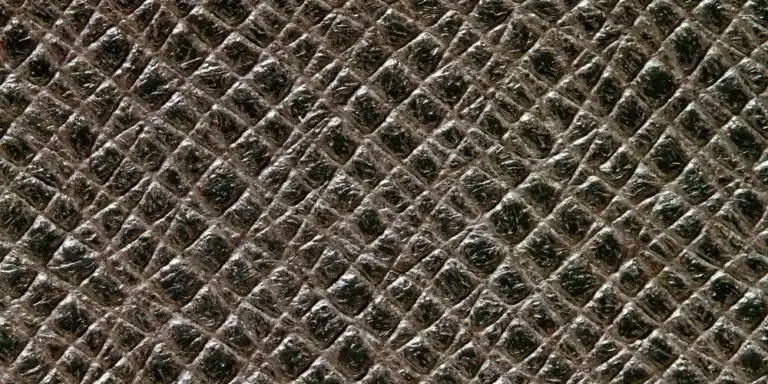
Do you see a uniform, woven fabric or a papery layer glued on? That’s bonded leather. It’s made from pulverized leather fibers pressed together and needs gentle care.
A real hide will show a fibrous, almost chaotic cross-section of natural tissue. It might look rough, but it feels strong.
Next, check the cut edges. Are they rough, porous, and show multiple layers like a sandwich? That’s a great sign of a thick, full-grain piece.
Are the edges painted over with a glossy, uniform color to hide what’s underneath? That edge paint often seals corrected grain or top-grain leather, giving it a cleaner look but telling you the natural edge wasn’t left to breathe.
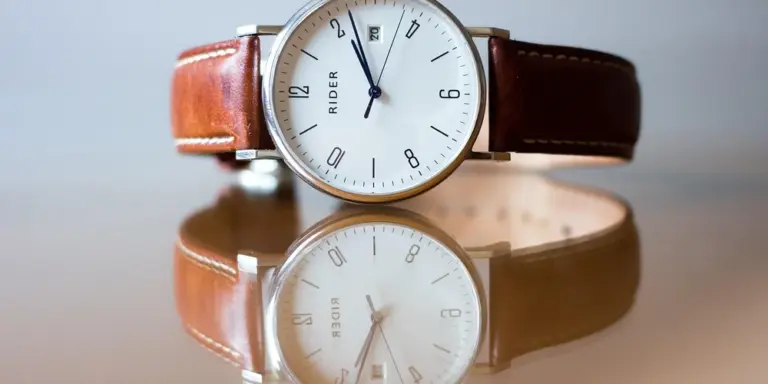
Full Grain Leather: Your Durable, Aging Companion
Think of full-grain leather as the original, unedited page from the animal’s story. It’s the top layer of the hide, complete with all its natural marks, grain, and pores. Nothing is sanded away.
This structure makes it incredibly strong and breathable. It’s the most durable type of leather because its dense fiber structure remains intact. My saddle, Mason, is made from it. After eight years, his deep chestnut color has matured into a rich, dark patina no factory could replicate. Every scuff from a branch and rub from a stirrup leather has added to his character.
Why Scratches and Marks Add Character
With full-grain, you don’t fight the marks, you embrace them. A scratch on corrected grain leather cuts through a thin topcoat, often leaving a white line. A scratch on full-grain leather compresses the dense fibers. You can often rub it gently with your thumb and watch it nearly disappear as the oils in the leather redistribute.
These imperfections are proof of life and honest use. They mean your bag or boots are developing a history that is uniquely yours, just like worn denim fades to fit its owner.
Cleaning and Conditioning for Longevity
Your goal is to clean without stripping, and condition without clogging. Here is my simple routine for pieces like Mason or a sturdy briefcase.
- Remove dry dirt with a soft, dry brush.
- Dampen a clean cloth with water and wring it out completely. Wipe the surface to lift grime. For heavier dirt, use a tiny drop of a pH-neutral leather cleaner on the cloth.
- Let the leather dry completely, away from direct heat. This might take a few hours.
- Test any conditioner on a hidden spot. Apply a small amount of a natural conditioner (like a balm or oil) to another clean cloth.
- Rub it into the leather in gentle, circular motions. The leather should drink it in slowly; if it sits on top, you’ve used too much.
- Let it absorb for at least an hour, then buff off any excess with a dry cloth to restore the natural sheen.
A common mistake is over-conditioning. Full-grain leather doesn’t need feeding often. Once or twice a year is usually plenty for most items. Overdoing it can soften the leather too much or darken it permanently.
Top Grain and Corrected Grain Leather: The Refined Smooth Surfaces
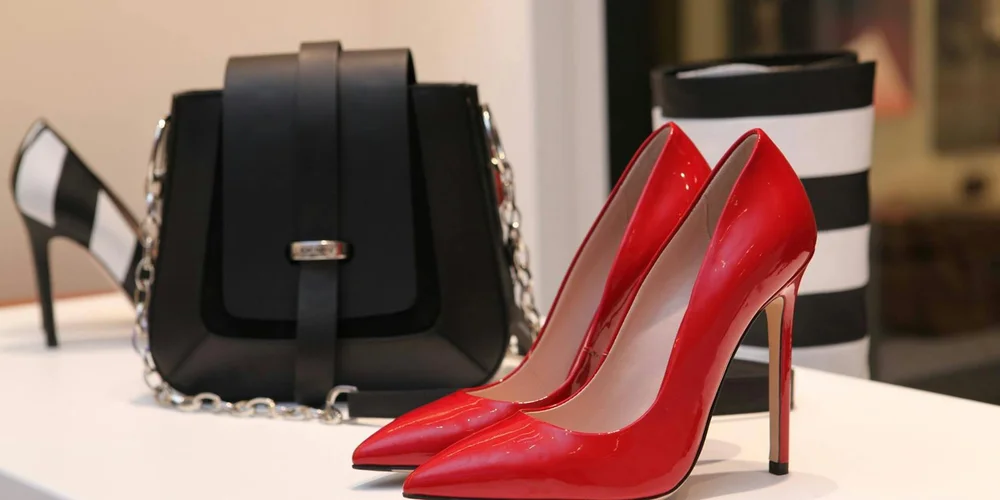
Top grain leather is the layer just below full grain. It has been sanded to remove the natural grain and imperfections, giving it a consistent, smooth surface. Corrected grain leather takes this a step further. It’s heavily buffed and then embossed with an artificial grain pattern, often to mimic a more expensive hide. Think of it like this: if full grain leather is a piece of solid wood with its unique knots and rings, top grain is that wood sanded smooth, and corrected grain is plywood with a wood-grain sticker applied.
Their look is uniform. You won’t see the scars or insect bites you might find on full grain. This makes them popular for formal briefcases, sleek handbags, and furniture where a flawless appearance is desired. My jacket, June, is a top grain calfskin. Its surface is even and soft, perfect for the clean look I wanted.
Caring for these smooth finishes is straightforward. The goal is to clean without scratching and condition without clogging the pores.
- Start with a soft, lint-free cloth, barely damp with cool water. Gently wipe the surface to lift dust and grime.
- For deeper cleaning, use a drop of pH-balanced leather soap on a damp cloth. Work in small circles, and immediately wipe away any soapy residue with a second damp cloth. Never let soap dry on the surface.
- Always let the leather dry completely, away from direct heat, before moving to the next step.
To restore shine and protect the surface, a quality leather cream or lotion is your best tool. These products contain conditioners and mild waxes that nourish the leather and provide a protective layer.
Spotting a Corrected Grain Finish
Corrected grain can be tricky to identify. The texture often feels a little too perfect and uniform. Run your fingers across it. A real, natural grain has subtle high and low points. A corrected grain might feel slightly plastic-like or the pattern may repeat in a way that seems unnatural. Look closely at the pores; on corrected grain, they are often stamped on and look identical. A common mistake is treating it like fragile suede. Corrected grain is durable and can handle gentle creams and cleaners meant for smooth leather.
Polishing and Protecting for Daily Use
After cleaning and conditioning, you can add a layer of protection. Use a very soft cloth to apply a thin coat of a protectant designed for finished leather. This helps guard against water spots and everyday spills. For items like belts or wallets that see lots of friction, a light buff with a clean, dry cloth after conditioning can bring up a nice, subtle sheen. Remember, less is more. Applying too much product can create a sticky, unattractive buildup over time.
Nubuck and Suede Leather: Caring for Soft, Velvety Textures
Nubuck and suede are often confused, but they come from different parts of the hide. Nubuck is made from the top grain of the leather, which is then sanded to create a soft, velvety nap. Suede is made from the split underside of the hide, giving it a more fibrous, fluffy texture. Because nubuck starts as a tougher top layer, it is generally more durable than suede, though both require gentle handling.
The golden rule for both materials is dry care first. Water and most liquid conditioners are the enemy. They can cause permanent dark stains, mat down the nap, and leave hard water marks.
Your primary tools are a soft-bristled nubuck/suede brush and a specialized gum eraser. For daily maintenance, a quick, gentle brush in one direction is all you need to lift the nap and remove surface dust. For scuffs or dirt, use the gum eraser. Gently rub it over the mark, then brush the area to restore the texture.
Brushing Techniques to Revive the Nap
Over time, the nap can get flattened, especially on shoes or bag straps. To revive it, hold the item firmly and brush vigorously in one direction with your suede brush. Then, brush it again from a different angle. This cross-brushing technique helps stand the tiny fibers back up. You can see this on a pair of suede shoes; a good brushing can make the color look rich and new again. Always store these items with plenty of air space so the nap isn’t crushed.
What to Do After a Spill or Stain
Act quickly, but don’t panic. For a liquid spill, immediately blot-do not rub-with a dry, absorbent cloth. Let the area dry completely away from heat. Once dry, you will likely see a water ring or stained spot where the nap is matted. Use your suede brush and eraser to work on the spot. For oil-based stains, sprinkle a small amount of cornstarch or talc on the spot to absorb the oil. Let it sit overnight, then brush it out thoroughly. If a stain persists, a suede-specific cleaning foam is the safest next step. Test it in a hidden area first, apply sparingly, and brush thoroughly after it dries.
Bonded and Faux Leather: Knowing Limits and Basic Care
Not every leather-looking item is made from a single animal hide. Bonded and faux leather are different. They need different care, and more importantly, different expectations.
Bonded leather is like a collage. It uses shredded leather fibers mixed with polyurethane or latex binders, then layers this pulp onto a fabric or paper backing. Real leather, by contrast, is made from the whole hides of animals. Faux leather, sometimes called PU or vinyl, is entirely synthetic with no animal content.
You can often spot these materials. Look for a surface pattern that repeats perfectly, like a printed sticker. Feel for a lack of natural grain variation. Give it a sniff. A strong, chemical or plastic smell is a telltale sign. The backside usually reveals a woven fabric or uniform coating, not the fibrous flesh side of real leather.
Cleaning them is straightforward, but you must be gentle to avoid stripping the thin surface layer. Use a soft cloth dampened with water and a drop of mild, pH-neutral soap. Wipe in one direction, never scrub in circles. Dry immediately with another cloth.
Restoration, however, has firm limits. You cannot truly rehydrate or feed these materials with leather conditioner. The conditioner will sit on top or be absorbed by a fabric backing, doing little good. Your best strategy is prevention: keep them clean and out of direct, hot sunlight to slow down the aging process.
Why These Materials Crack and How to Slow It
Bonded and faux leather crack because the top plastic layer is not flexible. It cannot expand and contract with use or temperature changes. The plasticizers that keep it soft evaporate over time. Once gone, the coating becomes brittle and fractures.
To slow this down, avoid extreme heat from radiators or car dashboards. Keep the material away from alcohol-based cleaners and solvents, which aggressively dry out the plastic. Using a water-based protectant spray designed for synthetic materials can create a barrier against spills and slow plasticizer loss. Think of it as sunscreen for your sofa or bag.
When Cleaning Helps and When Replacement is Wise
A simple clean can work wonders on a bonded leather office chair with everyday dust and light stains. It restores the look without risk.
If the material has deep scratches that reveal a different color underneath, or if the surface is already flaking like a sunburn, cleaning will not fix it. Applying dressings or “magic” repair kits often creates a sticky, messy patina that attracts more dirt. When the top coat is actively peeling or deep cracks have formed, consider replacement, as repair is rarely durable or cost-effective.
Your Restoration Toolkit: How to Recondition and Revive Old Leather
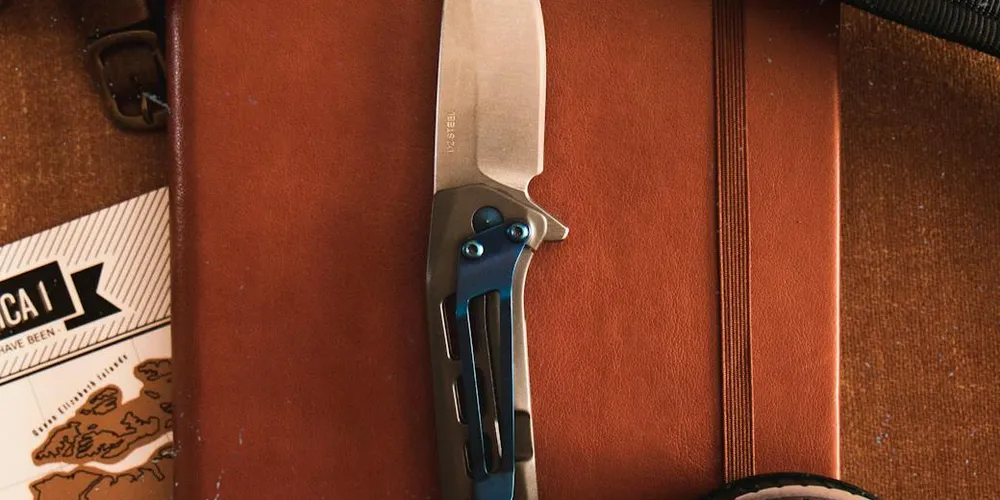
Real leather is forgiving. It wants to be restored. Whether it’s an old coat, a dry wallet, or a stiff bag, the process follows a gentle, universal rhythm: clean, condition, protect. Let’s walk through restoring an old wallet, like my Scout, which became dry and pale from back pocket duty.
First, always assess your piece. Look for:
- Major structural rips or tears: These may need professional repair first.
- Flaking finish: If the color coat is peeling, clean very delicately.
- Mold or heavy unknown stains: Address these with specific cleaners before general conditioning.
If the piece is just dry, scuffed, and thirsty, you’re ready to begin.
Step 1: Deep Cleaning Without Damage
Cleaning removes grime that blocks conditioner. Use a soft horsehair or bristle brush to dry brush away surface dirt. For a deeper clean, you need a cleaner.
Choosing Between Saddle Soap and Mild Cleaners
Saddle soap is a classic, gentle cleaner that adds a bit of fat back into the leather. It’s excellent for sturdy, oil-tanned items like boots, belts, or work gloves. For more delicate leathers like a jacket (my June has soft calfskin), a pH-balanced leather cleaner is safer. It cleans without affecting the tannins or dyes. When deciding what’s best for your leather, consider the item and its finish. A quick comparison of saddle soap versus pH-balanced cleaners can guide your choice.
Apply your chosen cleaner to a damp cloth, not directly to the leather. Work in small sections using circular motions. You will see dirt transfer to your cloth. Wipe away any residue with a second cloth dampened with clean water. Let the piece dry completely, away from heat. This can take a full day for a jacket. These steps show you how to clean a leather coat at home without damaging it. Gentle handling helps preserve the leather’s finish and durability.
Step 2: Rehydrating Dry, Thirsty Leather
After cleaning, the leather is open and ready to drink. Conditioner replaces lost oils. For most items, a balanced leather conditioner or cream works best. For extremely dry, thick leathers, a pure oil like neatsfoot can be used sparingly. Some ingredients suit most leathers, while others are better matched to specific leather types. Knowing the key ingredients helps tailor a conditioner to different leather types.
How to Apply Conditioner for Even Absorption
Use your fingers or a lint-free cloth. Your body heat helps the product penetrate. Apply a small amount and massage it into the leather in circular motions. You are looking for a matte, even sheen, not a thick, greasy layer. If the leather soaks it up immediately, apply a second thin coat after 15 minutes.
Let the conditioner absorb for at least an hour, preferably overnight. Buff off any excess with a dry cloth the next day. The leather will feel softer and more supple. My Scout wallet regained its plump feel and rich color after this step alone.
Step 3: Recoloring Leather to Refresh Its Look
Recoloring is for when cleaning and conditioning aren’t enough to revive faded color or cover scuffs. You use leather dye or pigment. Dyes penetrate and stain, while pigments sit on top in a thin layer of color.
Testing Dyes and Pigments on a Hidden Spot
Always test first. Apply your product to an unseen area, like an inside seam or the back of a strap. Let it dry completely. Check for color match and see if the finish feels stiff or tacky. This tells you if you need to thin the product or choose a different type.
Apply thin coats with a dauber or sponge, letting each coat dry fully. Multiple thin layers look more natural than one thick, painted coat. Once done and fully dry, always seal your work with a leather finisher or wax to lock in the color and provide protection. Remember, recoloring changes the look permanently, so patience here makes all the difference.
Special Care for Exotic Leathers and Sentimental Pieces
So far, we’ve talked about common leathers you see every day. Now, let’s look at the pieces that need a gentler, more informed touch, especially when it comes to developing patina.
Exotic leathers like ostrich, alligator, or stingray are stunning. Their textures are unique. Ostrich has those distinctive quill follicles, alligator has a raised tile pattern, and stingray is hard and pebbled. These hides often have their own natural oils and a finish that common conditioners can easily ruin. With heirloom bags or vintage jackets, the goal shifts. You’re not trying to make it look new. You’re preserving its story.
Your first move with any special piece should be research, not action. Find out what it is. A mistake here isn’t just a setback. It can be permanent.
Handling Oily Exotic Hides
Many exotic skins are naturally oily. Adding a standard conditioner is like pouring water on a raincoat. It sits on top, creates a sticky film, and can cloud the finish.
For a dusty or lightly soiled exotic item, follow a cautious path. My approach with a piece like an ostrich leather wallet would be this.
- Take a soft, dry horsehair brush. Gently flick away any surface dust. This prevents grinding grit into those delicate textures.
- Dampen a clean, white microfiber cloth with distilled water. Wring it out completely. You want it barely damp.
- Wipe the leather with light, quick strokes. Follow the direction of the scales or pattern. Do not soak any area.
- Let it air dry completely, away from heat, for a few hours.
- If conditioning is absolutely needed, use a tiny amount of a product made for exotic or oily leathers. Test it on the most hidden spot you can find first. Apply with a cotton swab for control.
The biggest error is assuming “leather is leather.” A heavy oil will clog the pores of an alligator hide and deaden its natural shine. When in doubt, less is always more. Often, a careful dry clean is all an exotic piece needs.
Preserving the Story in a Vintage Find
I have a soft spot for vintage leather. There’s a history in the creases and a warmth in the patina that new leather just doesn’t have. Think of my friend June, the jacket. Her light scratches aren’t flaws. They’re chapters.
With an heirloom bag or an old bomber jacket, your job is archivist, not renovator. Aggressive cleaning or conditioning can strip away that earned character and actually weaken the fibers.
Start with an assessment. In good light, look it over. Are there loose threads? Is the lining intact? Is the color wear even, or are there deep, isolated stains? This tells you what you’re working with.
Here is a gentle process for preservation.
- Empty the item completely. Check pockets and linings for old debris.
- Use a soft brush to remove loose dirt from the grain and stitching.
- Mix a drop of mild, pH-neutral leather cleaner with a few drops of distilled water. With a second, barely-damp cloth, work up a faint lather.
- Apply this lather to a small, inconspicuous area with circular motions. Wipe it off immediately with a dry part of the cloth.
- If the result looks good, continue this method over the entire piece, working one small section at a time. Do not saturate the leather.
- Allow it to dry fully for 24 hours. Then, apply the thinnest possible layer of a light, non-greasy conditioner. Your goal is to hydrate, not to darken or change the texture.
Accept that some marks are part of the object’s life. A faint ink spot or a smooth, dark spot from handling adds authenticity. Trying to scrub it out can do more harm than leaving it be. The value is in the piece’s entire journey, not in a factory-fresh surface.
Common Questions
What’s the single most common leather care mistake you see?
Over-conditioning. Applying too much product, or doing it too often, can saturate and weaken the fibers or create a sticky residue. For most items, a light conditioning once or twice a year is sufficient.
What’s the quickest, most reliable way to spot real leather versus faux?
Trust your nose and inspect the edges. Real leather has a distinctive, rich organic smell, while faux often smells chemical. Genuine hide will have uneven, fibrous edges, not a perfectly smooth, painted border.
How often should I really be cleaning and conditioning my leather goods?
There’s no universal schedule; it depends entirely on use. A daily work bag needs attention every few months, while a decorative pillow may go years. Let the leather’s feel-dryness or stiffness-be your guide, not the calendar.
I have a suede item that’s lost its softness. Is it ruined?
Not at all. A flattened nap is usually just dirty or compressed. Use a dedicated suede brush and gum eraser to lift dirt and restore the texture. Always use dry cleaning methods first before considering any specialized foam.
Are there any cleaning products I should absolutely avoid?
Yes. Never use household cleaners, disinfectant wipes, or anything containing alcohol or ammonia, as they strip natural oils. Also, avoid placing leather near direct heat sources like radiators to dry, as this causes irreversible cracking.
Final Thoughts on Leather Care
Your most valuable tool is knowledge. Identify your leather first, then choose your cleaners and conditioners to match its specific needs.
Treating your leather well honors the animal and the craft, turning everyday items into lasting companions. Building this skill lets you preserve beautiful materials and the stories they hold. Exploring the best general methods for caring and treating leather items can further guide your routine.
Related Guides and Information
- 7 Types of Leather Care Products | LeatherCult
- The Ultimate Guide to Durable Leather: Types, Care, and FAQs – LeatherNeo
- How to Care For Different Types of Leather – Anderson Lumber
- The Essential Guide to Caring for Your Leather
Harriet is a avid collector of leather goods such as purses, bags, seat covers, etc and has an extensive background in leather care, recovery, stain removal and restoration. She has worked for a number of years perfecting her leather care techniques and knows the ins and outs of restoring all kinds and types of leather products. With her first hand knowledge in leather care, you can not go wrong listening to her advice.
Full-grain and Top-grain Leather Care