How Do You Repair Cat Scratches on Leather Furniture?
Published on: March 16, 2026 | Last Updated: March 16, 2026
Written By: Harriet Nicholson
Hello Tannery Talk. I know that sinking feeling when you spot fresh claw marks on your sofa, and I want you to know it’s usually fixable.
We will cover assessing the scratch depth, cleaning the area, using a leather filler, color matching with dye or cream, and protecting your repair.
As a leather care specialist, I’ve restored everything from light nicks on jackets like June to deeper gauges on well-used saddles.
How to Tell If You Can Fix Cat Scratches on Leather
Before you do anything, you need to understand what you’re dealing with. Start by gently running your fingertip across the scratch. I do this exact same thing to check the tight grain on my old wallet, Scout.
This simple touch test tells you almost everything you need to know about the depth and severity of the damage.
You can sort scratches into three main categories. This method works for a cat scratched leather sofa, a pair of boots, or a handbag. The principles are always the same.
And to answer the big question right away: yes, you can fix cat scratches on leather in most situations. It’s a matter of matching the right repair method to the level of damage you find.
Minor Scratches: Surface-Level Marks
These are the best-case scenario. A minor scratch looks like a thin, white line on the surface. If you run your fingernail over it, it won’t catch or snag.
Think of the first soft creases that appeared on the arms of my calfskin jacket, June. They were just on the very top. These surface marks haven’t broken through the leather’s protective topcoat or dyed layer, which makes them the simplest to address yourself.
Moderate Scratches: Into the Grain
This is where the cat’s claw has bit deeper. The scratch will feel slightly rough or textured under your finger, and the color will be more pronounced, often a pale line.
It’s like the scuffs and abrasions my English saddle, Mason, has collected over years of riding. The leather’s natural grain pattern is disrupted, but the material itself isn’t torn. These scratches require more than just conditioning; they need help to blend the damaged fibers back together.
Deep Scratches and Gouges
This is serious damage. A deep scratch is a cut where you can see the lighter, fibrous underside of the leather. A gouge means a small piece might actually be missing.
The edges of the leather may be separated. At this level, the repair involves physically rebuilding the leather’s structure, which often calls for filler and color matching that can be tricky for a first attempt. For deep gouges, consulting a professional restorer is a smart, honest choice.
What You Need Before You Start Your Leather Scratch Repair
Gathering your tools first is non-negotiable. I never start conditioning Mason or treating a scuff on Scout without everything laid out. It saves time and prevents mistakes.
Here is your essential kit:
- Mild Leather Cleaner: A pH-balanced, neutral cleaner. This removes oils and dirt from the scratch so other products can work properly.
- Soft, Lint-Free Cloths: Microfiber is perfect. You’ll need several for cleaning, applying, and buffing.
- A High-Quality Leather Conditioner: This is your most important tool. Look for one with natural oils like lanolin or mink oil. It rehydrates the leather and can make minor scratches vanish.
For moderate to deep scratches, you will also need:
- Leather Filler Compound: A flexible paste used to fill gouges and level out deeper scratches.
- Leather Adhesive: For bonding any separated flaps of leather from a deep cut. My clear preference is for modern water-based formulas. They are plenty strong, don’t smell toxic, and are easier to work with.
- Leather Colorant or Dye: A liquid pigment to match the repaired area to the original color after filling. Always test this on a hidden spot first.
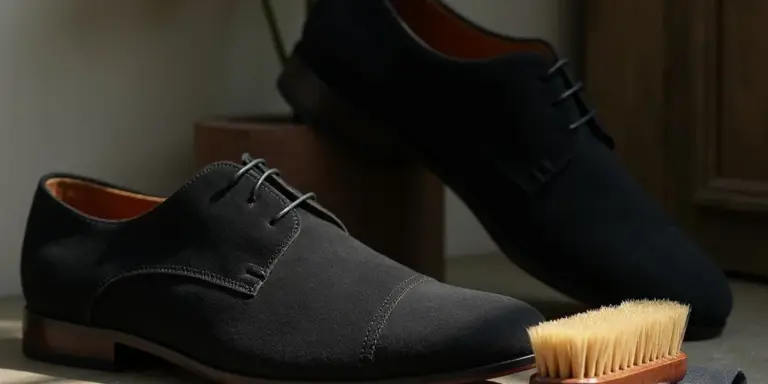
- Soft-Bristled Brush or Sponges: For gently working cleaner and conditioner into the grain.
Choosing products with simple, natural ingredients is better for your leather’s long-term health and for your own safety while working. A good conditioner does the heavy lifting for most common pet scratches. Have it ready.
The First, Crucial Step: How to Clean Scratched Leather

Before you even think about color or filler, you need a perfectly clean surface. Think of it like this: you wouldn’t put a bandage on a dirty cut. Leather needs the same care.
Dirt, skin oils, and old conditioners sit in those scratches. If you try to fix leather without cleaning it first, your repair products won’t stick. They’ll just sit on top and eventually peel or rub off. A proper clean makes the leather ready to accept help. Especially when dealing with oil stains on leather, a thorough cleaning is crucial.
Your Step-by-Step Cleaning Process
Gather a soft, lint-free cloth (like a microfiber), a bowl of lukewarm water, and a pH-balanced leather cleaner. Here is what to do next.
- Test your cleaner on a hidden spot, like under a cushion or behind a seam. Wait for it to dry completely to check for color change or texture issues. I always do this with June’s jacket, even with cleaners I’ve used before. Leather can be unpredictable.
- Dampen your cloth with clean water and wring it out until it’s just moist, not dripping wet.
- Apply a small amount of pH-balanced leather cleaner to the damp cloth, not directly onto the sofa.
- Gently wipe the scratched area using small, circular motions. You’re not scrubbing. You’re coaxing the grime out of the scratches. Apply very little pressure.
- Use a separate section of the cloth dampened with only water to rinse the area, removing any cleaner residue.
- Take a dry, clean cloth and pat the area to remove moisture. Do not rub.
- Now, wait. Let the leather air dry completely. This can take a few hours. Patience is part of the repair. A bone-dry, clean surface is the only proper foundation for a lasting repair.
Common Mistakes and Simple Fixes
It’s easy to rush this part. Here is what to watch for.
- Using too much water: Leather is skin. Soaking it can cause water stains or damage the backing. Your cloth should only ever be damp.
- Using household cleaners or soap: These are often too harsh. They can strip the leather’s natural oils or leave a filmy residue that blocks repairs. A dedicated, pH-balanced leather cleaner is made for this job.
- Not letting it dry fully: If the leather feels cool to the touch, it’s still damp inside. Applying anything now will trap moisture and lead to a weak, messy repair.
Once your leather is clean and completely dry, the scratches will look clearer. This is good. You have a true picture of the work ahead and a perfect canvas to start the repair.
How Do You Get Minor Cat Scratches Out of Leather?
For those light, surface-level marks where the leather’s surface is disturbed but the fibers underneath are intact, you have a simple fix. Think of a cat’s nail dragging across the leather like a fingernail across your skin. It leaves a white, dry-looking mark because the top layer has been compressed and dehydrated.
The solution is not to “fill” the scratch, but to replenish the oils and waxes that give the leather its flexibility and unified color. A quality leather conditioner is your best tool here. My jacket, June, gets similar fine lines from daily wear, and a simple conditioning makes them virtually disappear.
The Conditioner Method: Step-by-Step
This process works for aniline, semi-aniline, and pull-up leathers with minor scuffs. It hydrates the leather fibers, allowing them to swell slightly and close the visual gap of the scratch.
- Clean the area. Use a soft, damp cloth or a dedicated pH-balanced leather cleaner to wipe away any dust or oils. Let it dry completely.
- Apply a small amount of conditioner. Use about a dime-sized drop for a few scratches. It is better to use too little than too much.
- Rub it in with purpose. Using your fingertips or a soft, clean cloth, work the conditioner into the scratched area using a gentle, circular motion. Apply a bit more pressure than you would just wiping it on. The warmth and friction from your fingers help the product penetrate.
- Let it absorb. Walk away for 15-20 minutes. The conditioner needs time to soak into the dried-out leather fibers within the scratch.
- Buff it gently. With a fresh, dry part of your cloth, buff the area in a circular motion. You are removing any excess conditioner and helping to smooth the surface.
If the scratch is still visible after the first round, you can repeat the process once more after the leather has fully dried, usually waiting 24 hours. The leather can only absorb so much at one time.
Why This Works: The Skin Analogy
Imagine your hands in winter. The skin gets dry, cracks appear, and it looks lighter in color. You do not paint over it. You apply lotion. The lotion sinks in, rehydrates the skin cells, and the cracks become less noticeable as the skin regains its suppleness.
Leather conditioner works the same way. It replaces the natural oils that get scraped away. The buffing step is like smoothing the lotioned skin, helping the surface reflect light evenly again so the scratch blends with the patina.
This method directly answers “how do you get cat scratches out of leather” for superficial marks. It is a maintenance task, not a major repair. For deeper gouges where you can feel a groove or catch your fingernail, conditioning alone will not be enough. It will nourish the leather and improve its look, but the physical damage will remain. For such cases, you may need to repair and remove scratches from leather.
How to Fix a Cat Scratch on a Leather Couch That’s Moderate
A moderate scratch is one you can feel with your fingertip. The surface is broken, but the leather isn’t torn open. You can see a distinct line, and the color is lighter underneath. My jacket, June, has a few of these from daily wear. This repair is about building the surface back up.
Think of it like filling a small dent in a wood table. You are adding material, letting it harden, and then smoothing it flush. The goal is to create a new, level surface that you can barely see or feel. It requires patience and a very careful hand.
The Step-by-Step Process
Gather your tools: a clean, soft cloth, a leather cleaner, a flexible spatula (often included with filler kits), a leather filler or wax stick in a matching color, and a soft buffing cloth.
- Clean the Area Thoroughly
Dirt or oils will prevent the filler from sticking. Dampen a corner of your cloth with a pH-balanced leather cleaner and gently wipe the scratch and a small area around it. Let it dry completely. This is non-negotiable for a good bond.
- Apply the Leather Filler
Use your spatula to pick up a tiny amount of filler. Less is more. Press it firmly into the scratch, moving across the gouge to force the material down into it. Overfill it slightly, so there’s a small ridge on top. Your first application should focus on filling the depth, not creating a perfect surface.
- Smooth It Level
Wait about two minutes for the filler to start setting. Then, take your clean spatula and drag it gently across the filled scratch at a shallow angle. You are scraping off the excess ridge to make it perfectly level with the surrounding leather. Wipe the spatula clean after each pass.
- Let It Cure Fully
This is where patience pays. Do not touch it. Let the filler harden according to the product instructions, usually for at least 4-6 hours, sometimes overnight. Rushing this step means the filler will shrink or crumble when you buff it.
- Buff It Smooth
Once rock-hard, take a soft, dry cloth (like a microfiber) and gently buff the repaired spot in a circular motion. You are polishing the filler to blend its sheen with the leather’s finish. If the spot feels rough, use very fine grit sandpaper (800+ grit) with a light touch before buffing.
This method for how to fix a cat scratched leather couch works because you are addressing the physical gap in the material. It’s also a practical approach when you need to repair scratches, tears, or cracks on a damaged leather couch. The common mistake is using too much filler and creating a bump, or not letting it cure and smearing it. If the color isn’t quite right after buffing, you can use a leather cream dye to tint the area very carefully.
With a steady touch, the scratch will virtually disappear, leaving only the story of your pet’s mischief and your careful restoration.
Repairing Deep Cat Scratches and Gouges on Leather Furniture
Run your fingertip over the scratch. Does your nail catch in a groove? Can you see a clear flap of leather lifted away from the surface? That’s your sign. For shallow surface marks, a filler can work wonders. But a true gouge has parted the leather fibers. Trying to fill a deep hole is like patching a pothole without packing the base first, it will just collapse again. You need to bond the separated leather back together before you can even think about color or finish.
When to Use Leather Glue or a Patch
Think of the leather’s top layer like skin. A surface scratch is a scrape. A gouge is a cut that needs stitches. If the leather flap is still attached and flexible, you can glue it down. If a chunk is missing entirely, you’ll need to create a backing patch from a spare piece of leather. I’ve fixed gashes on old briefcases this way. My jacket, June, has a glued repair near the cuff from a similar mishap. It’s held for years because the foundation was secured first.
The Step-by-Step Bonding Process
This requires patience and a steady hand. Gather a flexible leather adhesive, a small, stiff brush for cleaning, cotton swabs, and a smooth, hard tool for pressing, like the back of a spoon.
- Clean and Dry: Gently clean inside the gouge with a neutral leather cleaner on a swab. Any dirt or oils will weaken the bond. Let it dry completely.
- Align and Apply: Carefully position the leather flap back into place. Lift just the edge with tweezers. Apply a thin layer of flexible leather glue to both the underside of the flap and the base of the gouge. Water-based adhesives are my preference, they’re strong and don’t release harsh fumes.
- Press and Hold: Immediately press the leather down firmly. Use your spoon back to burnish the area, applying even pressure for at least two full minutes. Wipe away any excess glue that squeezes out.
- The Crucial Cure: This is where many rush. Follow the adhesive’s cure time exactly, usually 24 hours. Do not test it, condition it, or sit on it. The bond must set fully from the inside out. Place a light weight, like a small book, over the repair to keep it flat as it cures.
A secure, flexible bond is the invisible foundation that makes the visible repair last. After the glue has fully cured, the area will be structurally sound but likely discolored. That’s when you move on to using a leather filler and color-matched cream to blend the surface.
Knowing When to Call a Professional
Be honest with yourself about the value of the piece, both monetary and sentimental. Is the damage on a primary cushion of a premium sofa? Is the gouge over six inches long or in a high-stress seam? Professional leather technicians have tools and materials, like specialized backing fabrics and industrial-grade pigments, that are hard to replicate at home. Getting a quote is a smart move. For severe damage on a centerpiece item, a professional repair can be an investment that preserves the furniture’s life and value. It’s like taking a treasured leather jacket to a tailor for a torn lining, sometimes expert hands are the right choice.
Addressing Common Concerns
In online forums, I see the same worries about tackling deep scratches. People fear making it worse or the scratch just reopening. The anxiety is real. The key is accepting this is a two-stage repair: structure first, then appearance. Using the wrong glue, like a brittle super glue, is a top mistake. It will crack with the leather’s natural flex. Rushing the cure time is another. If you’ve glued it properly and allowed it to set, the bond will be stronger than the surrounding leather. From there, any color work has a stable canvas to build upon.
Is a Leather Repair Kit a Good Choice for Cat Scratches?

When you find a fresh set of claw marks, a prepackaged repair kit feels like a quick answer. I keep a few on my shelf for clients who want to try a fix themselves. The right question is not just if a kit is good, but if it’s good for your specific scratch.
Think of a scratch in three parts: the physical gouge, the lost color, and the need for protection. A proper fix addresses all three. Many kits do, but the quality of the materials inside varies widely.
DIY Kits vs. Separate Products: The Trade-Off
Let’s compare your two main paths. I’ve used both methods on pieces like June, my jacket, where a deep scrape needed more than a kit could offer.
| All-In-One Kit | Separate Products |
|---|---|
| Convenience is the biggest pro. Everything you need is in one box, often with colorants you can mix. This eliminates the guesswork of buying five different bottles. | You control the quality of every component. You can choose a professional-grade filler, a specific type of dye, and a top-coat sealant you trust. |
| Kits are cost-effective for a single, small repair job. You won’t have leftover specialty products you may never use again. | This method is more economical if you have multiple repairs or anticipate future damage. A bottle of good leather filler will last for many fixes. |
| A common con is that some kits use lower-grade acrylics or pigments. These can dry stiff, crack over time, or create a plastic-like finish that doesn’t move with the leather. | The learning curve is steeper. Matching color perfectly with separate dyes is an art. It requires more time, patience, and potentially some testing on a hidden area first. |
Choosing a Kit That Actually Works
Not all kits are created equal. Based on repairing everything from chair arms to briefcases, here’s what to look for.
A complete kit must have three things:
- A Leather Filler: This is like spackle for your sofa. It fills the gouge so the surface is level again. Look for a flexible, sandable formula.
- A Colorant: This is usually a pigmented cream or liquid dye to restore the color over the repaired spot. Kits with a palette of base colors you can mix are best for matching.
- A Topcoat or Sealant: This clear layer protects your repair from wear and moisture. It’s what makes the fix last.
Avoid kits that are just a colored cream or wax. These merely mask the scratch temporarily and will rub off. For a real repair that lasts, you need to rebuild the leather’s structure, not just paint over the problem. (Similarly, when you repair scuffs on leather shoes or boots), simply coloring is not enough.
Answering Your Questions on Kit Effectiveness
On forums, I see the same doubts come up. Let’s address them directly.
“Will a repair kit make the spot hard and crusty?”
It can, if the filler is poor quality. This is the main complaint I have with budget kits. The fix becomes a stiff patch on soft, supple leather. You’ll feel it every time you sit down. A good filler remains slightly flexible.
“How close can I really get the color match?”
This is where kits shine for beginners. By mixing the provided colors, you can often get a 90-95% match. The final step of applying a neutral sealant helps blend it further. Remember, a perfect match on aged leather is rare; you’re aiming for a blend that the eye skips over.
“When should I NOT use a kit?”
Do not use a standard kit on:
- Large, torn areas (bigger than a coin).
- Very delicate leathers like aniline or suede.
- Deep punctures that have gone through the leather entirely.
For these, a professional repair is the kindest thing you can do for your furniture. I learned this on a client’s heirloom sofa where a kit would have caused more harm. Sometimes, preserving the piece means knowing when to call for help.
When Should You Call a Professional? Cost and Process
You can fix a lot with patience and a careful hand. I’ve repaired countless nicks on June’s jacket and conditioned Mason’s saddle through deep scratches. Some damage, though, needs a specialist’s touch.
Signs Your Sofa Needs a Professional
Think about calling a pro in these situations.
- Large or Numerous Scratches: If a whole cushion arm looks like a scratching post, DIY repair kits often struggle to blend such a big area seamlessly.
- Aniline or Semi-Aniline Leather: This is top-tier, minimally finished leather. It’s beautiful but stains and scratches easily because there’s no protective topcoat to fix. Trying to spot-repair it can create a dark, obvious patch.
- Deep Gouges or Torn Leather: If the scratch has actually cut through the leather, creating a flap or hole, you need more than filler. The structure is compromised.
- Extensive Finish Damage: When the colored protective coating is scraped off over a wide, uneven area, reapplying it evenly is a very skilled job.
If you’re looking up “cat scratched leather furniture repair” and the damage fits any of these descriptions, the professional option is your safest path to a like-new restoration.
What a Leather Repair Specialist Actually Does
It’s more than just adding color. A good technician approaches it like an artist restoring a painting. First, they clean and prep the area to ensure anything they apply will stick. For deep cuts, they might use a flexible leather filler, similar to bodywork on a car.
The magic is in the color matching. They don’t just use a premade dye. They custom-mix pigments to match your sofa’s exact shade and sheen, layer by layer. Finally, they apply a new protective topcoat that blends with the rest of the piece. For catastrophic damage, they might advise reupholstering just that specific panel, which is a major but precise undertaking.
Understanding the Cost Variables
Pricing isn’t simple. It depends on the same factors I’d consider if someone asked me to fully restore Mason’s saddle. The size and number of scratches are the biggest factors. A single, small scratch is one thing. A sprawling network of them is another.
The leather type matters greatly. Fixing a simple, protected full-grain leather is standard. Correcting a delicate aniline leather requires higher skill and materials, which increases the cost. Your location and the technician’s expertise will also affect the final price. A master craftsperson in a major city charges more than a general handyman.
Here is a rough idea to set expectations.
| Damage Severity | Professional Process | Cost Estimate Range |
|---|---|---|
| Few, shallow surface scratches | Cleaning, color blending, and refinishing | $150 – $300 |
| Multiple, deeper scratches or small gouges | Filling, extensive color matching, and refinishing | $300 – $600 |
| Large area or aniline leather damage | Complex color matching and full panel refinishing | $600+ |
Getting a few in-person quotes is always the best move. A trustworthy pro will give you a clear estimate after seeing the damage firsthand.
How to Prevent Future Cat Scratches on Your Leather Furniture

Repairing scratches is one thing. Stopping them from happening again is another. I think of it like conditioning a jacket after cleaning it. The cleaning is the repair. The conditioner is the protection for tomorrow. A little foresight saves a lot of work later.
Your cat isn’t being malicious. They’re following instinct. Our job is to make the leather less appealing than the alternatives we provide. This takes patience, but it works.
Offer Better Scratching Options
The single most effective strategy is giving your cat a superior place to scratch. Place a sturdy scratching post or pad directly next to the furniture they target.
Choose a post with a rough, appealing texture like sisal rope, and make sure it’s tall enough for a full stretch.
Rub a little catnip on the post to attract them. When they use it, offer praise or a treat. If you see them heading for the sofa, gently pick them up and place their paws on the post. Consistency is key.
Maintain Your Cat’s Claws
Keeping claws trimmed is a simple act of care, for your cat and your couch. Short, rounded claws do far less damage. Use a proper pet nail clipper and focus on the clear tip, avoiding the pink quick inside.
If you’re nervous, ask your vet or a groomer for a demonstration. Doing this every couple of weeks makes a significant difference. Think of it like the regular conditioning I give to my wallet, Scout. It’s routine maintenance that prevents bigger issues.
Use Safe, Natural Deterrents
Cats dislike certain smells. You can use this to your advantage without harsh chemicals. Citrus scents are a common deterrent.
- Mix a few drops of lemon or orange essential oil with water in a spray bottle.
- Lightly mist a throw blanket or a small piece of fabric placed near the furniture.
- Never spray the citrus solution directly onto the leather, as oils can dry it out.
The goal is to make the area around the couch less inviting, not to create an unpleasant environment. Reapply the scent every few days as it fades.
Employ Physical Barriers
Sometimes, the simplest solution is the best. A physical barrier gives you peace of mind. I keep a soft, attractive throw blanket draped over the arm of my reading chair where June, my jacket, often rests.
A well-chosen throw or a fitted slipcover protects the leather completely when you’re not there to supervise.
Choose materials with a texture your cat doesn’t enjoy, like a tightly woven microfiber. This is a temporary measure while you train them to use their post. It’s not a surrender. It’s a strategic defense for your furniture.
Apply a Leather Protector
After conditioning repaired scratches, consider applying a dedicated leather protector. This creates an invisible, breathable barrier on the surface.
It won’t make the leather claw-proof, but it can help repel moisture and make the surface slightly slicker, which cats often find less satisfying to dig into. I use a protector on Scout to guard against spills and skin oils. It’s a final, light shield.
- Ensure the leather is perfectly clean and dry.
- Apply a thin, even coat of a water-based leather protector with a soft cloth.
- Let it dry fully before using the furniture.
Reapply this protector every six to twelve months, just like you would recondition any leather good.
Prevention for All Your Leather Items
These principles apply whether you’re protecting a sofa, a chair, or a leather ottoman. The goal is always the same. Redirect the behavior, protect the surface, and maintain the item’s health.
For smaller items like bags or briefcases left on a couch, the best prevention is to store them in a closet. For fixed furniture, your strategy will be a mix of training, barriers, and care. Assess the damage, make the repair, and then put these gentle prevention habits in place. Your leather will thank you for years to come.
Common Questions
Can I use household items like vinegar or olive oil to fix cat scratches?
No. Vinegar’s acidity can degrade leather finishes, and olive oil can turn rancid, attracting grime. Stick to pH-balanced leather cleaners and conditioners designed for preservation.
Is repairing a cat-scratched leather bag or boots different from furniture?
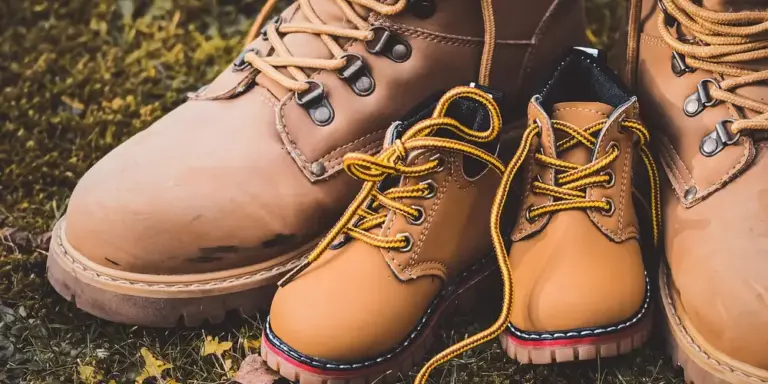
The core steps are identical-clean, assess, and repair based on depth. For items like bags or boots that flex more, prioritize flexible fillers and frequent conditioning to maintain integrity.
Why do some DIY repairs crack or peel after a few weeks?
This usually stems from improper surface prep or using rigid, low-quality fillers. Ensure the leather is impeccably clean and dry, and select flexible repair compounds that move with the material. It’s also helpful to know which methods are most effective for repairing and fixing general leather items. That knowledge helps you choose techniques that balance durability with the leather’s natural flexibility.
How can I prevent scratches on leather boots or bags left out at home?
Store them properly in closets or closed shelves when not in use. For added protection, apply a breathable leather protector to create a subtle barrier against casual clawing.
Final Thoughts on Leather Repair
The most important step is to act fast. Gently clean and condition any fresh scratch to prevent the leather from drying out and the damage from setting. For deeper repairs, patience and matching your filler or dye to the leather’s original finish matters more than any fancy technique.
Every repair you perform deepens your connection to the material and extends the life of a well-made piece. This mindful maintenance is the heart of sustainable leather care. With each small fix, you build not just skill, but respect for the craft and the material itself.
References & External Links
- Leather Cat Scratch Repair Kit | Leather Scratch Restorer
- r/fixit on Reddit: My cat decided the chair was her new scratching post. Is there any way to fix this to look good again? It’s faux leather of some type.
- How to Repair Cat Scratches on Leather | E-Learning
- How to Repair Cat Scratches on Leather Furniture | Chewy
Harriet is a avid collector of leather goods such as purses, bags, seat covers, etc and has an extensive background in leather care, recovery, stain removal and restoration. She has worked for a number of years perfecting her leather care techniques and knows the ins and outs of restoring all kinds and types of leather products. With her first hand knowledge in leather care, you can not go wrong listening to her advice.
Fixing Surface Scratches and Scuffs