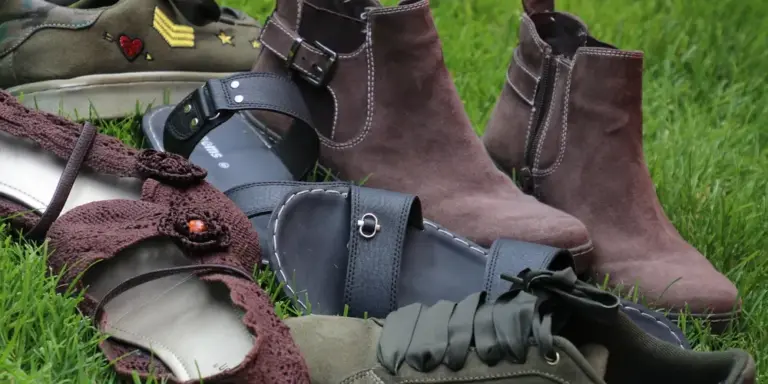
How to Clean, Condition, Waterproof, and Maintain Nubuck Leather
Published on: January 11, 2026 | Last Updated: January 11, 2026
Written By: Harriet Nicholson
Hello Tannery Talk. That soft, velvety feel of nubuck is special, but it can seem daunting to care for without causing damage.
This guide breaks it down into manageable steps, covering gentle cleaning, nourishing conditioning, reliable waterproofing, and simple maintenance.
I’ve worked hands-on with nubuck for years, repairing and preserving items just like yours.
What is Nubuck Leather, Really?
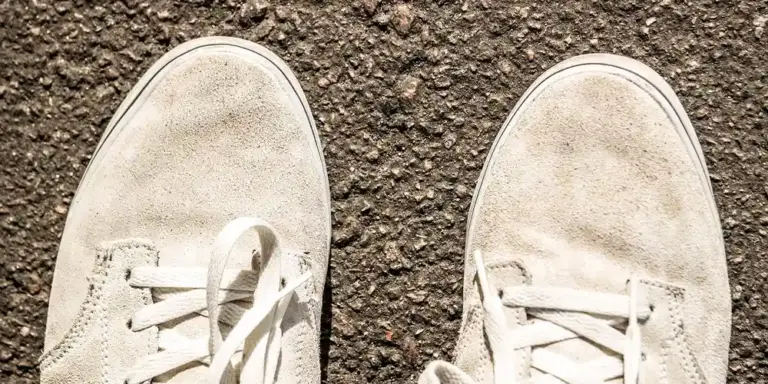
Nubuck is top grain leather, the same strong outer layer you find on my saddle, Mason, but with a key difference. It’s been lightly sanded or buffed on the surface. This creates a short, soft, velvety nap you can see and feel.
Think of it this way. If suede is the fuzzy fleece lining inside a jacket, nubuck is the fine skin of a peach. It has that same delicate, plush texture, but it comes from the top of the hide, making it stronger and more durable than suede.
That texture has a direction, called the grain. You can see it if you look closely. Brushing and cleaning with this grain is the single most important rule for caring for nubuck, as going against it can permanently damage the nap.
I appreciate nubuck for its beautiful handfeel and breathability. A well-made piece from a responsibly sourced hide will develop a rich character over time, much like the soft creasing on my jacket, June.
How to Clean Nubuck Leather, Step by Step
You must clean nubuck before you do anything else. Conditioning or protecting a dirty surface will just trap grime and oil deep in the leather. Gather your dedicated tools: a proper nubuck brush (with brass or synthetic bristles), a nubuck eraser, and a cleaner made specifically for nubuck or suede. Make sure to clean and care for the delicate surface properly to avoid any damage.
Here is the reliable process I follow.
- Let mud or wet stains dry completely. Trying to clean wet dirt makes a bigger mess.
- Take your nubuck brush and give the entire item a thorough, dry brushing. Always brush in one direction, following the grain. This lifts the nap and dislodges surface dust.
- For scuffs or marks, use the nubuck eraser. Rub it gently back and forth over the spot, then brush the residue away with your brush.
- For deeper soil or spills, use your dedicated cleaner. Apply a small amount to a clean, soft cloth-never pour it directly on the leather. Dab and gently rub the soiled area.
- Let the item air dry naturally, away from radiators, heaters, or direct sunlight. This can take a full 24 hours.
- Once completely dry, give it one more firm brushing with the grain to lift and align the nap. You’ll hear a light, raspy whisper and feel the surface become uniform again.
Patience during the drying phase is non-negotiable; applying heat will stiffen and potentially crack the leather.
The Right Way to Brush Nubuck
Brushing is not just for cleaning. It’s how you revive the material after every wear. The technique is simple but vital.
You must always brush with the grain. Look at the leather under light to see which way the tiny fibers lay. Brush in that direction, using firm, even strokes. Brushing against the grain will mat the nap down and can create permanent, shiny bald spots.
A proper brush on clean nubuck has a specific sound and feel. It’s a light, consistent scratch that raises the fibers without damaging them. It should leave the surface looking even and full, like fresh velvet.
Dealing with Stubborn Stains and Spills
What is the best method for stains? The answer is always: act quickly, use the right tool, and never panic-scrub. Here is my targeted advice for common offenders.
- Mud: Let it dry fully, then brush it out vigorously with your dry brush. For residue, use the eraser.
- Oil or Grease: This is tricky. Immediately blot (do not rub) with a clean, absorbent cloth or paper towel to soak up excess. Sprinkle a small amount of cornstarch or talc on the spot to draw out the oil. Leave it for several hours or overnight, then brush it out completely. You may need to repeat this.
- Salt Stains (from winter roads): Mix a solution of equal parts white vinegar and water. Dampen a cloth with the solution and gently dab the stain. Follow with a clean, water-dampened cloth to rinse the area. Let it dry, then brush.
Using water alone or a general-purpose cleaner will likely set a stain and leave a noticeable water mark or ring on the delicate nap. Always test any cleaner or method in a small, hidden area first. For oil stains, patience with the absorbent powder method is often the only safe fix that prevents you from spreading the grease further into the leather. This same approach also applies to removing oil stains from leather footwear and other leather items. It’s a safe, patient method for boots, bags, belts, and more.
How (and Why) to Condition Nubuck Leather

You can use a conditioner on nubuck, but you must be very selective. Using the wrong type will ruin its signature texture.
Think of it like caring for a soft, short-haired animal versus a thick-skinned workhorse. For my full-grain English saddle, Mason, I work a rich oil-based conditioner deep into the pores with my hands. That method would clog and matte the delicate nap of nubuck instantly.
Conditioning nubuck is not about adding a visible layer of product, it’s about replenishing oils invisibly from within to prevent the leather from drying out and cracking at the flex points.
Choosing the Right Nubuck Conditioner
Look for products specifically labeled for nubuck, suede, or “rough-out” leathers. They come in two main forms:
- Spray Conditioners: These are usually water-based or have very light oils in a fine mist. They’re excellent for overall, even application without disturbing the nap.
- Light Cream Conditioners: These are rubbed in with a fingertip or soft cloth, but they absorb quickly without leaving a residue. They are good for targeting very dry spots.
Avoid any conditioner made for smooth leather, especially those containing waxes, heavy oils, or silicone. They will darken the leather permanently and make the surface look stiff and greasy. It’s essential to know what goes into a leather conditioner and how to use it for different leather types.
How to Apply Nubuck Conditioner: A Safe Method
Always test any product on a small, hidden area first, like inside a shoe tongue or under a bag flap. Wait for it to dry completely to check for color change.
- Start Clean: Ensure the nubuck is completely clean and dry from any previous cleaning. Dirt trapped under conditioner will set in.
- Apply Sparingly: For a spray, hold the can 6-8 inches away and apply a light, even coat. For a cream, put a tiny dab on your fingertip and gently rub it into the leather in a circular motion.
- Let it Absorb: Give the conditioner 10-15 minutes to soak into the leather fibers. Do not buff or rub at this stage.
- Dry Thoroughly: Let the item air dry away from direct heat for at least a few hours, or overnight. The leather should feel supple, not sticky or stiff.
- Restore the Nap: Once fully dry, use a clean nubuck or suede brush to gently brush the surface. This lifts the nap back up and restores the velvety handfeel.
This gentle process moisturizes the leather from the inside, keeping it flexible and preventing the small cracks that start when the material gets too dry. Slow, gradual drying helps keep moisture evenly distributed. This minimizes internal stresses that lead to cracking. It maintains that soft, tactile quality you love without changing the look. Conditioning might slightly darken the leather when wet, but it should return to its original hue as it dries. If an area still feels dry after a day, you can carefully apply a second, very light coat.
Waterproofing Nubuck: What Works and What Doesn’t
You found a perfect pair of nubuck boots. They feel amazing. Now you’re wondering if they can handle a rainy commute. Let’s get this straight.
Nubuck boots are not waterproof, but with the right care, you can make them highly water-resistant. Think of it like a wool sweater versus a raincoat. One repels a light drizzle beautifully, the other is meant for a downpour. Nubuck is that wool sweater.
How Nubuck Protector Sprays Work
You cannot use the same heavy waxes or oils you might use on smooth leather. Those will ruin the soft nap. Instead, you need a specialized spray.
These sprays are usually silicone or fluoropolymer-based. They work by forming an invisible, breathable shield over each tiny fiber of the nubuck. The spray sits on the surface of the fibers without soaking in and gumming them together, which preserves the texture and breathability you love. It causes water to bead up and roll off instead of soaking straight in.
How to Apply Protector Spray: A Simple Guide
This is the easiest part of nubuck care. Always start with clean, dry leather. Do this in a well-ventilated space.
- Shake the can of nubuck protector spray vigorously for at least 30 seconds.
- Hold the can about 6 inches away from the leather.
- Apply a light, even coat over the entire surface. Use a steady, sweeping motion. Don’t soak one spot.
- Let the item dry completely. This usually takes an hour or two. Don’t touch it.
- For maximum protection, apply a second light coat after the first is fully dry.
Reapplication is the secret to lasting protection. One treatment is not forever. For shoes you wear often, plan to re-spray them every month or two. For a bag you use less frequently, every season might be enough. If water stops beading on the surface, it’s time for a fresh coat.
Wearing Nubuck in Rain and Snow: Setting Expectations
With a fresh coat of protector, your nubuck can handle a walk in a light rain. I’ve taken my own nubuck boots on damp morning walks many times. The key is what you do afterward.
If they get wet, let them dry naturally, away from direct heat like radiators or hair dryers. Heat will bake the leather, making it stiff and brittle. Once they are fully dry, the nap might look flat or stained in spots. This is normal. Use a soft nubuck brush (like a suede brush) to gently brush the nap back up. Brush in one direction to restore the uniform, velvety look.
For heavy snow, slush, or salt? I advise against it. The sheer volume of moisture and harsh chemicals will overwhelm the protector. For those conditions, a different type of boot is a better choice for your leather’s long-term health. No leather protector can guard against such harsh conditions.
The Products to Avoid at All Costs
This is where I see well-meaning owners accidentally cause damage. You must avoid traditional leather conditioners, waxes, oils, and dubbin on nubuck.
Products like dubbin or wax pastes are designed to penetrate and feed the leather, but they will permanently darken nubuck and matte down its nap into a stiff, flat mess. It’s like using cooking oil to clean a suede couch. The effect is not easily reversed. If your goal is to keep that distinctive nubuck handfeel and appearance, stick only to products labeled specifically for nubuck or suede.
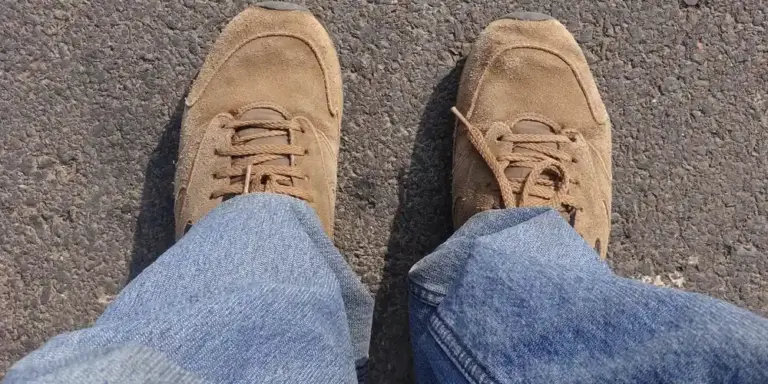
Daily Maintenance for Nubuck Shoes, Boots, and Bags
Think of this as a gentle, consistent conversation with your leather. Nubuck’s delicate nap is beautiful because it shows wear, but that same quality means it needs a guardian, not a rescuer. A tiny bit of attention today stops a major cleaning project tomorrow.
This routine is my foundation for keeping nubuck looking its best. I treat my own nubuck boots with this same calm ritual.
Your First Defense: The Gentle Brush
This is the single most important tool for nubuck. A dedicated soft-bristle brush, often made of brass or plastic, is your best friend. I keep one by the door.
Use it every single time you take your shoes or boots off. Brush gently in one direction to lift the nap, remove surface dust, and erase light scuffs. For a bag, give it a quick brush before you put it away.
Regular brushing redistributes the oils in the leather and prevents dirt from being ground into the pores, which is what causes permanent staining and a flat, tired look.
- Brush in the direction of the nap (usually from heel to toe on shoes).
- Use very light pressure, you are grooming, not scrubbing.
- For stubborn dust, a soft pencil eraser can gently lift marks without damaging the surface.
Give Them Shape and a Breath
Leather is skin. It needs to rest and dry in its proper shape. When you take off your nubuck footwear, insert shoe trees immediately.
Shoe trees absorb moisture from your feet, prevent deep creases from setting, and maintain the toe shape. For nubuck bags, stuff them loosely with acid-free paper or a clean cloth to help them hold their form while stored. Let everything air-dry at room temperature, never near a direct heat source.
I learned this the hard way with an old pair that developed a deep, permanent crease. Now, my boots always get their trees, just like my saddle Mason gets a proper stand.
Safe Haven Storage
Never just toss your nubuck items in a closet. Dust is the enemy, and pressure from other items can crush the nap. Always store them in a breathable fabric dust bag.
This simple sack protects from dust and minor scratches while still allowing the leather to breathe. Keep them in a cool, dry place away from direct sunlight, which can dry out the leather and fade the color over time.
Treating your nubuck to a dust bag is a small act that vastly extends its vibrant life and keeps it ready for your next adventure.
The Power of Rotation
Leather needs recovery time. Wearing the same pair of nubuck boots day after day doesn’t give the material a chance to fully dry and rebound from the stress of wear.
If you can, rotate between two pairs. This isn’t just for shoes, either. If you have a favorite nubuck bag you use daily, consider giving it a day off each week. This practice significantly reduces overall wear and tear.
It’s the same principle as not overworking a piece of gear. My jacket June gets worn often, but I never wear it for rough tasks two days in a row. It needs its rest.
Fixing Common Nubuck Problems
Nubuck can feel delicate, but it’s tougher than it looks. Problems happen. Let’s walk through fixes, one step at a time.
What to do if your nubuck gets soaked
Panic is normal. I learned this the hard way when I got caught in a downpour with June, my favorite nubuck jacket. The key is slow drying. Do not use direct heat from a hairdryer, heater, or sun. Heat bakes the leather, making it stiff and brittle.
- Blot away surface water immediately with a clean, absorbent towel. Press, don’t rub.
- Stuff the item with crumpled paper or a dry towel to help it hold its shape as it dries. Replace the stuffing when it becomes damp.
- Let it dry naturally in a room with good air circulation. This can take a full day or more for boots or a bag.
- Once completely dry, the nap will be matted and stiff. Use a soft nubuck brush to gently reactivate the fibers. Brush in one direction to restore the velvety texture.
Rushing the drying process causes more damage than the water itself.
Removing salt rings and stains
Winter is tough on nubuck. Salt stains look bad, but they are removable if you act before they set. You need to dissolve the salt.
- Let the item come to room temperature first.
- Make a solution of equal parts white vinegar and cool water. Dampen a soft cloth with the solution, wring it out thoroughly so it’s only slightly damp.
- Gently dab at the salt stain. You will see the salt dissolve. Do not soak the leather.
- Use a second cloth dampened with only cool water to dab the area and rinse.
- Let it air dry completely, then brush the nap back up.
For oil-based stains, sprinkle a little cornstarch or talc on the spot to absorb the oil. Let it sit overnight, then brush away oil stains. This method is especially effective on suede footwear like shoes, boots, and Uggs. Repeat if needed.
Reviving flattened nap
Over time, high-wear areas like boot toes or bag corners get shiny and flat. This is just the fibers being compressed. You can bring them back.
A proper nubuck brush or a suede/nubuck eraser is your best tool. For lightly flattened areas, vigorous brushing in a circular motion can often lift the fibers. For stubborn, shiny spots, use the eraser’s abrasive side. Rub gently back and forth, then use the brush’s bristles to sweep away the residue and fluff the nap.
Think of it like brushing a carpet pile back to life; patience and the right tool make all the difference.
Can You Polish Nubuck Leather or Restore Its Color?
This is the most common question I get. The short answer is no, you do not polish nubuck. Traditional wax or cream polishes will clog the porous surface, creating a sticky, blotchy mess that ruins the texture.
Instead, you restore color and refresh the look with products made specifically for nubuck and suede. These are usually spray-on renewers or colorants. They work by depositing a fine, flexible pigment that coats the individual fibers without gluing them together.
If your boots are just looking faded and tired, a neutral nubuck renewer spray can darken them back to a rich, even color. For significant scuffs or color loss, a pigmented spray that matches your item’s original shade is the choice.
Always test any spray on a small, hidden area first. Apply in a well-ventilated space with light, even passes from about 6 inches away. Let it dry, then brush gently. It may take two light coats to build an even color.
The goal with nubuck is not a mirror shine, but a rich, uniform patina that tells the story of its use.
Nubuck ages gracefully. Its color will lighten in high-friction spots and darken where oils from your hands touch it. This character is part of its beauty. Your care should aim for even, gentle aging, not a factory-fresh look.
The Biggest Mistakes People Make with Nubuck

I want to start here, because getting this part wrong can change your nubuck’s look and feel forever. The velvet-like nap on its surface is beautiful, but delicate. Think of it like the soft suede on the collar of June, my leather jacket. Treat it roughly, and that texture flattens. It becomes shiny, stained, or stiff. The good news? Every mistake has a simple, better alternative.
The “Don’t” List: What to Avoid at All Costs
These are the lessons I learned the hard way, so you don’t have to.
- Don’t use heat to dry wet nubuck. Never put boots on a radiator or use a hairdryer. Heat bakes the leather, making it brittle and prone to cracking. It can also set stains permanently.
- Don’t use silicone-based sprays or wax-based conditioners. These products clog the pores and coat the delicate nap. They leave a greasy, sticky residue that attracts more dirt and prevents the leather from breathing.
- Don’t scrub stains aggressively. Rubbing a stain on nubuck is like rubbing a carpet the wrong way. You’ll mat down the fibers and spread the stain deeper, making a small spot into a large, permanent blotch.
- Don’t use regular shoe polish. Wax or cream polishes are for smooth leathers. On nubuck, they create a messy, discolored, patchy finish that is very difficult to remove.
- Don’t let dirt build up. Grime acts like sandpaper, grinding away at the nap every time you move. Regular, gentle cleaning is your best defense.
The “Do” List: Your Path to Confident Care
Now for the empowering part. Here is exactly what you should do instead.
For drying, always air dry at room temperature. Stuff bags or shoes with crumpled paper towels or a dry cloth to help them keep their shape and absorb moisture from the inside. Let them dry slowly, away from direct sunlight.
For cleaning, use a dedicated nubuck/suede brush and eraser. First, brush the item all over with a soft-bristled brush to lift the nap and loosen surface dirt. For scuffs or light stains, use a nubuck eraser. Gently rub it back and forth, then brush the area again to restore the texture. For other types of stains, check out our guide on stain removal for suede.
For deeper stains, use a specialist nubuck cleaner. Look for a pH-neutral, water-based foam or spray. Apply a small amount to a clean, soft cloth and dab (never rub) the stained area. Let it dry completely, then brush vigorously to reactivate the nap.
For conditioning and protection, use products made only for nubuck or suede. These are usually spray-on formulas containing fluoropolymers. They condition the leather without clogging it and create an invisible barrier against water and stains. Spray evenly from about 6 inches away, let it dry, and give it a final light brush. This is particularly important since traditional oils and waxes used for leather conditioning can be too heavy for delicate suede surfaces.
Make a simple care kit and use it often. Your maintenance routine is simple: brush off dirt after each wear, use the eraser for scuffs as they happen, and apply a protector spray every few months or after a full clean. This keeps your nubuck looking rich and feeling soft for years.
Answering Your Nubuck Care Questions
After going through the cleaning and protection steps, a few common questions always come up. Let’s tackle them directly.
Can I use nubuck spray on other leathers?
I wouldn’t recommend it. Nubuck protectors are designed for a porous, suede-like surface. They form a barrier that sits on top of the nap.
Using them on a smooth leather like the calfskin on my jacket, June, would be like putting a raincoat over a waxed jacket. It might bead up, feel sticky, or create a cloudy, plastic-like film on the surface. For smooth leathers, you want a conditioner that soaks in to moisturize, not a spray that mostly sits on top.
The one possible exception? You might use a nubuck protector spray on rough-out leather, which is similar to nubuck but uses the flesh side of the hide. Even then, test it on a hidden spot first.
Is a nubuck bag worth the care?
This is a fair question. Nubuck asks for a bit more attention than a polished calfskin bag. But so does a beautiful linen shirt compared to a cotton tee.
The care is the trade-off for its unique feel and look. That velvety texture is luxurious and soft. It develops a character all its own as it ages, with subtle color variations in high-wear spots. If you love the rich, matte finish and tactile feel of nubuck, the simple maintenance routine is absolutely worth it.
Think of it like my wallet, Scout. Its veg-tan leather marks and darkens with use, and that’s the point. A nubuck item tells the story of your use, gently and quietly. With basic care, that story lasts for years.
How do I get a shine back? (Focus on Sheen)
Nubuck isn’t meant to have a high-gloss “shine.” What you’re likely missing is the original, uniform sheen of the healthy nap. Dirt, oil, and water spots matte it down unevenly.
Restoring that sheen is about reviving the nap itself. Here’s how I approach it:
- Start with a clean slate. Gently brush the entire item with a nubuck brush or eraser to lift and loosen any surface dust or grit from the previous steps.
- Use gentle, circular motions. Focus on stained or matted areas. You’re not sanding, you’re coaxing the tiny fibers to stand up again. For stubborn spots on a bag, a dedicated nubuck eraser can work wonders.
- Brush with the grain. For a final touch, make light, one-directional strokes with your brush to align the nap for a consistent, velvety look.
This brushing process redistributes the natural oils in the leather and lifts the nap, which brings back that soft, luminous sheen. I did this recently on a worn spot on June’s jacket collar, and the difference was immediate. The color evened out and the surface looked alive again.
Avoid waxes, glossy conditioners, or anything that promises a “high shine.” These will clog the nap and create a stiff, sticky patch.
All these questions point to one simple idea. Nubuck isn’t fragile, it’s just specific. Gentle, consistent care tailored to its unique texture is the secret to enjoying its beauty for the long term. It’s a rewarding material that grows with you.
Common Questions
How often should I really condition my nubuck?
Condition only when the leather feels dry or stiff at flex points, not on a rigid schedule. For frequently worn boots, this might be once or twice a year; for a bag in a closet, it could be every few years. If you’re conditioning boots, you’ll want to align frequency with wear and climate, and learn the best application method. The next steps walk through how often to condition leather boots and the best way to apply conditioner.
Can I use a hairdryer to dry my nubuck quickly after they get caught in the rain?
Absolutely not. Heat will bake the leather, making it brittle and likely to crack as it dries. Always let nubuck dry at room temperature, stuffed with paper to hold its shape.
What’s the best way to store nubuck items I won’t use for a season?
After a final clean and brush, place them in a breathable cotton dust bag. Store in a cool, dark, and dry place-never in a plastic box or damp basement.
When is a nubuck stain beyond home care?
If a proper cleaning with a dedicated nubuck eraser and cleaner, followed by drying and brushing, does not lift the mark, it’s time to stop. Further home attempts may set the stain or damage the nap, so consult a professional conservator.
Keeping Your Nubuck Looking Its Best
The most important step is always the gentlest one. Clean with a dedicated nubuck eraser and brush, and protect with a spray made just for nubuck or suede-using the wrong product can change its texture permanently.
Proper care extends the life of your gear, which is the most sustainable choice you can make. Learning to maintain materials like nubuck deepens your appreciation for the craft and the animal it came from.
References & External Links
- Nubuck Leather Care Guide | Carl Friedrik
- r/Boots on Reddit: so confused about nubuck care
- Leather Honey Suede & Nubuck Care Kit: Cleaner …
- Nubuck/Roughout Leather Care | How To Clean Guide
- Leather Care Guide: Nubuck Leather
Harriet is a avid collector of leather goods such as purses, bags, seat covers, etc and has an extensive background in leather care, recovery, stain removal and restoration. She has worked for a number of years perfecting her leather care techniques and knows the ins and outs of restoring all kinds and types of leather products. With her first hand knowledge in leather care, you can not go wrong listening to her advice.
Suede and Nubuck Care