How Do You Choose the Right Thread and Sewing Machine for Leather Projects?
Published on: March 11, 2026 | Last Updated: March 11, 2026
Written By: Harriet Nicholson
Hello Tannery Talk. Picking the wrong supplies can make your leather project feel impossible before you even start.
Let’s simplify it. This article will walk you through the types of thread that hold up, how to select the correct thread weight, and what to look for in a sewing machine that can handle leather.
My advice comes from years at the workbench, stitching everything from robust saddles to everyday wallets, learning what truly lasts.
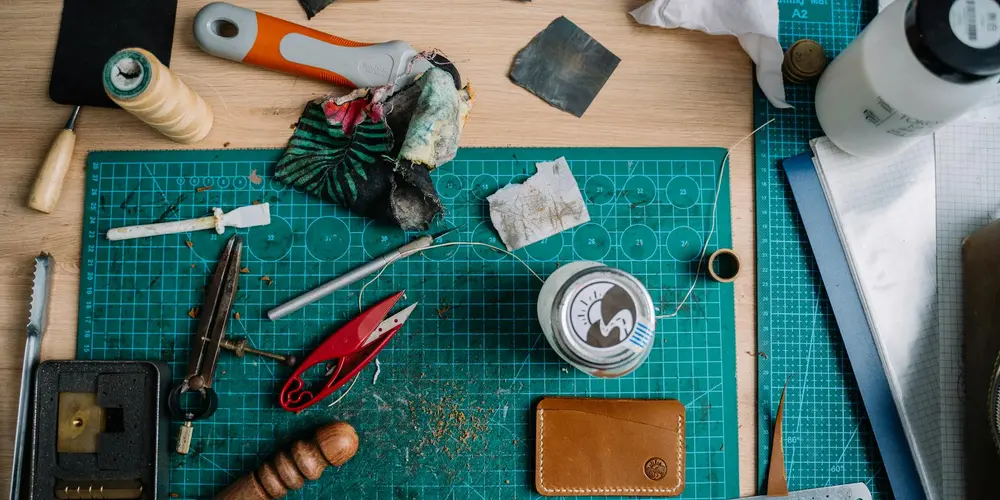
Why Leather Sewing Needs Special Tools
Sewing fabric is not the same as sewing leather. You must change your thinking. A fabric needle pushes threads aside. A leather needle must cut a clean hole, often used with a leather awl for hand-stitching.
Think of it like this. Using a fabric needle on leather is like trying to push a key through a lock instead of turning it. You’ll just bend the key and damage the lock. A leather needle is that sharp, cutting key—just what you need for attaching a leather patch to repair a garment or bag.
Your goal is a durable, beautiful seam. The kind I’ve put into my own saddle, Mason. Those stitches have held through years of riding. They don’t pull or fray. They become part of the leather’s story. Matching the right needle and thread to your leather’s thickness is the first step to a seam that lasts for decades.
A common mistake is trying to use a regular home sewing machine. It often can’t handle the thickness. The motor strains. The needle breaks. The thread snaps. You end up frustrated with a damaged project. Start with the right tools, and you avoid this heartbreak.
Picking Your Leather Sewing Thread: Material and Mindset
The thread is the muscle of your seam. It must be as strong and durable as the leather itself. Choosing cheap thread is like building a stone wall with weak mortar. It might look okay at first, but it will fail.
Let’s compare the common materials. Think about what your project will face.
| Material | Best For | What to Know |
| Polyester | General projects, bags, cases. | Strong, good UV resistance, flexible. A reliable all-rounder for items like a travel bag. |
| Nylon | High-stress items, outdoor gear. | Very strong and elastic. Can degrade in strong sunlight over many years. Perfect for a backpack strap. |
| Bonded Nylon | Heavy-duty saddlery, holsters. | Nylon coated for extra toughness and friction resistance. This is what I trust for Mason’s critical stress points. |
| Linen (Waxed) | Traditional look, hand-stitching. | Classic, natural feel. It can be less consistent in thickness. When waxed, it sews smoothly and tightens beautifully. Great for a classic wallet like Scout. |
Now, waxed or unwaxed? Waxing matters. A waxed thread passes through the leather more smoothly. It burns less from friction. The wax also helps the stitches bed down and lock together tightly. For hand-stitching, I almost always choose a pre-waxed thread for its control and ease. For machine sewing, follow your machine’s recommendations.
My simple rule is this: never skimp on thread. It is the foundation. A high-quality thread lays flat, has consistent thickness, and won’t rot or break before the leather does. It’s a small cost that protects your entire investment of time and material.
What Size and Type of Leather Thread Should You Use?
Think of thread like the bones in a leather piece. It holds everything together. The wrong size can make your work look clumsy or, worse, fail over time. Let’s make this simple.
Thread thickness is measured in a number called “tex.” A higher tex number means a thicker, stronger thread. It’s like comparing a piece of string to a piece of rope. The rope (higher tex) is for heavier jobs.
For most leatherwork, you are matching the thread’s strength to the leather’s thickness and the stress the seam will face.
A Simple Guide to Pairing Thread with Your Leather
This isn’t a strict law, but a reliable starting point from my bench. My wallet, Scout, and my saddle, Mason, need very different support.
- Light & Flexible Leathers (like for wallets, cardholders, or small pouches): Use a thinner thread, often in the Tex 70 to Tex 135 range. This keeps the stitches neat and doesn’t overwhelm the delicate material. It’s what I used on Scout.
- Medium Weight Leathers (like for belts, bags, or journal covers): Step up to a medium thread. Look for Tex 200 to Tex 300. This provides a strong, visible stitch that can handle daily tugging and weight.
- Heavy & Structural Leathers (like for saddles, harnesses, or heavy-duty tooling): This is where you need the rope. Use a heavy thread, from Tex 400 up to Tex 600 or more. This is the category for Mason, my saddle, where every stitch carries real weight and responsibility.
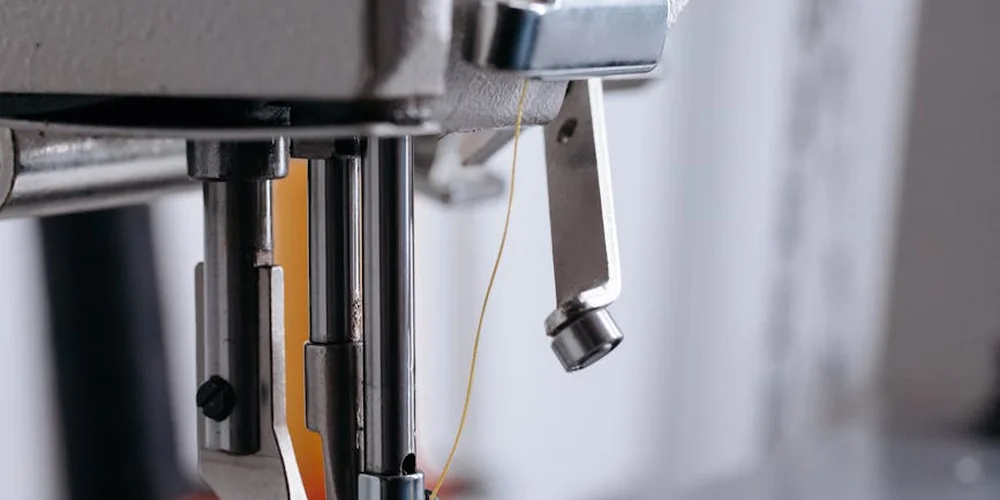
The Needle and Thread Partnership
The thread size tells you what needle to use. They are a team. If they aren’t matched, you’ll have trouble.
- The eye of the needle must be large enough for the thread to pass through without forcing it. Forcing it frays the thread.
- The needle’s shaft (its thickness) needs to be appropriate for the leather. A needle that’s too thin for thick leather will bend. A needle that’s too thick for thin leather will leave ugly, large holes.
A common rule is that your needle size (like 110/18 or 125/20) increases with your thread thickness. Your thread supplier will have a chart. If your thread keeps snapping as you sew, the needle eye is almost certainly too small. It’s a simple fix-just switch to a larger needle size.
Color and Character: How Thread Shapes the Look
Thread does more than hold things together. It defines the piece’s character. You have two main choices here.
You can choose a thread color that blends seamlessly with the leather. This creates a subtle, refined look where the leather itself is the star. For a piece like June, my jacket, I might use a thread just one shade darker than the calfskin for discreet repairs.
Or, you can use contrast. A natural linen thread on dark brown veg-tan leather, or a bright stitch on a black bag, makes the craftsmanship the highlight. This is a beautiful way to show off your handiwork, proving the seams are strong and intentional.
Remember, natural threads like linen or cotton will darken when you wax them. Synthetic threads (like polyester) keep their color. Always test your thread and finish on a scrap piece first. That little step saves the heartache of a finished project that doesn’t look the way you pictured.
Choosing the Right Needle for Sewing Leather
Think of the needle as the bridge between your thread and your leather. It has one job: to make a clean hole for the thread to pass through. Get it wrong, and you can scar your leather piece for good. Get it right, and your work will be strong and beautiful for decades.
The Point is Everything: Wedge vs. Sharp
You wouldn’t use a pin to cut a steak. Don’t use the wrong needle point on leather. For fabric, you use a sharp point to pierce between woven threads. Leather isn’t woven. It’s a dense mat of fibers.
A sharp needle point acts like a tiny spear. It tries to pierce the leather, often pushing it down or making a ragged, weak hole. For leather, you need a wedge point or a knife point needle. This needle has a flat, triangular tip that slices through the leather fibers, creating a clean, short slit.
It separates the fibers instead of tearing them. My jacket, June, has stitching from a previous owner who used the wrong needle. The holes are slightly torn, not crisp. I see it every time I condition her. A wedge point needle protects your leather’s integrity from the very first stitch.
Decoding Needle Sizes: It’s Simpler Than It Looks
You’ll see numbers like 90/14 or 110/18. It can be confusing, but it’s just two numbering systems for the same thing.
- The first number (90, 110) is the European metric size.
- The second number (14, 18) is the American size.
Forget the two numbers. Just remember this: the bigger the number, the thicker and stronger the needle. A size 110/18 needle is much heavier-duty than a 80/12. You match the needle size to the thickness of your thread and the weight of your leather. A thin needle with thick thread will break. A thick needle on thin leather will leave giant, ugly holes.
A Simple Guide to Pairing Thread, Needle, and Leather
This chart is a starting point from my bench. Your specific project might need slight adjustments, but this will keep you safe.
| Leather Weight (oz/mm) | Good For | Recommended Thread Size | Recommended Needle Size |
|---|---|---|---|
| 2 – 3 oz (0.8 – 1.2 mm) | Light garments, linings, delicate wallets (like my wallet, Scout) | Tex 40 or lighter | 80/12 or 90/14 |
| 3 – 5 oz (1.2 – 2.0 mm) | Belts, bags, heavier jackets (like June) | Tex 70 to Tex 100 | 100/16 |
| 5 – 8 oz (2.0 – 3.2 mm) | Strap work, saddlery, holsters (like Mason’s saddle) | Tex 135 to Tex 175 | 110/18 or 120/19 |
When in doubt, test on a scrap piece first. Run a few stitches and look at the hole. It should be a clean slice that closes snugly around the thread.
The Real Cost of a Dull or Wrong Needle
This is non-negotiable. A dull wedge point needle doesn’t slice. It punches and tears. You’ll see frayed edges around the stitch holes, weakening the entire seam. The leather can’t recover from this.
Change your needle more often than you think you need to, especially when working with dense or oily leathers. If you hear a pronounced “pop” with every stitch instead of a clean “punch,” the needle is likely dull. That popping sound is the leather ripping, not cleanly parting. Inspect your work. If the holes look ragged or the leather is stretching oddly around them, stop immediately. A fresh, correct needle is the cheapest insurance for a beautiful, durable project.
How to Pick a Sewing Machine for Leather
Choosing a sewing machine for leather is not like picking one for fabric. Leather is dense. It resists the needle. Think of it like the difference between brushing dust off June’s jacket and scrubbing ground-in dirt from Mason’s saddle. You need the right tool for the job, especially when using a standard home sewing machine.
The Three Main Types of Machines
Let’s break down your options. I group them by how they handle leather’s stubborn nature.
A heavy-duty domestic machine is your entry point, best for thin to medium leathers like those used for Scout the wallet or a lined jacket. It’s built stronger than a basic model but still lives on a table. It can handle several layers, but you must go slow. The motor has more power, but it can struggle with thick belt leather or saddle stitching.
A walking foot machine has a special feed system that moves the top layer of leather in sync with the bottom layer. This prevents slipping and puckering. It’s the machine I use most for repairs on items like June’s jacket, where even seams are crucial. If you plan to work with multiple layers or different leather thicknesses, this feature is a game-changer.
An industrial machine is the powerhouse, built for all-day, every-day work on the heaviest materials. This is what you’d use to stitch a new panel onto Mason’s saddle. It’s fast, incredibly strong, and often bolted to the floor. It’s an investment for serious volume, not for occasional hobby projects.
Non-Negotiable Features to Check
Ignore the fancy stitches. For leather, these are the features that truly matter.
- A Powerful Motor: Look for motors rated for continuous duty. This power is what cleanly punches the needle through thick hide without stalling. A weak motor will burn out.
- Metal Interior Construction: The gears, shafts, and hooks inside must be metal. Plastic parts will crack under the stress of sewing leather. Open the side panel and look; it should look and feel solid, like a well-made tool.
- Adjustable Presser Foot Pressure: This lets you control how firmly the foot holds the leather down. Light pressure for soft calfskin, heavier pressure for stiff veg-tan. Without this, thick leather won’t feed evenly.
- A Strong, Straight Stitch: Forget zigzags. You need a machine that produces a perfect, lockstitch straight line. Test this on a scrap of leather. The stitch should look even and feel tight on both sides.
Considering a Used Machine
Many great machines are pre-owned. Here is the simple trade-off.
The pros of a used machine are cost and proven durability. Older, all-metal industrial machines are often built like tanks. You can find a capable machine for less money. I found my first walking foot machine at a workshop sale.
The cons are maintenance and unknown history. You must be ready to clean, oil, and possibly replace parts. Always test it yourself. Bring a piece of your leather, thread it up, and sew a line. Listen for smooth operation, not grinding or skipping. Check for worn gears or a bent needle bar.
Brand Names Versus Real Capability
Do not shop by brand name alone. I hear, “Is a Singer good?” or “Should I get a Juki?” The brand matters less than the model’s specific design.
Some brands make both light home machines and heavy-duty models. The name on the front is not a guarantee. Focus on the machine’s specifications and how it feels when sewing your leather, not the logo on its side. Look for the features I listed above. Read reviews from other leather workers. A machine marketed as “heavy-duty” for denim might still hesitate with 4 oz leather. Your best test is hands-on. The right machine will have a confident, rhythmic sound as it works, not a strained whine.
Setting Up to Sew: A Simple Checklist Before You Start
You have your thread and machine ready. Now, let’s get everything set up correctly. Rushing this part leads to frustration and wasted leather. I do these steps every single time, even for a quick stitch on something like Scout my wallet.
Your Pre-Stitch Routine
Follow these steps in order. They build on each other.
- Install the correct needle. For topstitching thread, that’s a 110/18 or 120/19 heavy-duty needle. Make sure the flat side of the needle shank faces the correct way for your machine (usually backwards). A fresh needle is non-negotiable for clean stitches.
- Thread the machine with your chosen thread. Use the topstitching thread in the needle. For the bobbin, you can use a matching regular polyester thread. This reduces bulk and helps with tension. If your project is very thick, use the topstitching thread in the bobbin too.
- Adjust tension on scrap leather. This is the most important step. Never test on your final piece. Take two scraps of your project leather, glue them together, and punch your stitch holes with an awl. Run a line of stitches. Perfect tension means the two threads lock in the middle of the leather layers, with no loops on top or bottom. Adjust the upper tension dial slowly until you get it right.
The Presser Foot: Your Unsung Hero
Leather is sticky. A standard presser foot will grab, drag, and mar the surface. A Teflon or roller foot glides. It’s a simple swap that makes a world of difference. Think of it like the difference between dragging a brick and rolling a wheel. I learned this the hard way, putting a ugly skid mark on a bag side. A roller foot would have let it glide under smoothly. Leather’s key properties—grain, moisture, and surface finish—shape how burnishing and edge work actually perform. Recognizing these factors helps you tailor techniques for a true professional finish.
Stitching Straight and Managing Thickness
Go slow. Let the machine’s feed dogs pull the leather through; don’t push or pull it yourself. For straight lines, use the machine’s guide or apply a strip of painter’s tape on the leather as a visual marker.
When you hit a thick seam, like where a strap meets a bag body, the height can jolt the machine. Place a small, folded piece of scrap leather behind the presser foot to “ramp” it up to the higher level as you approach the thick spot. This keeps the foot level and prevents skipped stitches. Hand-wheel through the very toughest parts if you need to.
Essential Hand Tools for Machine Sewing
Your machine doesn’t work alone. These hand tools set it up for success.
- Awl: Pre-punching your stitch holes, especially in layers over 3mm thick, relieves strain on the needle and ensures perfect alignment. It’s like pre-drilling a hole for a screw.
- Rubber Mallet: Use it to hammer seams flat before you stitch. A flat seam feeds through the machine evenly. You can also gently tap the presser foot down onto a very thick seam to help it engage.
- Edge Beveler: A beautifully rounded edge not only looks professional, it prevents the upper thread from catching on a sharp leather edge as you stitch, which can cause snags or breaks.
Hand Sewing Leather: When and How to Do It Right
There is something special about hand-sewn leather. A machine seam is a clean line, but a hand stitch has a soul. Each loop is a tiny decision, a moment of attention. The saddle stitch is the king here. Two needles, one thread, creating a lock stitch that won’t unravel if one part breaks. It’s the stitch I used for Scout, my wallet. After three years of daily use, those stitches are as tight and proud as the day I finished them. But are hand-stitching and other methods the most effective ways to repair general leather items?
The beauty of hand sewing is in its strength and its slight, human imperfection, which becomes part of the piece’s character.
The Right Tools for the Job
You can’t fight thick leather with a sewing kit from a general store. You need tools made for the battle. Think of it like choosing the right conditioner: you wouldn’t use a heavy wax on a delicate suede.
- Harness Needles: These are blunt, which sounds wrong. Their job isn’t to pierce, but to follow a pre-made hole. This prevents cutting the leather fibers, keeping the hole small and the stitch tight.
- Pricking Irons or Chisels: These make the holes. Pricking irons make slanted slots, perfect for that classic saddle-stitch look. Diamond chisels make round holes. You tap them with a mallet. The solid *thunk* is a sound you’ll come to love.
- Stitching Pony or Clamp: This is your third hand. It holds your work firmly, leaving both of yours free to manage the needles. For a small project like a card sleeve, you can manage without one. For anything bigger, it’s a must.
- Thread: Use a strong, waxed thread. The wax helps it glide through the leather and locks the stitches in place. For most projects, a medium thickness works well.
Walking Through the Saddle Stitch
It seems complicated until you do it once. Then it becomes a calm, rhythmic process. Let’s walk it through.
- Punch Your Holes. Line up your leather pieces and clamp them. Use your pricking irons and a mallet to punch evenly spaced holes along your stitch line. Keep the irons straight up and down.
- Thread Your Needles. Cut a length of thread-about four times the length of your seam. Thread each end onto a harness needle. You now have one thread with two needles.
- Start the Stitch. Push one needle down through the first hole. Pull it through until the thread is centered, with both needles hanging from the same hole.
- The First “Saddle.” Take the left needle and pass it up through the next hole. Now take the right needle and pass it through the *same* hole, going the same direction. You’ve just wrapped the thread around the leather between the holes.
- Pull Tight. This is the key. Pull both threads in opposite directions with a firm, even pull. You should feel the stitch “set” and hear a slight, satisfying creak. That’s the waxed thread locking down.
- Repeat. Move to the next hole. Left needle through, right needle through the same hole, pull tight. This rhythm builds the stitch.
The most common mistake is not pulling each stitch tight enough before moving to the next one, which leaves a loose, weak seam. Take your time. Feel the tension. When done right, the stitches look like a neat, angled line of little knots.
Choosing Your Method: Hand or Machine?
Not every project needs hand sewing, and that’s okay. A machine is a fantastic tool for the right job. It’s about matching the technique to the leather and the item’s life.
Hand sewing is perfect for:
- Small, thick items like wallets (Scout is a prime example), cardholders, and key fobs.
- Areas that will see immense stress, like the stirrup leathers on a saddle (Mason has hand-stitched repairs in these spots).
- Any project where the stitching is a featured part of the design. You have total control.
A sewing machine is better for:
- Long, straight seams on lighter to medium-weight leathers. Think about the long seams inside a tote bag or along the sleeves of a jacket like June.
- Projects where speed is practical, like making multiple simple items.
- Seams that will be hidden or lined, where the beauty of the hand stitch won’t be seen.
My rule is simple: if the piece is small, thick, or needs to withstand a lifetime of pulling, I reach for my needles and pony. If I’m working with a larger panel of softer leather, the machine gets the call. Both methods, when chosen wisely, result in durable goods you can be proud of.
Quick Answers
What’s the first thing to check if my machine struggles with leather?
The needle. A dull or incorrect needle type is the most common culprit. Swap it for a fresh, wedge-point needle in the correct size for your leather thickness before you touch any other settings.
Is it worth buying a used industrial machine?
Only if you’re willing to inspect it like a conservator. Check for gear wear, a bent needle bar, and listen for grinding sounds when you test-sew your specific leather. A used machine is a tool, not a collectible; its history matters more than its price.
Do I really need special needles for leather, or can I just use a heavier universal one?
You need the correct point. A universal needle has a sharp point that pierces and tears leather fibers. A wedge point slices them cleanly. Using the wrong point permanently weakens the stitch hole, compromising the structure of your piece.
Can I use my regular Singer for light leather projects?
Some older, all-metal domestic models can handle thin leathers if you go slow, use the right needle, and keep the motor cool. However, routinely pushing it past its limit will wear it out prematurely. Know your machine’s true capacity and respect it.
Where’s the best place to buy a leather sewing machine?
Skip general marketplaces and seek out specialty leatherworking suppliers or reputable industrial dealers. Their machines are vetted for the task, and they understand the required specifications. This is a tool for preservation; buy from people who understand that. This mirrors how leatherworking tools have evolved through the ages—from simple awls to precision machines. Adopting time-tested best practices from those eras helps ensure durable, high-quality results today.
Your Toolkit for Lasting Leatherwork
Start by matching your thread weight to your leather’s thickness, and always test your machine’s power on a scrap piece first. These two simple checks build the foundation for every strong, clean stitch in any leather project, whether it’s treated cowhide leather or another type of material.
Choosing durable materials and proper techniques honors the leather and extends the life of what you make. Your skills will grow with each project, just like the patina on a well-loved piece like my wallet, Scout.
Further Reading & Sources
- Thread & Sewing – Rocky Mountain Leather Supply
- Leather Sewing Thread & Stitching Supplies – Weaver Leather Supply
- Premium Bonded Nylon Thread for Sewing Leather – Heavy Duty
Harriet is a avid collector of leather goods such as purses, bags, seat covers, etc and has an extensive background in leather care, recovery, stain removal and restoration. She has worked for a number of years perfecting her leather care techniques and knows the ins and outs of restoring all kinds and types of leather products. With her first hand knowledge in leather care, you can not go wrong listening to her advice.
Fixing Hardware and Stitching