How to Make Leather Bracelets, Tie Leather Laces, and Reshape Leather Wallets
Published on: February 2, 2026 | Last Updated: February 2, 2026
Written By: Harriet Nicholson
Hello Tannery Talk. If tangled laces or a floppy wallet have ever frustrated you, or if you’re curious about starting a simple leather project, take a deep breath.
This guide walks you through practical, hands-on steps for crafting a simple leather bracelet, tying leather laces with secure knots, and gently reshaping a leather wallet.
I share this from years at the workbench, applying these same methods to care for pieces like my trusted wallet Scout and my well-worn jacket June.
What You Need to Start: Essential Tools for Leather Work
You do not need a full workshop to begin. A few key tools make all the difference between a frustrating mess and a clean, professional-looking piece. I keep these same items on my bench for everything from conditioning Mason’s saddle to making a simple key fob.
Think of your tools as an extension of your hands. The right one makes the work feel easy and safe.
The Basic Kit
Here is what you should gather first:
- A Sharp Knife: A utility knife or a dedicated leather craft knife works perfectly. A dull blade will tear and drag. A sharp one glides through leather like a hot knife through warm butter, giving you a clean edge.
- A Self-Healing Cutting Mat: This protects your table and keeps your knife blade sharp. It is a non-negotiable for safety and precision.
- A Steel Ruler: A heavy metal ruler gives you a straight edge to cut against. A flimsy plastic ruler can bend, leading to crooked cuts, and you might accidentally slice into it.
- A Hole Punch: A simple rotary punch with multiple sized heads is ideal for putting holes in bracelets or laces. A drive punch and mallet work for single, larger holes.
- A Mallet: A rubber or poly mallet is perfect for driving punches without damaging them. The one I use for Mason’s stirrup leathers is the same one I use for small projects.
Starting with these five tools lets you measure, cut, and finish basic projects with confidence. You can always add more specialized tools later, but this kit is the true foundation.
Picking the Perfect Leather for Your Project
Not all leather is the same. The type you choose changes how your project looks, feels, and ages. The smell of good leather, like oak-tanned veg-tan, is warm and earthy. The surface should feel firm but not board-stiff, with a visible grain pattern.
Always ask your supplier about the leather’s origin. Supporting tanneries with transparent, ethical practices is a core part of caring for this craft.
Vegetable-Tanned vs. Chrome-Tanned Leather
These are the two main families of leather, and they behave very differently.
- Vegetable-Tanned (Veg-Tan): Tanned using natural tree barks and oils. It starts a light tan color and darkens to a rich honey-brown with exposure to light and oils from your skin. It is firm, holds tooling and stamps beautifully, and develops a deep personal patina over years. Think of it like raw denim that molds to you.
- Chrome-Tanned: Tanned using chromium salts. It is more water-resistant and comes in a vast array of colors from the start. It is softer and more pliable right away but will not develop the same classic patina or take tooling as well. Think of it like a pre-washed, dyed garment.
For most do-it-yourself projects, vegetable-tanned leather is the most rewarding choice because it ages with you. My wallet, Scout, is made from it and gets richer every day.
Matching Leather to Your Project
Here is how to make the choice simple:
- For Do It Yourself Leather Bracelets: Pick a firm, 3-4 oz vegetable-tanned leather. This thickness is sturdy enough to hold its shape on your wrist but can still be cut and punched comfortably. It will develop a beautiful wear pattern from your daily life.
- For Tying Leather Laces (like on boots or hoodies): You need supple, long strips. A chrome-tanned leather cut into thin laces is very flexible. For a veg-tan option, look for “lace” or “strap” leather that’s been pre-oiled and stretched for softness.
- For Reshaping or Repairing a Leather Wallet: The goal is to match. If you are adding a new interior panel, measure the thickness of the existing leather with a ruler. Use a similar type and weight. For reshaping a crumpled bill compartment, you need the leather to be pliable, which is where conditioning comes in later.
Run your fingers over the grain side; it should feel consistent, not powdery or cracked. A good piece of leather has a tight, pebbled texture and a substantial handfeel. Choosing the right leather for do it yourself leather bracelets and other small goods sets your project up for a lifetime of use.
How Do You Make a Simple Leather Bracelet?
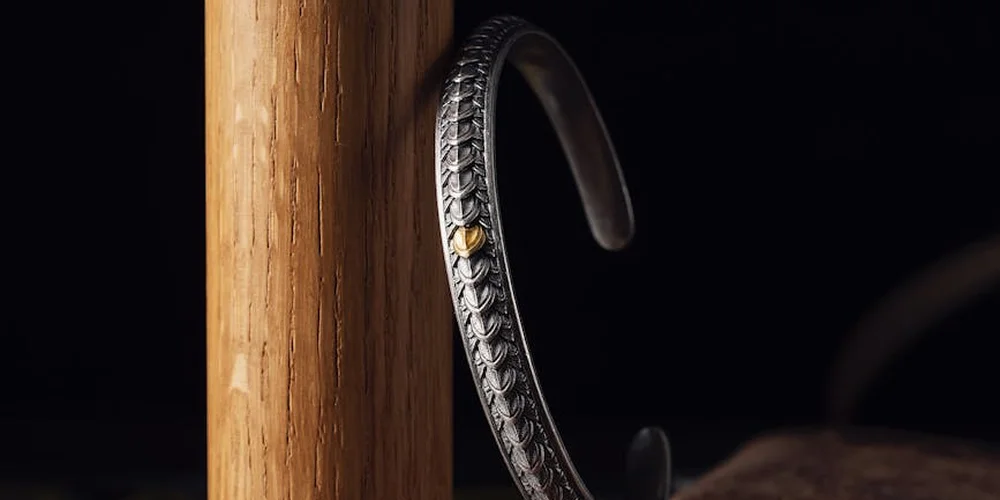
You can make a handsome leather bracelet with a few basic tools and a spare afternoon. This is how you make a leather bracelet from start to finish. The process is straightforward, focusing on clean cuts and smooth edges for a piece that feels great on your wrist.
The core steps are simple.
- You’ll measure your wrist and mark the leather.
- Then you make a clean, straight cut.
- Next, you sand and finish the edges so they are soft.
- Finally, you add your chosen clasp or tie.
For your first try, pick a medium weight vegetable tanned leather strap; it is firm enough to hold its shape but easy to cut and finish by hand.
Measuring, Cutting, and Shaping Your Cuff
Start by wrapping a soft measuring tape snugly around your wrist where you want the bracelet to sit. Do not pull it tight. For a comfortable fit, add at least one full inch to this measurement. If you plan to use a snap clasp, you need extra length for the overlap. For a simple knot closure, you need enough length to tie it.
Transfer your final length measurement to the back side of your leather strip. Use a metal ruler and a pen or awl to mark a perfectly straight line. A sharp utility knife or a dedicated leather craft knife works best for the cut. Hold the ruler firmly and cut in one smooth, confident pass. Do not saw back and forth.
Rounded corners make any leather accessory feel more refined and prevent pokey ends. Use a coin or a small template to draw a gentle curve on each corner of your cut strip. Carefully cut these curves. Then, take a medium grit sandpaper (like 220 grit) and sand all the cut edges. This removes the rough “fuzz” and evens everything out.
Adding Hardware or Knots for Closure
You have two reliable options for closing your bracelet: hardware or knots. A simple snap kit is very secure. You need a hole punch, a setting anvil, and the snap parts. Punch a small hole where you want the male part of the snap on one end, and the female part on the other, ensuring a good overlap. Follow the kit’s instructions to set the snaps firmly.
For a softer, adjustable closure, use a knot. A sliding knot, like a simple barrel knot, works beautifully. You will need to punch a single hole about half an inch from one end of your strap. Burnish this hole carefully with a wooden tool or the back of a spoon to keep the leather from stretching.
Finishing the edges is what turns a simple strip into a crafted piece, much like the care I give to Scout’s wallet edges. After sanding, run a damp cloth along the edge to raise the fibers slightly. Let it dry for a minute, then sand again with a finer grit paper. Finally, rub the edge vigorously with a piece of canvas or a wood burnisher. The friction heats and polishes the leather, creating a smooth, sealed edge that will not fray. Finishing edges properly is a skill that makes all the difference in professional leatherwork.
Getting Creative: Braided and Knotted Bracelet Designs
Once you are comfortable with a simple lace, you can try your hand at weaving leather into something more personal. Braided and knotted styles add texture and a custom look. The feel of a tight, even braid in your hand is deeply satisfying, like the solid grip on my old saddle, Mason.
These methods use the same principles as repairing a strap or lacing a project. A sliding knot, for instance, works just like the adjustable knot on a well-fitted leather dog collar. It gives you a perfect, custom fit every time you wear it.
For a quick and meaningful project, look at an old leather belt that has served its purpose. You can cut a section, soften the edges, and punch holes to create a simple cuff bracelet. It carries the history of its first life right onto your wrist.
Creating a Basic Braided Leather Bracelet
This classic three-strand braid is a great starting point. Use a softer, pliable leather like garment leather or a supple veg-tan. The leather for my wallet, Scout, would be perfect for this.
Here is how to build one.
- Cut three equal strands. For an average wrist, cut each strand about 12 inches long and 1/4 inch wide. The extra length is for braiding and finishing.
- Bundle the ends together and secure them firmly to your work surface with tape, or clamp them in a small vise.
- Begin braiding, keeping a steady, firm tension. Pull each strand snug against the previous one. Think about the consistent tension needed when saddle stitching.
- When you reach the end, keep hold of the braid so it does not unravel.
The most common issue is uneven tension, which makes the braid look loose in spots. If this happens, you can gently work the braid from the secured end, pushing and tightening the weave with your fingers.
To finish, you must secure the ends permanently so your braid never comes undone. A strong, flexible leather glue applied neatly to the last half-inch of the bundled ends works well. For the most durable hold, add a few hand stitches across the bundle after the glue dries.
Mastering the Sliding Knot Closure
This knot is a game changer. It turns any straight leather cord into an adjustable bracelet or necklace. It works on the same friction principle as a cowboy’s lariat knot.
You will need a single length of lace, about 10 inches for a bracelet.
- Form a loop that will fit over your hand. The size of this loop is your bracelet’s maximum size.
- Take the working end of the lace and wrap it around the base of the loop three or four times. Wrap neatly and tightly next to each other.
- Now, pass the working end through the small tunnel you created at the base of the wraps. Pull it through from the back to the front.
- Gently pull the long, working end to tighten the wraps around the loop. Do not pull it all the way tight yet.
- Repeat steps 2 through 4 on the other side of the loop with the other tail end of the lace.
You now have two sliding knots. Pull on the tails to tighten the bracelet around your wrist. Pull on the loop to loosen it. The friction of the leather-on-leather wraps holds the setting firmly.
If the knot slips too easily, you simply need more wraps. Add one or two more turns before passing the tail through the tunnel. This increases the surface area and friction for a stronger hold. It is the same logic as adding more stitches to a stressed seam on a jacket like June.
The Basics of Leather Laces and How to Use Them
Think of leather laces as the unsung heroes of the craft. They’re not just for tying things together. They can repair, decorate, and even become the main structure of a project, like a bracelet. Choosing the right one makes all the difference.
Flat vs. Round: Choosing Your Tool
Leather laces come in two main shapes, and each has a job it’s best at.
Flat laces are like sturdy ribbons, perfect for stitching pieces of leather together or for weaving patterns where you need a wide, flat surface. I use a flat lace to repair a torn strap on Mason, my saddle. It lies flush against the leather, creating a strong, almost invisible mend. You’ll often see them used in traditional saddle stitching or lacing up the sides of a journal.
Round laces are more like soft, pliable cords, designed for tying and binding where you need a knot to hold securely. They’re what you want for a leather bracelet, a shoelace, or tying a bundle. The round shape allows the knot to cinch down evenly without biting into the leather. The laces on my work apron are round – they hold tight but are easy to untie at the end of the day.
Picking the Right Thickness and Length
Getting this wrong is the most common mistake. A lace that’s too thin will cut through leather like cheese wire. One that’s too thick will be impossible to work with.
Match the lace thickness to the hole it needs to pass through. For pre-punched holes or eyelets, the lace should fill about two-thirds of the hole. For holes you punch yourself, use an awl or punch that creates a hole just slightly larger than your lace.
Always cut your lace longer than you think you need. It’s heartbreaking to get to the last knot and be an inch short. A good rule is to measure the path your lace will take, then add at least 50% more length. For a wrapped bracelet, you might need triple the length of your wrist. It’s always easier to trim the excess than to start over.
The Feel in Your Hand: Waxed and Unfinished
You’ll also choose between waxed and unfinished laces. This is all about handfeel and function.
Waxed laces are easier to handle. The coating helps them glide through holes and keeps the ends from fraying. They have a slightly tacky feel and develop a nice sheen with use. They’re great for beginners.
Unfinished, or “natural,” laces are softer and more absorbent. They will soak up oils from your hands and the environment, developing a rich patina over time. They can be a bit trickier to thread, but many crafters prefer them for their ability to age beautifully, much like a good veg-tan wallet.
Finding Laces That Last
Not all leather laces are created equal. A cheap lace is often made from split leather leftovers. It feels stiff, cracks easily, and won’t age-it just deteriorates.
Look for laces cut from the stronger top layer of the hide, just like you would with a quality belt or bag. They should feel supple, not plastic-like. A good lace will have a consistent color and grain throughout. When you source materials, ask about the leather’s origin. Laces from responsibly tanned, full-grain leather will be a companion for your project for years, softening and darkening into a legacy, not just a temporary fix.
My old scout wallet uses a thin, round lace as a closure. It’s darkened to a deep mahogany from years of handling, and it’s as strong as the day I tied it. That’s the goal.
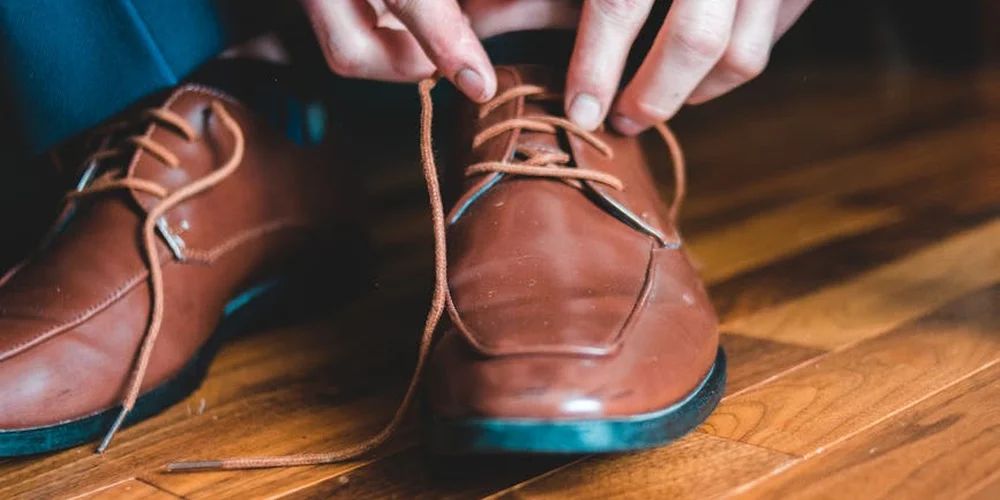
Step-by-Step: Tying Leather Laces That Hold Tight
You asked how to tie leather laces so they stay tied. It’s a common worry. Leather is smooth and stiff compared to fabric, so standard knots can slip. I focus on a few practical ties that work: the square knot for security, a simple bow for daily use, and a neat loop for looks.
The trick is in the final pull. With leather, you need to cinch every part of the knot firmly. Think of it like seating a grommet-apply steady, even pressure until it feels locked. For laces on things like my jacket June, I add one extra step after tying to make sure they never come undone on their own.
The Square Knot for Security
This is your most reliable knot. It lies flat and won’t jiggle loose with movement, which is perfect for bag closures or anything that gets tossed around.
The square knot is reliable because it uses friction against itself, creating a lock that tightens under tension.
Here is how you tie it:
- Cross the right lace over the left lace.
- Tuck the right lace under the left lace and pull it through. You now have a simple overhand knot.
- Cross the new right lace (which was the left) over the new left lace.
- Tuck this right lace under the left lace and pull it through again.
- Pull all four ends firmly and evenly to tighten. The knot should look symmetrical.
A common mistake is tying two identical overhand knots, which makes a granny knot. That knot will slip and often leans to one side. Check your work: if the laces exit the knot parallel to the sides they entered from, you have a proper square knot.
Decorative Ties for a Personal Touch
Sometimes, you want the tie to be part of the design. For a craft project or a simple closure on a journal, a decorative tie adds character without sacrificing function.
A simple loop-and-tuck tie gives a clean finish and is easy to adjust for a perfect fit.
Try this method for a neat look:
- Make sure your laces are even. Cross them as if starting a standard tie.
- Take one lace and form a small, single loop (like a rabbit ear).
- Wrap the other lace around the base of that loop once.
- Tuck the end of the wrapping lace through the space between the loop and the wrap. Pull gently to secure.
You can leave the ends dangling or trim them for a cleaner appearance. For items that don’t see much strain, this works well. To prevent slipping on smoother leathers, like a calfskin lace, I sometimes add a tiny, almost invisible dot of leather glue inside the final tuck on June’s jacket. It holds for seasons but can still be carefully picked apart if needed.
How to Reshape a Leather Wallet Back to Form
You want to know how to reshape a leather wallet. A misshapen wallet is common, and fixable. The best approach uses slight moisture and steady pressure, never high heat or soaking. Heat can fry the leather’s natural oils, making it brittle. Soaking can wash those oils out and distort the shape further.
First, assess your wallet. Pick it up. Feel the leather. Is it stiff and dry, like cardboard? Do you see fine white lines or cracks along the folds? My own wallet, Scout, got like this after a year in my back pocket. Dry leather won’t bend back into shape easily, it might just crack. If the leather feels parched or looks stressed, it needs a drink of conditioner before you try to reshape it.
Preparing Your Wallet for Reshaping
Start with a clean surface. Dirt can grind into damp leather. Take a soft, lint-free cloth, dampen it with cool water, and wring it out thoroughly. Wipe down the entire wallet, inside and out, to remove surface grime. Let it air dry for a few minutes.
Now, check the leather’s thirst. Press your thumb into an inconspicuous spot, like an inside seam. If the leather feels hard and the indentation doesn’t bounce back slowly, it needs conditioning. Use a light, pH-balanced leather conditioner or cream. Always test your conditioner on a small hidden area first to check for any color change you might not want.
Apply a tiny amount to another soft cloth. Rub it into the leather using small circles, focusing on dry, creased areas. You don’t want it soggy, just evenly moisturized. Think of it like putting lotion on your hands, you rub it in until it’s absorbed. Let the wallet sit for 15 minutes. The leather should feel softer and more pliable, with a soft, matte finish. This approach also works on other stiff leather accessories like wallets, belts, and bags. It helps them become more flexible and comfortable.
The Gentle Reshaping Process with Weight and Time
With your wallet prepared, you can now gently coax it back into shape. Lay it flat on a clean, dry towel. Gently press and fold it into its correct, natural shape with your hands. Don’t force it.
Next, you’ll use weight and time. Place another clean towel or piece of plain paper over the wallet. Then, stack flat, heavy objects on top. A pile of large books is perfect. Start with a few and add more for even pressure. You are not trying to crush it, just to hold its proper form firmly.
- Place the flattened, slightly conditioned wallet on a towel.
- Cover it with another towel or paper.
- Apply even weight (like books) across its entire surface.
- Leave it in a cool, dry place for 24-48 hours.
Air drying away from direct heat, sunlight, or vents is non-negotiable for a safe, even result. Check it after a day. If it’s still slightly damp or hasn’t fully held the shape, leave it under the weight for another day. Patience here rewards you with a wallet that remembers its original form. When you take it out, it should feel firm, hold its shape, and be ready for your pockets again.
Caring for Your Leather After Reshaping or Repair
Your work is not done once the shape is set or the lace is tied. The real goal is keeping that leather happy for years. Think of it like this: reshaping is a reset, and maintenance is the daily habit that makes it last.
Give It a Drink: The Conditioning Routine
Leather is skin. It dries out. Conditioning replaces the natural oils that time and use take away. A dry wallet is stiff and prone to cracking. A dry bracelet feels rough.
Condition leather every few months to maintain its suppleness and prevent it from becoming brittle and cracked.
Here is a simple routine. You only need a clean, soft cloth and a quality leather conditioner.
- Clean the surface first with a barely-damp cloth to remove dust and skin oils. Let it dry completely.
- Apply a small amount of conditioner to your cloth. Rub it into the leather using small, even circles.
- Focus on areas that bend or flex the most, like the folds of a wallet or where a bracelet knot sits.
- Let the leather absorb the conditioner for at least an hour. Buff off any excess with a clean, dry part of your cloth.
I condition my English saddle, Mason, at the start of every riding season and again before I store it for winter. That predictable schedule keeps his deep chestnut color rich and the leather strong, ready for work. Your wallet or bracelet does not need that much, but a regular schedule matters.
A Safe Place to Rest: Proper Storage
How you store leather between uses is just as important as how you treat it during use. The wrong environment can undo all your careful conditioning.
Always store leather goods in a cool, dry place away from direct sunlight and heat sources, which will prematurely dry and fade the material. For long-term storage solutions for leather goods, use humidity-controlled environments and breathable coverings to prevent mold, cracking, and color fading.
For a reshaped wallet, do not overstuff it when you are not carrying it. Let it keep its new form. For bracelets or laces, lay them flat if possible. Do not hang a wet or damp leather bracelet, as the weight can stretch it as it dries.
A common mistake is tossing a leather item into a plastic bag or airtight container. Leather needs to breathe. Trapped moisture leads to mildew. A fabric dust bag or a shelf in a closet is perfect.
Listening to the Leather: Checking for Wear
Leather talks to you. A slight change in feel or a new pale line is its way of asking for attention. Make a quick check part of your routine, maybe when you condition.
- Run your fingers over the surface. Does it feel excessively dry or rough compared to last month?
- Look at the edges and high-contact points. On my wallet, Scout, I always check the stitched edges and the card slots for any slight fraying.
- Inspect any repaired areas. Is the adhesive holding? Is the thread still secure?
Catching a small issue early means a simple fix, like a dab of conditioner or a touch of edge paint. Waiting often means a bigger repair later. This habit of looking and feeling is what turns a simple item into a lifelong companion, like my jacket, June, whose old scars I care for as part of her story.
Common Questions
What’s the best leather for a beginner’s bracelet?
Start with a 3-4 oz vegetable-tanned leather strap. It’s firm enough to be forgiving during cutting and sanding, and it will develop a personal patina from daily wear, which is the real reward.
Why do my leather lace knots keep coming undone?
You’re likely not cinching them tightly enough or using the wrong knot. Leather needs firm, even tension to lock; always finish a square knot with a strong, deliberate pull on all four ends of the lace.
Can I reshape a wallet if the leather is already dry and cracked?
Condition it first. Forcing dry leather to bend will cause more cracking. Apply a quality conditioner to restore pliability, then proceed with gentle reshaping under weight.
How often should I condition a wallet after reshaping it?
Treat it like any other leather good. Give it a light conditioning every few months, focusing on the high-flex areas, to keep the fibers supple and prevent it from reverting to a dry, crumpled state. For lambskin items, proper cleaning and care helps keep them soft and prevents damage. That way, you’ll maintain their texture and longevity over time.
What’s the worst way to store spare leather laces?
In a sealed plastic bag or damp environment. Leather needs to breathe; trapped moisture promotes mildew. Store them loosely coiled in a cool, dry place instead, especially when caring for leather in humid climates.
Your Leather, Your Craft
The most important step in any leather project is the first one: slowing down. Feel the material, plan your moves, and work with your hands, not against them. Good results come from respecting the leather’s nature, especially when you work with cowhide leather.
Every stitch you make and every time you condition a piece is a choice for longevity. Caring well for the leather goods you own, and building new ones with intention, honors the material and the craft. Your steady hands build a collection that lasts, piece by reliable piece.
Related Guides and Information
- Easy DIY Leather Bracelet Tutorials – YouTube
- How to Make a Leather Strap Bracelet – Weaver Leather Supply
- Stamped Leather Bracelet by Alix Bluh – Creativebug
Harriet is a avid collector of leather goods such as purses, bags, seat covers, etc and has an extensive background in leather care, recovery, stain removal and restoration. She has worked for a number of years perfecting her leather care techniques and knows the ins and outs of restoring all kinds and types of leather products. With her first hand knowledge in leather care, you can not go wrong listening to her advice.
Jacket and Apparel Care