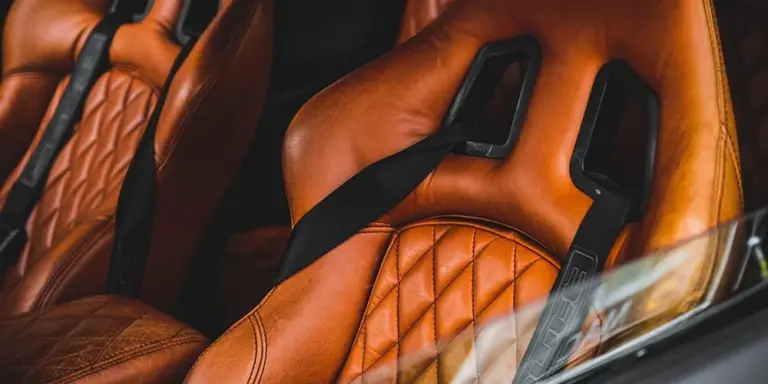
How Do You Fix Tears, Cuts, and Holes in Leather Car Seats?
Published on: February 1, 2026 | Last Updated: February 1, 2026
Written By: Harriet Nicholson
Hello Tannery Talk. Seeing a new cut or tear in your car’s leather can feel like a major setback, but I’m here to tell you that a beautiful repair is often within your reach.
This guide will take you through the entire process, covering identifying your leather type, cleaning and preparing the wound, selecting a repair method, applying filler or a patch, and color matching for a seamless finish.
With years spent hands-on conditioning, stitching, and reviving pieces like my dependable saddle Mason, I can show you how to approach this repair with confidence.
Stop and Look: What Kind of Damage Are You Dealing With?
Before you touch anything, take a moment. Run your finger over the damage. This tells you everything. You are figuring out if this is a simple “how to fix a cut” job or a more involved “how to fix a rip in a leather car seat” project.
I group damage into four simple types. The fix changes completely for each one.
The Surface Scratch
This is the most common. It looks like a white or light line. Your fingernail doesn’t catch in it. Think of it like a fingernail mark on a polished wooden table; the finish is marred, but the material underneath is intact. For a simple surface scratch, you often just need to rehydrate the leather to make the mark blend away.
The Clean Cut
This is a slice where the edges are still together. Your fingernail catches on a definite edge. Imagine a clean cut from a sharp box cutter on a piece of thick paper. The leather is parted, but the pieces are not missing or twisted. This needs a filler to bridge the gap and bind the edges.
The Torn Flap
This is a rip where a piece of the leather top-grain is peeled back, like a flap. Sometimes the backing fabric is visible underneath. This is like a torn page in a book. You must deal with the loose piece first, gluing it down flat before any other repair can happen.
The Hole or Gash
Here, material is missing. You can see through to the foam or backing. This is the most serious, like a hole punched in a piece of cardboard. Repairing a hole requires building a new surface from scratch, which always needs a backing patch for strength.
Your repair path depends entirely on this first assessment. A mistake here means the fix won’t last. Take your time.
Your Repair Toolkit: Everything You Need to Get Started
You don’t need a professional’s workshop. A well-chosen kit gets you 90% of the way. Think of it like a first-aid kit for your car’s interior. Here is what you should gather.
The Absolute Essentials
These are the non-negotiables for almost any repair.
- Leather Cleaner & Deglazer: A pH-balanced cleaner removes dirt and oils. A separate alcohol-based deglazer strips the factory finish so your repair materials can stick. It has a sharp, clean smell.
- Repair Compound (Filler): This is a flexible paste, often in a tube. It fills cuts and holes. Think of it like a very strong, sandable spackle for leather.
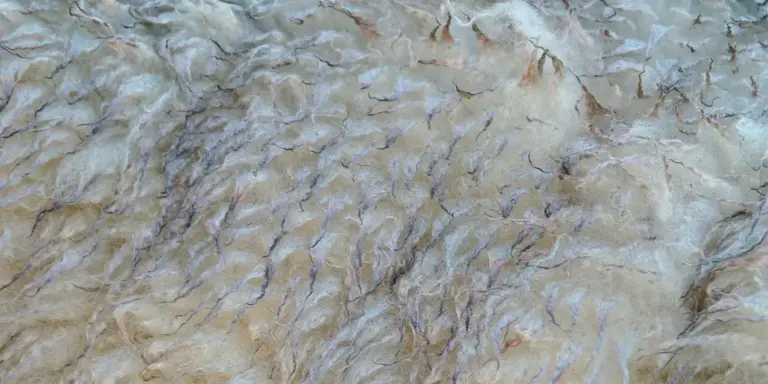
- Backing Fabric (Scrim): A strong, flexible mesh. You glue this behind holes and major tears. It acts like a cast for your leather, giving the filler something to hold onto.
- Adhesive: A flexible, water-based leather glue. It should dry clear and not become brittle. This is for securing flaps and the backing fabric.
- Colorant (Dye or Pigment): Liquid dye soaks into the repaired area. A thicker pigment paint sits on top to match the original finish. You often need both for a perfect match.
- Leather Conditioner: The final step. It replaces oils lost during cleaning and repair, keeping the area supple.
Choosing a Pre-Made Kit
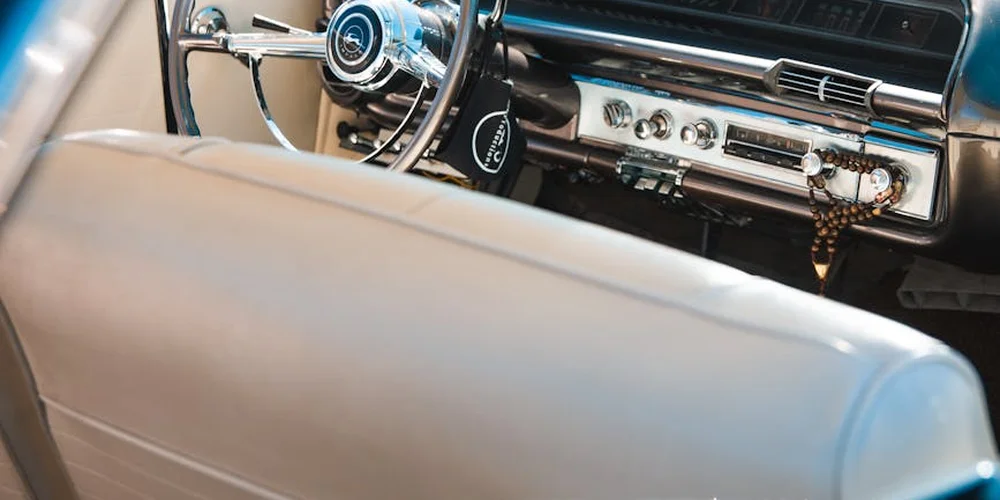
A good leather seat repair kit will contain most of the essentials above. Look for one that includes colorants. The best kits offer a range of base colors you can mix, like artist’s paints, to match your specific seat shade. Check that the kit includes a backing patch material and a flexible filler, not just a surface color paint. The texture and flex are as important as the color. For best results, use the right products and techniques for cleaning, maintaining, and repairing genuine and faux leather car seats. This applies to all automotive interiors.
Quick Fix Alternatives
Sometimes you need a temporary hold or a fix for a low-stress area. Leather seat repair tape or iron-on patches can work for small, clean tears on seat backs or sides. They are a bandage, not a cure. The adhesive can fail with heat and flex, and they rarely match the texture. For a permanent repair on a seat bottom (which gets constant stress), you will need the full process with filler and backing.
The Tools for Your Hands
Gather a few simple tools. You will need soft-bristle brushes for cleaning, firmer brushes for applying filler, and very fine sandpaper (like 600 grit) for smoothing. A palette knife or plastic spatula helps spread filler evenly. Have plenty of clean, lint-free cloths. The feel of a good, dense cloth wiping away excess dye is satisfying-it means you’re getting a smooth finish.
With your damage assessed and your kit ready, you can move forward without guesswork. It feels good to be prepared.
The Foundation: Cleaning and Prepping the Damaged Spot
Think of this step like preparing a wall for a fresh coat of paint. If you skip it, nothing you put on top will stick well or look right. A good repair is only as strong as the surface it bonds to.
Your first job is to clean the torn area and the leather around it. Dirt, oils, and old conditioners will create a barrier. Your patch or filler will not bond properly to a greasy surface.
A Two-Phase Cleaning Process
I always clean in two phases: dry first, then wet. This keeps you from grinding grit deeper into the leather.
- Dry Clean. Use a soft, dry brush (a clean shoe brush or a soft toothbrush works) to gently loosen any loose dirt or debris from the tear and the surrounding inch of leather. Brush away from the tear to avoid pushing dirt inside.
- Wet Clean. Dampen a clean, white cloth with water and a drop of pH-balanced leather cleaner. Wring it out so it’s barely damp. Wipe the area gently, again working from the edges of the clean zone toward the tear. Use a fresh part of the cloth often. A white cloth lets you see exactly how much grime you are removing.
Avoid soaking the leather or using household cleaners, window spray, or saddle soap here. Those can leave residues that weaken your glue later. For a cut on my jacket June, I once used a cleaner that was too waxy. The repair adhesive beaded up and refused to stick, and I had to start all over. For tears and rips, methods for repairing damaged leather jackets offer practical repair steps. We’ll cover those methods in the next steps.
The Non-Negotiable Dry Time
After cleaning, you must let the spot dry completely. This is the step everyone wants to rush. Do not rush it.
Leather is a skin. Moisture trapped underneath a repair will eventually cause the adhesive to fail or, worse, lead to mold. Let the area air dry naturally, away from direct heat like a heater vent or hair dryer. Patience here saves you from a failed repair later.
How do you know it’s dry? The surface will feel cool to the touch, not cold. The color will return to its normal shade. For a small area, this might take 30 minutes. For a larger, damp-cleaned spot, give it a few hours. I left June’s prepped spot near a fan for a full afternoon before I was satisfied.
How Prep Defines Your Repair
Proper prep does two critical things for your final result. First, it creates a strong bond. Your filler or patch makes direct contact with the bare leather fibers, creating a durable, almost seamless hold.
Second, it ensures the repair looks acceptable. Dirt or grease can stain a leather filler or cause color patches to adhere unevenly. A clean, dry base gives your color-matching products a true, consistent surface to work on, making the repair much less noticeable.
Mending Cuts and Small Tears: Bringing the Edges Together
A clean cut or a small tear in your car seat leather can feel like a major setback. I’ve felt that pang myself. The good news is, with a careful hand, you can mend these wounds and restore strength. The goal is simple: bring the edges back together perfectly and reinforce them from behind.
Your Step-by-Step Repair Guide
Think of this like first aid for leather. You must clean the area before you can treat it. Rushing this step is the most common mistake I see.
- Clean Thoroughly: Use a soft cloth dampened with a pH-balanced leather cleaner. Gently clean the tear and a wide area around it. Let it dry completely. Any dirt or conditioner left in the wound will weaken the bond.
- Prepare the Edges: If the cut has frayed fibers, use a fine-grit sandpaper to gently smooth the edges. You only want to remove loose material, not dig into good leather. Wipe away all dust with a dry cloth.
- Test Your Glue: Always test your adhesive on a hidden area first, like under the seat. This checks for color changes or unwanted reactions.
Applying Adhesive and Creating Pressure
This is the moment of truth. For how to fix a rip or a cut, the adhesive choice matters. I prefer a flexible, water-based leather glue. It doesn’t have harsh fumes, and it dries clear.
Apply a thin bead of glue directly into the cut. Use a toothpick to spread it evenly along both sides of the tear. Your goal is a thin, even layer; too much glue will ooze out and create a hard, visible lump.
Immediately press the edges together firmly. Hold them for a full minute to set the initial bond. Now, you need constant pressure.
- For flat areas, place a piece of wax paper over the repair and weigh it down with a heavy book.
- For curved seat bolsters, use masking tape to pull and hold the edges together tightly.
Leave the clamp or weight in place for at least 24 hours. Patience here makes the repair last.
Adding a Backing for Lasting Strength
Mending the surface is only half the job. The leather is now thinner at the repair site and can easily tear again. This is where a backing acts like a supporting bandage underneath the skin.
You need a strong, flexible fabric. I often use a piece of lightweight canvas or a dedicated leather repair fabric.
- Cut a patch that extends at least an inch beyond the tear in all directions.
- Apply glue to the back of the leather around the repair and to your fabric patch.
- Slip the patch under the leather. This can be tricky on car seats. A flexible tool, like a thin plastic spatula, can help you position it.
- Press the leather down onto the patch firmly, smoothing out any air bubbles. Apply weight again for another few hours.
This backing disperses any future stress, so the weak spot isn’t just the thin line of your glue. It’s the professional touch that makes the difference between a temporary fix and a permanent solution for how to fix a cut in a leather car seat.
Filling Holes and Gouges: When Material is Missing
Sometimes leather doesn’t just tear, it gets removed. A key gouges a seat, a pet claws a divot, or wear creates an actual hole. This is a different kind of repair, one that requires you to build new structure before you can think about color. The goal is to create a stable, flexible base that blends with the surrounding leather.
The Step-by-Step Process for a Lasting Fill
Think of this like filling a deep dent in a fine wooden table. You don’t just glob it on once. You build it up slowly, letting each layer cure. Rushing this guarantees a repair that cracks or sinks later.
- Clean the Wound. The hole must be absolutely clean and dry. Use a cotton swab dipped in a neutral leather cleaner to wipe away all dirt and oils from the inside edges of the hole. Any grease will prevent the filler from sticking.
- Roughen the Base. Gently scuff the inside of the hole and the immediate surrounding area with fine-grit sandpaper. This gives the filler something to grip onto, much like priming a wall before plaster.
- Apply the First Thin Layer. Using a small spatula or palette knife, press a small amount of leather repair compound into the very bottom of the hole. Ensure it gets into all the crevices. This layer is your foundation. Let it dry completely, often for a few hours.
- Build it Up. Apply a second, slightly thicker layer to bring the fill level closer to the surface. Smooth it as best you can. Let it dry again. You may need a third, very thin final layer to achieve a perfectly level surface that’s just slightly proud of the surrounding leather.
- Sand it Smooth. Once the final layer is fully cured, use very fine-grit sandpaper (like 400 grit) to carefully sand the repair down until it is perfectly flush with the leather. Sand in gentle, circular motions. The goal is a smooth, seamless transition you can feel with your fingers.
- Seal and Color. The filled area is now ready to be colored with a leather dye or refinisher to match the original piece, followed by a protective topcoat.
Choosing and Using Your Filler
Not all fillers are the same. For car seats and furniture, you need flexibility. A rigid filler will crack the first time you sit down.
- Flexible Compounds: Look for water-based latex or acrylic leather fillers. They dry flexible and can move with the leather. I typically avoid rigid epoxy-based pastes for seating surfaces.
- Layering is Non-Negotiable. Filling a deep hole in one go creates a thick blob that dries from the outside in. The inside stays soft, the outside hardens, and the whole thing shrinks and cracks as it finally cures. Thin, complete cures between layers are the secret to a permanent fix.
- The Smoothing Tool: Your finger can work, but a flexible plastic spreader gives you more control and a smoother finish. Dampen the spreader slightly with water to keep the compound from sticking to it.
I learned this on Mason, my old saddle. A stirrup bar took a chunk out of the flap. I glopped filler in once, sanded it, and thought I was done. Two weeks of riding later, a ugly crack appeared. I had to dig it all out and start over, the right way, with patience.
Different Scenarios, Same Principle
The process adapts based on the item, but the core idea of clean, build, and smooth remains.
- Car Seat Hole: This is high-stress. Flexibility is your top priority. After sanding the final fill, apply a leather conditioner to the entire seat to help keep the repaired area supple.
- Leather Jacket Tear (like June): For a small puncture, the process is identical but on a tiny scale. Use a toothpick to apply the filler. The challenge is matching the grain texture after coloring; a grain pad pressed into the final wet color coat can help.
- Chair Arm Gouge: Often less flex than a car seat but more than a bag. The same flexible filler works perfectly. The key is ensuring the filled area is as smooth as the original finish before you attempt to color it.
The most common mistake is underestimating drying time and overfilling in a single layer. If you overfill, simply let it cure fully and sand it back down. It’s easier to add more than to remove a gummy, half-cured mess.
Matching Color and Texture: The Art of Making it Disappear
Think of this step like touching up paint on your wall. The goal isn’t to make a new wall, but to make the small repaired spot blend in so well your eye just glides right over it. With leather, we’re matching both the color and the texture.
Finding the Perfect Color Match
Color matching is the most common place people slip up. A new bottle of “black” dye can look blue or purple next to your seat’s worn-in “black.” The lighting in your car is also different from your garage.
Always, always test first. I keep a notebook of swatches from past projects. For you, find a hidden spot. Under the seat, behind a headrest.
- Clean the hidden spot thoroughly with a neutral leather cleaner.
- Apply a tiny dab of your chosen dye with a cotton swab.
- Let it dry completely. This takes about 30 minutes.
- Check the color in different lights: bright sun, garage shade, interior dome light.
The true color only reveals itself once the dye is fully dry and you’ve looked at it in the same light your seats live in. If it’s off, you can often mix dyes or apply a second, different color in thin layers to adjust the tone.
Applying Dye and Blending the Edges
You have a good color match. Now, apply it so the repair becomes invisible. Rushing here will leave a dark, obvious blob. We want a gentle fade.
For a small tear, I use a small, dense sponge or an artist’s brush. For larger areas, a small airbrush kit is a game-changer for smooth blends.
- Shake your dye bottle for a full minute. Pigments settle.
- Apply the dye only to the repaired area and the filler you used. Do not paint the good leather around it yet.
- Let this first coat dry for 15-20 minutes. It will look too light and blotchy. That’s normal.
Now, for the magic of blending. Load your sponge with a minuscule amount of dye. Feather it out. Lightly dab and swirl the dye onto the good leather surrounding the repair, going about an inch out. Your motions should get lighter as you move outward.
Building color in several thin, feathered layers creates a gradual transition that the eye cannot detect, unlike one thick, hard-edged coat. Let each layer dry before adding the next. This whole process might take 3-5 layers and a few hours of patient work. I put on some music and settle in, just like when I’m building the patina on Scout, my wallet.
Recreating the Leather’s Grain
Your color is blended. But if you run your finger over the repair, it’s smooth. The seat around it has a pebbled, grainy texture. That missing texture will catch the light differently and give away your fix.
You need to re-impress the grain pattern. You have two main tools for this:
- Graining Papers: These are flexible sheets with a leather grain pattern etched into them. Place the paper over the repaired area (once the dye is fully dry) and rub firmly with a bone folder or the back of a spoon. The pressure transfers the pattern into the leather filler.
- Heated Grain Stamps: For a more permanent and deep impression, a small heated tool with a grain pattern tip can be pressed into the surface. This takes practice on scrap leather first to get the pressure and temperature right.
Start with graining paper. It’s forgiving. The key is to match the pattern. Look closely at your seat. Is the grain large or small? Press the paper down and move it slightly until the pattern lines up with the natural grain around the repair. Recreating the surface texture is the final, critical step that changes a visible patch into a secret only you know about.
Once the texture is set, you can apply a final, very light coat of dye if needed to even out any color shifts from the graining process. Finish with a light application of a pH-balanced leather conditioner to the entire seat to unify the sheen.
When to Do It Yourself and When to Call for Backup
You want to fix your seat. I get it. There’s pride in doing the work yourself, and a good repair can feel like a victory. But a car seat is a high-stress, daily-use item. Picking the right fight saves you time, money, and heartache.
The DIY Test: Size and Location
You can confidently tackle a repair yourself if it passes this simple two-part check.
- The damage is smaller than a standard pencil eraser. Think clean punctures, minor cat scratches, or very small cuts. These are contained. My old saddle, Mason, has a few of these from barn life. A quality leather filler and color-matching kit can make them nearly invisible.
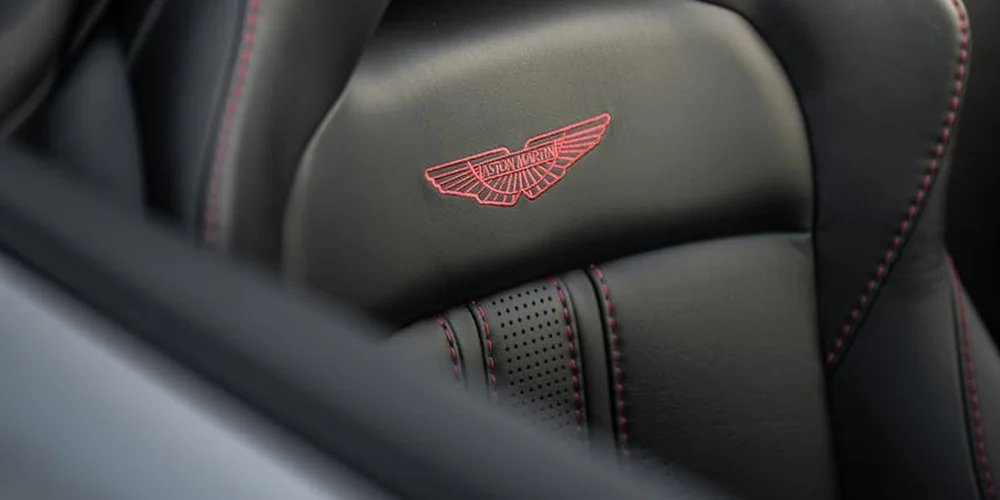
- The damage is not on a major seam, a deep fold, or directly on a bolster. These are high-flex areas. Any patch or filler here will crack and fail with regular sitting and movement. It’s like trying to fix a deep crease in June, my jacket-the repair moves every time you do.
If the tear is longer than an inch, the hole is gaping, or the damage is on a seam, your home fix will be temporary. You’ll see it every day, and it will likely get worse.
For larger or complex damage, a professional repair is not a failure-it’s the responsible choice for preserving your leather.
Weighing the Cost: Kit vs. Professional Service
Let’s talk numbers. A do-it-yourself leather repair kit costs between $20 and $60. It includes filler, colorants, and basic tools. For a small nick, this is perfect. The investment is low, and learning the skill is rewarding.
Professional mobile repair services or upholstery shops handle the big jobs. Costs vary widely by damage and location, but you can expect a range. A single, complex tear repair might start around $150. Replacing a whole seat panel can cost several hundred.
On community forums, owners often share that a pro quote gave them peace of mind. They realized their DIY attempt on a large split would have wasted a kit and left the seat vulnerable. The real cost of a DIY mistake is a more complicated and expensive professional fix later.
Finding the Right Professional Help
Searching “leather seat repair near me” is a good start. Look beyond general auto detailers. You want specialists. Check their galleries for before-and-after shots of tear repairs, not just conditioning. Read reviews that specifically mention fixing cuts or gashes, especially for car seats and dashboards.
A true craftsman will ask you questions: What caused the damage? How old is the leather? They’ll explain their process, which should include cleaning, filling, reinforcing, color-matching, and sealing. It’s a detailed, multi-step process similar to rebuilding the structure of a worn boot heel.
Trust your gut. If a repair estimate seems too cheap for the damage, or the technician can’t explain their method, look for another pro.
Knowing When to Hand It Over
There’s no shame in calling for backup. I know when a welt stitch on a boot is beyond my touch-it goes to the cobbler. The same logic applies here.
You should call a professional if:
- The leather is torn completely through, and you can see the foam underneath.
- The damaged area flexes constantly (like the side bolster you slide across every time you get in).
- The cut runs along a stitched seam, compromising the seat’s structure.
Taking care of leather means making smart choices for its long-term life. Sometimes, the most hands-on thing you can do is pick up the phone. A professional repair restores both the look and the durability of the seat, letting you enjoy it for years more. Of course, you can also try to repair minor damage yourself.
Aftercare: Protecting Your Repair for the Long Haul

The repair is set. The glue or patch has bonded. Your work isn’t finished, it’s just entered a new phase. Think of this like caring for a healing wound; you need to support the area as it integrates and regains strength.
Proper aftercare seals your hard work, blends the repair, and prevents the leather around it from becoming brittle and failing.
Conditioning the Repaired Area
Wait at least 24 to 48 hours after your repair is complete before starting. This lets adhesives fully cure. Rushing this can weaken the bond.
- Clean Gently: Use a soft, dry cloth or a brush to remove any dust from the repair site. If needed, dampen a cloth with a little distilled water-avoid soaking the area.
- Apply Conditioner: Use a pH-balanced leather conditioner or cream. Put a small amount on a clean, lint-free cloth. Gently rub it into the repaired spot and the surrounding leather using small circles. You want to moisturize the area without forcing product into the seam of the repair.
- Let it Absorb: Allow the conditioner to soak in for at least an hour. Buff lightly with a dry part of the cloth if any residue remains.
The goal is to restore flexibility. Freshly repaired leather can be stressed and dry. Conditioning prevents it from cracking at the edges of your fix.
How This Aftercare Differs from Regular Maintenance
Regular maintenance is about overall health. Aftercare is targeted rehabilitation.
When I condition my wallet, Scout, I give the whole piece a light, even coat every few months. It’s routine. For a repair, you focus intensely on one spot and the leather immediately around it. You might apply conditioner more frequently at first-perhaps once a week for two weeks-to ensure the leather fibers there regain their suppleness. This focused, more frequent initial care ensures the repair site becomes as durable as the original material, not a weak point.
You also handle it more delicately. While June my jacket gets a vigorous buffing, you’ll pat and dab a fresh repair.
The Gentle Start, Then Back to Normal
For the first month, treat that part of the seat with extra kindness. Avoid scrubbing directly over it during cleaning. Don’t use heavy, waxy protectants yet, as they can build up in the repair seam.
After this initial period, the repair should be fully integrated. You can then treat the entire seat uniformly. Return to your normal cleaning and conditioning schedule, whether that’s every season or every six months. The patched area is now part of the leather’s story, just like the creases on Mason my saddle are part of his.
Connecting to Everyday Leather Care
This process echoes a core principle of leather care: listen to the material. Dry, stiff leather needs conditioning. A new repair is simply a small section of leather asking for immediate attention. By responding with careful aftercare, you don’t just fix a tear. You extend the life of the entire piece, ensuring it ages gracefully and uniformly for years to come. Understanding the science of leather aging explains why it cracks and how to combat it. With that knowledge, regular conditioning and proper care slow the process and keep leather supple over the years.
Quick Answers
Do those leather seat repair kits from auto parts stores actually work?
They can be effective for very small, clean cuts or scratches if they contain a flexible filler and colorants. For anything larger than a pencil eraser or on a high-flex area, their results are often temporary and visually obvious.
What’s a realistic cost difference between DIY and a pro for a medium-sized tear?
A DIY kit costs $20-$60, while a professional repair for a several-inch tear typically starts around $150. The professional cost buys you durability and an invisible finish that a DIY kit usually cannot achieve on significant damage.
Can a repair on a high-wear area like a seat bolster ever last?
Only if it’s professionally done with the correct flexible materials and backing. A DIY patch or filler on a bolster will crack and fail quickly due to the constant friction and flex every time you enter and exit the vehicle.
Is there a temporary fix I can use before a proper repair?
For a clean tear, a specialized leather repair tape can act as a short-term bandage. Understand it is not a solution; the adhesive will degrade with heat and movement, so plan for a permanent repair quickly.
Caring for Your Repaired Leather Seats
From fixing tears on jackets like June to car seats, I know the foundation of any good repair is a perfectly clean, dry surface. That careful preparation allows your patch or filler to bond deeply, creating a fix that flexes with the leather instead of cracking.
Choosing to repair upholds a responsible approach, valuing the material and reducing waste. View each maintenance task, whether for seats or a wallet like Scout, as practice that builds your respect for leather’s longevity and character.
Deep Dive: Further Reading
- Leather Car Seat Repair In Los Angeles, CA 90232 – Best Way
- Amazon.com: Leather Repair Kit
- r/DIY on Reddit: How to repair leather car seat, or at least stop cut from expanding?
- How to Fix A Hole in a Leather Car Seat | UK Tutorials
- How to fix a torn leather car seat
Harriet is a avid collector of leather goods such as purses, bags, seat covers, etc and has an extensive background in leather care, recovery, stain removal and restoration. She has worked for a number of years perfecting her leather care techniques and knows the ins and outs of restoring all kinds and types of leather products. With her first hand knowledge in leather care, you can not go wrong listening to her advice.
Car Interior and Auto Leather Care