How Are Leather Knife Sheaths Made? A Craftsperson’s Guide from Hide to Hold
Published on: January 29, 2026 | Last Updated: January 29, 2026
Written By: Harriet Nicholson
Hello Tannery Talk. You love that trusted knife, and it deserves a sheath that’s just as reliable-let’s see how one is born from a piece of hide.
We will cover cowhide processing, crafting techniques, tooling, and cutting methods to show you the full journey.
I’ve shaped, stitched, and conditioned leather for years, so I can walk you through this craft with clear, hands-on advice.
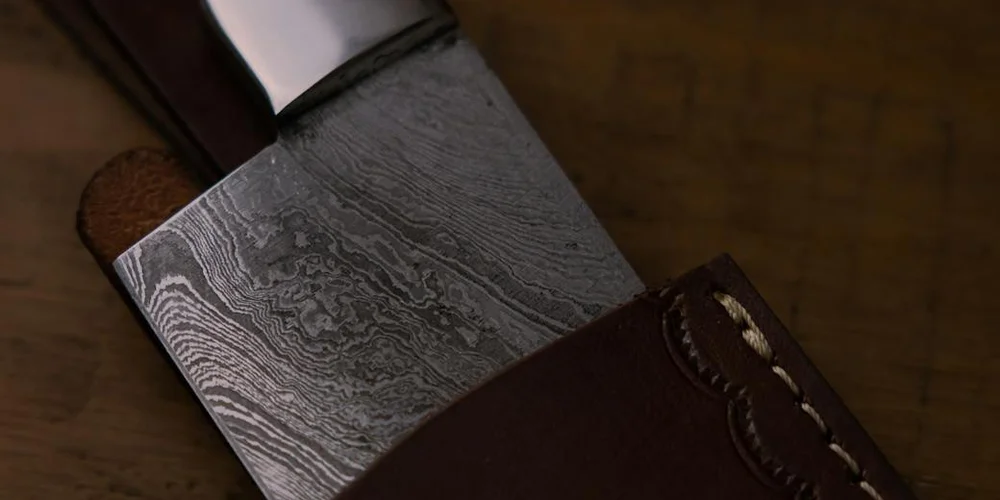
What Is a Leather Knife Sheath and What Does It Do?
A leather sheath is a simple, smart piece of gear. Think of it as a custom-fitted cover for your knife blade.
Its job is twofold: to keep you safe and to keep your knife sharp. A good sheath holds the knife securely so the edge can’t cut you or snag on your gear when you move. It also shields the blade from moisture, dust, and impacts that can dull or damage it.
A well-made sheath protects both the user and the tool, turning a sharp blade into a safe, carry-ready companion.
How Sheaths Are Carried
Sheaths are designed for how you move. The most common styles attach to your belt.
- Vertical Carry: The knife hangs straight down. This is a classic, secure fit best for longer blades and active use.
- Horizontal Carry: The sheath sits sideways on your belt, with the handle facing forward or backward. This style sits flush against your body and is great for comfort while sitting or in a vehicle.
- Multi-Position Sheaths: Many sheaths have slots or loops that let you switch between vertical and horizontal carry to suit your task for the day.
You can think of a knife sheath like a scabbard for a sword, but built for the dings and demands of daily life. My old hunting knife’s sheath, for instance, has ridden on my belt for years in every position. Its job is always the same: keep the edge where it belongs until I need it.
Where Does the Leather Come From? How Is It Made?
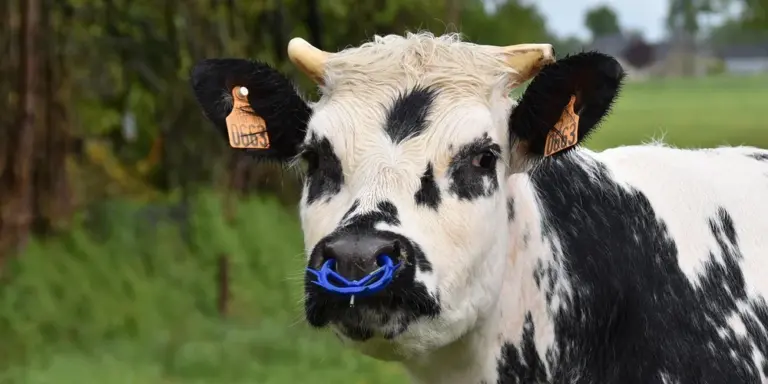
The journey to a durable sheath starts long before any cutting or stitching. It begins with a raw animal hide, most often from a cow.
Fresh cowhide is perishable. If left untreated, it would rot. The process that stops this decay and transforms a stiff hide into workable leather is called tanning.
From Hide to Leather: The Tanning Process
Tanning is how leather is produced. It uses natural or synthetic agents called tannins to permanently alter the protein structure of the hide. This makes it resistant to decay, heat, and moisture. The chemistry behind tanning also explains how care steps affect durability. Different tanning methods change how leather responds to cleaners and conditioners.
- Preparation: The raw hide is cleaned, hair is removed, and it is softened.
- The Tanning Vat: The hide is submerged in large drums containing tannins. For generations, this was done with tree bark (like oak), which gives a firm, natural leather. Today, mineral (chrome) tanning is also common for its speed and soft results.
- Drying & Finishing: After tanning, the leather is dried, softened, and sometimes dyed or embossed with a texture.
The tanning method chosen directly defines the leather’s character, its strength, and how it will age in your hands. For a tool sheath that needs to hold its shape and last for decades, vegetable-tanned leather is often the first choice.
Leather Types for Sheaths
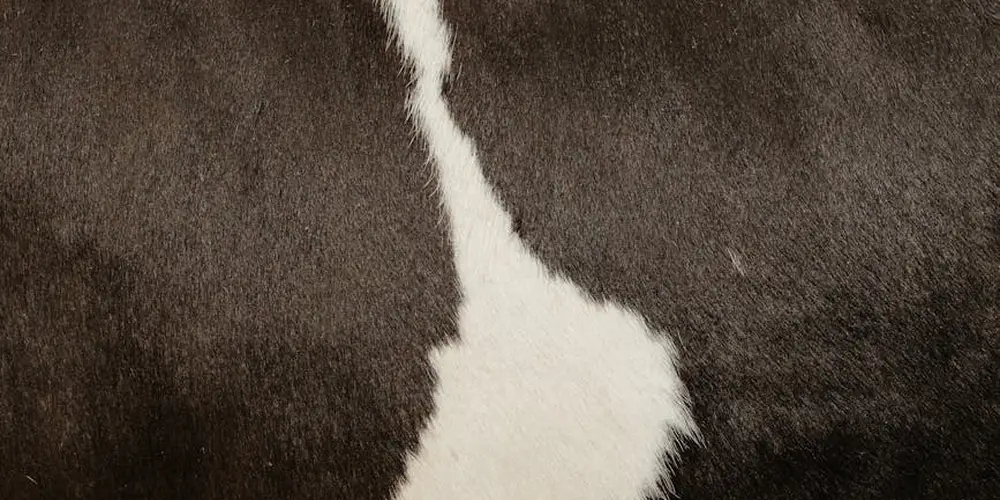
While cowhide is the workhorse, different animals and tanning methods create different leathers.
- Vegetable-Tanned Cowhide: This is the gold standard for many craftsmen. It’s firm, molds beautifully to a blade over time, and takes tooling and carving exceptionally well. It develops a rich patina with use and care.
- Chrome-Tanned Cowhide: Softer and more pliable right away, often with a wide range of colors. It’s very durable but doesn’t hold crisp tooling like veg-tan. Great for sleek, flexible sheaths.
- Other Leathers: Exotic leathers like ostrich or lamb are made through similar tanning processes. They are chosen for their unique texture and appearance, often for decorative sheaths, but generally lack the rugged durability of thick cowhide for a hard-use tool.
Where and how the leather is sourced matters. Leather from reputable tanneries that follow ethical and environmental standards tends to be more consistent in quality and thickness. This means fewer hidden flaws in the hide, which translates directly to a stronger, more reliable sheath for your knife.
Why Is Leather the Best Material for a Knife Sheath?
You have options for a knife sheath. Nylon and molded plastics are common. But for a tool you depend on, nothing matches the feel and function of leather.
Think of my old saddle, Mason. It has seen years of hard use. The leather is not broken. It is trained. It has conformed perfectly to its job. A synthetic sheath cannot do that. Nylon can fray at the edges. Plastic can crack in the cold. Leather adapts. It can be molded with heat and moisture to hug your specific knife. This custom fit starts strong and gets better every time you slide the blade in.
A Guardian for Your Blade
A good sheath does two things. It keeps you safe from the edge, and it keeps the edge safe from everything else. Leather excels at both.
The inside of a quality leather sheath is smooth. There are no hard seams or rough spots to scrape against the blade’s polished surface. The natural fibers are far softer than steel but densely packed. They cradle the edge without dulling it. For the handle, leather offers a gentle, non-abrasive hold. It won’t scratch wood or micarta like a tight plastic clip might.
A well-made sheath includes a welt. This is a strip of leather sewn between the main pieces. It creates a gap so the sharp edge never touches the stitching threads. Without it, you would cut your own sheath over time. The welt is a simple, brilliant piece of protection that leather craftsmen have used for centuries.
The Secure, Gentle Grip
That satisfying *snug* feeling when you sheath your knife is leather’s secret. It is not about being tight or forcing it in.
Leather is made of a network of interwoven fibers. When you press the blade against them, they flex and then grip. It is a firm handshake. With use, these fibers learn the shape of your knife. They create a memory. The sheath holds the knife securely, even upside down, but releases it with a smooth, consistent pull.
Compare that to a synthetic material. A plastic sheath relies on a rigid snap or friction clip. Those parts can wear out or break. The leather itself is the retention system. It ages with the knife, its grip becoming more personal and reliable.
Patina: The Story You Can See
This is where leather leaves all other materials behind. A nylon sheath fades and gets dirty. A leather sheath develops character.
Patina is the story of your use. The darkening where your thumb rests every day. The light creasing at the bend. The warm glow that comes from oils in your hands and a little bit of conditioner. My jacket, June, has this. Scratches and scars from years of wear do not make it look worse. They make it look like June.
With simple care, a leather sheath does not wear out. It wears in. Every six months or so, after it sees rain or dirt, you clean it with a damp cloth and a drop of mild soap. You let it dry slowly, away from direct heat. Then you apply a small amount of a natural conditioner, like a paste wax or oil, and rub it in. This method is considered one of the best general methods for caring for and treating leather items.
This maintenance does not just restore it. It improves it. The leather drinks in the moisture, staying supple and strong. The color deepens. The next time you slide your knife in, the fit feels even more sure. A cared-for leather sheath becomes a more perfect partner for your knife with every year that passes.
Other materials simply cannot do that. They are replaced when they fail. Leather is repaired, refreshed, and relied upon for a lifetime.
How Do You Start Making a Sheath? Pattern, Leather, and First Cuts
Before a single cut is made, you need a plan. Making a sheath begins with a pattern, just like sewing a shirt. A good pattern is your roadmap.
The most reliable pattern comes from the knife itself. Lay the knife on a piece of paper or thin cardboard. Trace around the blade and handle. Now, this is the secret: you must add space. Trace a second line about 1/4 inch outside your first line. This is your “seam allowance,” the extra leather that will be folded and stitched. For a simple pouch sheath, this is often enough. You can find more complex “leather knife sheath patterns” online for specific designs, but starting with your own knife is the best teacher.
Taking the time to make a precise paper pattern saves leather and prevents frustration later.
Choosing Your Leather: Thickness and Type Matter
Not all leather works for a sheath. You need something that will protect the blade, hold its shape, and last for years. Think of my old saddle, Mason. It’s thick, stiff, and tough. A sheath needs similar qualities.
For the main body, you want vegetable-tanned leather. It’s firm, molds well when wet, and takes tooling beautifully. A thickness between 7 and 9 ounces is the sweet spot. That’s about 3/32 of an inch thick-sturdy but not impossible to sew by hand. For a lining or a welt (the strip between layers that stops the blade from cutting the stitches), you can use a thinner, softer leather.
Vegetable-tanned leather in a medium-heavy weight provides the perfect balance of protective stiffness and workability for a durable sheath.
Making the First Cut: Tools and Technique
This answers the core question: how do you cut leather? A dull tool will tear and bruise the leather fibers, leaving a ragged edge you can’t fix. You need a sharp blade. A utility knife with a fresh blade or a dedicated round knife works best.
Place your paper pattern on the leather’s “flesh side” (the rough, suede-like back). Weight it down or use small clips. Trace the pattern firmly with a stylus or ballpoint pen. Now, follow that line with your knife. Use a steel ruler for straight cuts. For curves, move the leather, not just your wrist, to keep the cut smooth.
Pay attention to the grain. Leather has a natural stretch, like fabric. You generally want the length of the sheath to run parallel to the backbone of the hide, where the leather stretches the least. This helps the sheath keep its shape over time.
Always cut with a sharp blade against a cutting mat, using steady pressure to get a clean edge you won’t have to fight later.
Safety Isn’t an Afterthought
You are handling sharp metal to work with a material that will hold sharp metal. Slow down. Always cut away from your body and your other hand. A cut-resistant glove on your non-dominant hand is a wise investment. Keep your tools sharp; a dull blade requires more force and is more likely to slip. Keep your workspace clean and well-lit so you can see exactly what you’re doing every step of the way.
How Do You Tool and Decorate the Leather?
Tooling is where a plain piece of leather becomes your own. It is the art of impressing permanent designs by compressing the leather’s fibers. For a knife sheath, this adds grip, character, and a signature touch. The process starts long before any tool touches the surface.
Casing: Preparing the Canvas
You cannot tool dry leather. It would be like trying to carve a cracker. First, you must “case” the leather, which means dampening it to a specific, workable state.
I use a clean sponge and water. The goal is not to soak the leather but to hydrate it evenly until it feels cool and firm to the touch, like a chilled stick of butter. The color will darken slightly, but this is different from truly darkening the color using tanning techniques.
Proper casing gives the leather a temporary plasticity, allowing tools to sink in and leave a crisp, lasting impression without tearing the fibers. A common mistake is working leather that is too wet (soggy and mushy) or too dry (brittle and resistant). If it feels wrong, let it dry back a bit or add a little more moisture. Patience here saves frustration later.
The Basic Tooling Steps
With your leather cased and ready, the real work begins. For a first sheath, a simple border or geometric pattern is a perfect start.
1. Tracing the Design
Place your pattern or stencil on the damp leather. I use a stylus, which is a blunt metal tracing tool, to firmly press the design lines into the surface. You are not cutting, just creating a shallow guide groove. For straight lines, a ruler helps. Press firmly enough to see a clear indent.
2. Cutting with a Swivel Knife
This is the defining step. Following your traced lines, you use a swivel knife to make the primary cuts. You hold it like a pencil, but the blade pivots in its head to follow curves smoothly. The goal is a clean, beveled cut about one-half to two-thirds through the leather’s thickness.
The key is consistent pressure and a steady hand, letting the sharp blade do the work rather than forcing it. You will hear a quiet, satisfying whisper as it slices through the damp fibers. On my wallet, Scout, I practiced this on scraps for an hour before cutting the simple border lines.
3. Stamping for Texture and Depth
With your design cut, you use metal stamps to add texture and bevel the edges of your cuts. You place the stamp’s tip exactly where you want it and strike the top once, firmly, with a mallet. A solid “thwack” means you hit it right.
- Bevelers: These stamps press down the edge of your swivel knife cuts, making the design pop up from the background.
- Background Tools: Textured stamps (like a pebble or basketweave pattern) are tapped into the areas around your design to create a recessed, shadowed effect.
- Decorative Stamps: For adding floral motifs, lines, or other details directly.
Each strike compresses the leather fibers downward permanently. The design will lighten in color as it dries, creating beautiful contrast.
Why Tooling Lasts a Lifetime
Tooling is not a surface decoration like paint. When you case the leather and apply pressure with stamps, you physically rearrange and compress the network of collagen fibers within the hide. Think of it like pressing your thumb into soft clay. When the clay dries, the dent remains. In leather, that “dent” is permanent. The compressed areas become harder and more resistant to wear, which is why tooled borders on a sheath add durability to high-stress points.
A Practical Example: Adding a Border to ‘Scout’
When I made the sheath for my daily-carry knife, I wanted a simple, rugged look. After casing the leather, I used a ruler and stylus to trace a border about a quarter-inch from the edge. I followed that line with my swivel knife, focusing on smooth, connected cuts.
Next, I used a basic beveler stamp along the inside edge of that cut. Tap, tap, tap, all the way around. This simple step transformed the flat border line into a raised, clean ridge. Finally, I used a small background stamp to texture the area between the border and the edge of the sheath. This gave it depth and extra grip. The whole process took about twenty minutes, but it turned a functional piece into a personalized one.
The beauty of tooling is that even a simple, repeated pattern creates a handcrafted feel that mass-produced goods can never match. Start small, practice on scraps, and remember that every tap of the mallet is a conversation with the material.
How Do You Assemble the Sheath? Stitching, Gluing, and Forming
This is where the flat pieces of leather become a functional home for your knife. A sloppy assembly means a loose, unsafe fit. A precise one creates a sheath that feels like an extension of the knife itself. We take our time here.
Preparing the Edges: Skiving and Beveling
Before any glue or thread touches the leather, we prepare the edges. This reduces bulk and makes the final product smooth.
Skiving is the process of thinning down the edges of the leather where two pieces will meet, especially at seams. I use a sharp skiving knife to shave a tapered edge on the backside of the leather. For a sheath, I’ll skive the entire perimeter of the main body piece where it will meet the welt (the thin strip between the layers that protects the stitching). This creates a seamless, low-profile transition instead of a thick, clunky ridge.
After skiving, I bevel the edges. Running a hand-held edge beveler along the sharp, 90-degree corner of the leather cuts a small, rounded groove. This does two things: it makes the edge more comfortable to the touch and gives the burnishing process a smooth surface to work on later. Think of it like sanding the rough edge off a piece of wood before you apply a finish.
Stitching for Strength: Hand vs. Machine
Stitching holds everything together under tension. The method matters for durability and repair.
I saddle stitch all my sheaths by hand. It’s the method I used on Scout, my wallet. This stitch uses two needles, one on each end of a single thread, working in opposite directions through pre-punched holes.
A properly executed saddle stitch is incredibly strong because each hole is locked by two independent knots; if one section of thread breaks, the rest of the stitch will not unravel. It has a distinctive, slanted look I find beautiful. It’s slower, but it’s a forever kind of stitch.
Machine stitching is faster and produces very consistent, straight lines. For high-volume work, it’s practical. However, it uses a single, continuous thread locked by a bobbin underneath. If that thread breaks or wears through at a stress point, a longer section can come undone. Both methods work, but I trust the resilience of a hand-saddle stitch for a item that will see daily wear and tear.
Gluing Before Stitching: The Temporary Hold
You never stitch pieces that are just flopping around. Glue is your temporary, super-accurate clamp.
I apply a thin, even layer of contact cement to both pieces I’m joining-say, the sheath body and the welt. I let it dry until it’s just tacky to the touch, not wet. This usually takes a few minutes. Then, I carefully align the pieces and press them together. The bond is immediate and very strong.
This glued bond does the critical job of holding every layer in perfect alignment while you punch stitching holes and sew, preventing shifting and guaranteeing a clean result. While some crafters use solvent-based contact cement, I prefer a water-based leather glue. It has no harsh fumes, cleans up easily, and provides more than enough hold for the stitching stage. The permanent strength will always come from the thread.
Wet-Forming the Perfect Fit
This is the magic step that makes a sheath “snap” onto the knife. We make the leather temporarily malleable with moisture and shape it directly to the tool.
First, I fully assemble and stitch the sheath, but I leave the top inch or so unstitched. I then soak the sheath in clean, cool water for a few seconds until the leather is evenly damp all the way through-it will darken in color. I pat off the excess water with a towel.
Next, I insert the knife blade, wrapped tightly in a layer or two of plastic wrap (to protect it from moisture). I then use smooth, rounded tools like a bone folder or the back of a spoon to press, rub, and mold the damp leather tightly around every contour of the knife. You work it until the leather is hugging the steel.
Let the sheath dry with the knife inside, and as the moisture evaporates, the leather will shrink slightly and permanently hold that custom shape. It will now have a satisfying, secure “click” when sheathed. I learned this technique making a sheath for an old skinning knife, and that perfect, glove-like fit is worth the extra patience. Just ensure the knife is completely dry before its final storage.
How Do You Finish the Sheath? Edges, Dye, and Protection
A raw leather sheath is functional. A finished sheath is a companion. This stage transforms rough edges and pale leather into something that feels complete in your hand and looks ready for a lifetime of use.
Sanding, Burnishing, and Sealing the Edges
Unfinished leather edges are fuzzy and vulnerable. They catch on fabric and absorb moisture. A clean edge looks professional and lasts much longer, especially when you understand leather’s key properties and how they affect burnishing techniques for a professional finish.
My process for a sheath like Mason’s involves a few careful steps.
- Sanding: Start with a coarse grit sandpaper to level the edge, then progress to a fine grit. The goal is a perfectly smooth, rounded profile.
- Beveling: Use an edge beveler tool to shave off the sharp 90-degree corner. This creates a slight rounded angle that’s more comfortable and burnishes better.
- Burnishing: Dampen the edge with a sponge and rub it vigorously with a wooden slicker or canvas cloth. The heat and friction fuse the leather fibers, creating a hard, polished surface. For Scout’s wallet, I do this by hand; for a larger sheath, I might use a rotary tool with a burnishing attachment.
- Edge Paint or Gum: Some crafters prefer the look of colored edge paint. Others, like me, often stop at a well-burnished natural edge sealed with a dab of beeswax or a dedicated edge-finishing gum. The choice between a natural burnish and colored edge paint is purely aesthetic, but sealing the edge in some way is non-negotiable for durability.
Adding Color with Dye or Antique
This step is for visual character. Vegetable-tanned leather starts a light tan color. You can leave it natural to darken with age, or add color now.
- Dye: Liquid or gel dyes penetrate the leather for solid, even color. Always apply in thin, even coats with a dauber or sponge, and let it dry completely between coats.
- Antique Gel: This sits in the tooling grooves and creases, highlighting the depth of your carving. You apply it, let it sit for a minute, then wipe the high spots clean. It gives incredible depth, like the shadows in the creases of June’s jacket.
Test every dye or antique on a scrap piece of your project leather first; color results can vary dramatically. Wear gloves and work in a ventilated area. Sealing the dyed leather with a compatible finish can help lock in color and boost durability. We’ll explore the best methods for sealing leather dye paints in the next steps.
Sealing and Conditioning the Leather
This is the most critical care step you will do. An unfinished sheath has no defense against water, dirt, or the oils from your skin.
First, apply a leather conditioner or oil. This replaces the natural fats lost during crafting and drying. For a tool sheath, I use a heavier oil or paste for maximum protection. Rub it in thoroughly and let it soak in overnight.
Next, apply a sealant or finish. This creates a protective top layer.
- For high water resistance: A wax-based sealant or acrylic resolene.
- For a natural, penetrative finish: An oil-based sealant like a beeswax blend.
Apply the finish in thin, even coats. Let it dry fully. You may lightly buff it with a soft cloth after. Regular conditioning helps prevent cracking and drying out. It keeps leather supple and ready for real-world use. Conditioning feeds the leather, while sealing armors it; a sheath needs both to survive real-world use.
Attaching Hardware: Snaps, Loops, and Clips
Hardware makes the sheath useful. A misplaced rivet can ruin months of work.
Always mark your placement with an awl before punching any holes. For a belt loop, ensure it’s wide enough for your intended belt. For a snap, make sure the male and female parts align perfectly so the closure is secure but not strained.
- Punch clean holes using the correct size drive punch for your rivets or snaps.
- Set hardware using a maul and the appropriate setting anvil. Work on a solid, hard surface.
- Reinforce stress points. I often add a small leather patch behind a belt loop attachment point, just like I patched the underarm on June’s jacket. It spreads the pull force and prevents tearing.
A final check: insert the knife. It should slide in and out smoothly, with the retention snug but not tight. The hardware should operate without putting stress on the leather stitches.
How Do You Choose and Care for a Leather Knife Sheath?
Choosing a sheath is more than finding a cover for your blade. You’re selecting a partner that must protect your tool and keep you safe. A good sheath fits the knife snugly, looks great, and lasts for years. A poor one can be dangerous or fall apart. Let’s look at what makes the difference.
What to Look For in a Well-Made Sheath
Start with the stitching. Run your finger along the seams. The stitches should be even, tight, and lie flat against the leather. Loose, sloppy, or broken threads are a sign of rushed work. Strong, consistent stitching is the first sign of a sheath built to handle daily use and stress.
Next, check the fit. Slide your knife in and out. It should go in smoothly but not fall out if you turn the sheath upside down and give it a gentle shake. Think of it like a firm handshake. Too tight, and you’ll struggle to draw the knife. Too loose, and it’s a hazard. The welt-the strip of leather between the front and back pieces where the edge sits-should be thick enough to stop the blade from cutting the stitches.
Finally, inspect the finish. Look at the edges of the leather. Are they smooth and burnished, or rough and frayed? A cared-for edge feels almost polished. Check the surface for a uniform dye job and a protective topcoat. These details show a craftsperson took their time.
Starting Your Own Project: The Value of a Kit
If you’re feeling inspired to make your own, a leather knife sheath making kit is the best place to start. I learned on pre-cut pieces, and it saved me from costly early mistakes. A good kit removes the guesswork.
It should include:
- Pre-cut, quality leather pieces (often vegetable-tanned).
- The necessary hardware (snaps, rivets).
- A clear, step-by-step guide.
- The essential tools you might not have, like a stitching awl or a edge beveler.
A kit gives you the confidence to focus on the core skills of assembling, stitching, and finishing without worrying about designing patterns or sourcing odd supplies. You get to feel the process in your hands, which is the best teacher.
Simple, Actionable Care for Your Sheath
Leather is skin. It needs cleaning and moisture, just like my old saddle, Mason. A simple routine a few times a year keeps it supple and strong.
Step 1: Gentle Cleaning
First, remove the knife. Use a soft, dry brush to dust off any dirt or grit from the surface and stitching. For tougher grime, use a barely-damp cloth with a drop of pH-balanced leather cleaner. Wipe gently, never soak the leather. Let it air dry completely away from direct heat. This might take an hour. Looking ahead, you may want to explore the best products and methods for cleaning leather. Choosing the right approach can protect the material and extend its life.
Step 2: Deep Conditioning
Once clean and dry, apply a thin, even coat of a natural leather conditioner or oil. Use your fingers or a soft cloth. Rub it in thoroughly, paying extra attention to stiff areas or stitch lines. Let the conditioner soak in for at least an hour; the leather will drink it up and the color will even out as it dries. If it still feels dry to the touch, a second light coat is fine. Remember, like with my wallet Scout, conditioning will often darken the leather initially, but this mellows as it cures.
Step 3: Proper Storage
Never store your knife in the sheath for long periods. Trapped moisture from the air or the blade can cause rust on the metal and rot the leather. Keep them separate in a cool, dry place. Avoid attics, damp basements, or spots in direct sunlight, which will bake the leather dry.
How Care Prevents Damage and Extends Life
Without oil, leather dries out. It loses its flexibility. When dry leather is bent or flexed, the fibers crack instead of stretching. Think of a dried-out old belt-stiff and prone to creasing. Regular conditioning replaces the natural oils that processing and time remove.
This simple act of feeding the leather is what prevents those irreversible cracks and keeps the stitching flexible and strong. A sheath cared for this way doesn’t just last years; it can last decades, developing a rich, personal patina that tells the story of its use, much like the wear on my jacket, June. The leather stays safe to handle, protects your blade, and remains a trusted part of your gear.
Common Questions
Should I choose a vertical or horizontal carry sheath?
Choose based on your daily activity. A horizontal sheath sits flush against your body, offering superior comfort for sitting or driving, while a vertical carry is more traditional and secure for active movement.
Is a leather knife sheath making kit a good way to start?
Yes, a quality kit is an excellent beginner’s tool. It provides pre-cut pieces and focused instructions, letting you learn assembly and stitching without the intimidation of pattern drafting from scratch.
How do I find a quality leather knife sheath near me?
Seek out local custom knife makers or leatherworkers at craft fairs and specialty shops. Inspect their work for tight, even stitching and burnished edges-these are the hallmarks of a careful craftsperson.
How often should I condition my leather sheath?
Condition it every 6 to 12 months, or whenever the leather feels dry and stiff. Apply a thin coat of a natural conditioner, like neatsfoot oil or a beeswax paste, and let it absorb fully to prevent cracking. For boots, frequency can vary with climate and wear. In the next step, we’ll share the best application method for conditioning leather boots.
Your Sheath, Your Craft
The heart of a durable knife sheath is matching the leather to its job and taking your time with each cut and stitch. Focus on these foundations, and you’ll create a protector for your blade that only improves with age.
Honor the leather by maintaining it well and seeking out hides from responsible sources. Every time you condition a sheath or practice a new stitching technique, you’re continuing the craft’s story.
Industry References
- DIY Leather Knife Sheath Kits – Weaver Leather Supply
- Knife Sheath Making – YouTube
- Leather Sheath and Holster Making Supplies | KnifeKits.com
Harriet is a avid collector of leather goods such as purses, bags, seat covers, etc and has an extensive background in leather care, recovery, stain removal and restoration. She has worked for a number of years perfecting her leather care techniques and knows the ins and outs of restoring all kinds and types of leather products. With her first hand knowledge in leather care, you can not go wrong listening to her advice.
Vegetable-tanned vs. Chrome-tanned Care