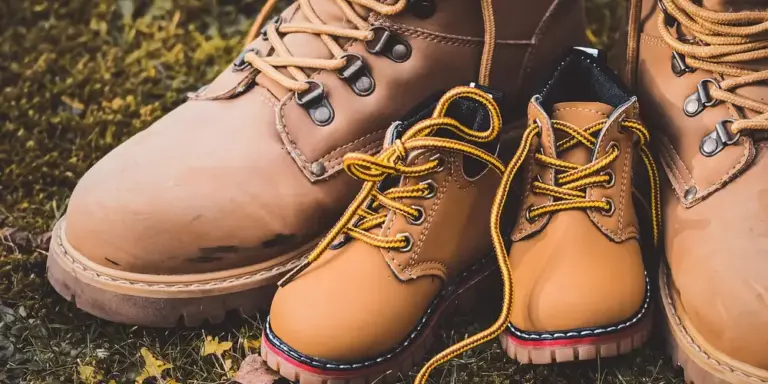
How Do You Repair Scratches on Leather and Suede?
Published on: January 24, 2026 | Last Updated: January 24, 2026
Written By: Harriet Nicholson
Hello Tannery Talk. Seeing a new scratch on your favorite leather couch or suede jacket can make your heart sink, but most marks are simpler to fix than you might think.
This guide walks you through a clear, craft-focused process. We will cover identifying the type of scratch and material, cleaning the area properly, applying repairs for smooth leather, handling delicate suede, and blending fixes for a seamless look.
I have spent years in the workshop, personally restoring pieces like my trusty saddle Mason and jacket June from similar wear and tear.
First, Look Closely: Is Your Scratch a Mark or a Wound?
Before you do anything, get close. Run your fingertip over the mark. Now, gently drag your fingernail across it, perpendicular to the scratch. This is the “fingernail test.” Your nail will tell you everything.
If your nail glides right over without catching, you likely have a surface mark. Think of a scuff from a shoe or a light rub against a table. A surface mark is like a smudge on a polished wood table; the finish is disturbed, but the wood beneath is perfectly fine. The leather’s top layer, or finish, is scuffed, but the actual fibers underneath are not broken.
If your nail catches in a groove or you can see a distinct, lighter colored line, you have a deep scratch. The fibers of the leather are cut. A deep scratch is more like a chip in that wooden table, where you see the raw, unfinished material underneath the polish. This is a true wound in the material.
My old saddle, Mason, has plenty of both. The light surface scuffs from the stirrups just blend into his patina. But the one deep gouge from a fence post needed a different approach. Whether you can completely erase a mark or just skillfully conceal it depends entirely on this first, simple assessment.
Gather Your Tools: The Right Fix for the Right Scratch
Once you know what you’re dealing with, you can choose your tools. Using the wrong one can make the problem worse. Here are the kits you should assemble.
For Surface Marks & Scuffs on Smooth Leather
This is about cleaning and replenishing, not filling. The goal is to minimize the appearance and keep the leather healthy.
- A soft, lint-free cloth (microfiber or cotton).
- A pH-balanced leather cleaner. This gently lifts dirt from the scuffed area without damaging the finish.
- A quality leather conditioner or cream. This moisturizes the leather, helping scuffed areas blend. A leather scratch repair cream is often just a pigmented conditioner designed to mask light marks while nourishing the hide.
For a scuff on a bag or couch arm, I often just use conditioner. Applying it to the whole panel evens out the look. On June, my jacket, a little conditioner rubbed into a light crease scratch makes it virtually disappear.
For Deep Scratches & Gouges on Smooth Leather
This is a repair process. You are rebuilding the leather’s surface. A leather scratch repair kit will typically contain all these items.
- Leather filler or compound. This is a flexible paste that fills the physical gap. Let it dry completely, often for 24 hours.
- Fine-grit sandpaper (like 400-600 grit). For feathering the edges of the dried filler so it’s flush with the leather.
- Color-matching products. This can be a dye, a pigment cream, or a precise pen. You must match the color after filling.
- A sealant or topcoat. This protects your color work and blends the sheen with the surrounding leather.
The common mistake here is rushing. Filler needs to cure, and color needs to be applied in thin, layered coats. Patience is your most important tool.
For Any Marks on Suede or Nubuck
Forget everything about liquids and creams. These materials have a raised nap. Your tools work by lifting and cleaning that nap.
- A suede brush with brass or nylon bristles. This is your primary tool for reviving the nap.
- A suede eraser (often a rubber or gum eraser). For rubbing out scuff marks and dirt.
- A suede-specific color spray or pencil. Only for severe color loss, and always test first.
Using a wet cloth or standard leather cleaner on suede will often create a permanent, dark stain by matting the fibers down. Always brush first. For a muddy mark, let it dry completely, then brush and use the eraser. The nap usually bounces back. Scout, my wallet, is full-grain, but I treat my suede shoes the same way—brush, eraser, more brushing. It works.
Preparing the Surface: Cleanliness is Non-Negotiable
Think of leather repair like painting a wall. You would never paint over dust and grime. The same rule applies here. Any dirt, oil, or old conditioner left on the surface will get trapped forever under your repair, creating a dull, uneven patch. This first step is the foundation of everything that follows. Understanding the most effective repair methods for general leather items will guide your approach as you continue. These principles apply whether you’re fixing a belt, a chair, or a jacket.
I learned this the hard way years ago with an old briefcase. I was in a hurry and skipped a proper clean before conditioning a scratch. The spot turned darker and greasy, a permanent reminder to never rush the prep work.
Your Simple, Universal Cleaning Method
The goal is to remove surface debris without harming the leather’s natural oils or the suede’s delicate nap. Here is how you do it, step by step.
- Gather your tools. You need two soft, clean microfiber cloths (one damp, one dry), a soft-bristle brush (like a horsehair detailing brush), and the right cleaner. For finished leathers (like most furniture and bags), use a pH-balanced leather cleaner. For suede and nubuck, you need a dedicated suede cleaner or a very mild soap solution.
- Do a spot test. Apply a tiny amount of your cleaner to a hidden area, like the back of a cushion or an inside seam. Wait for it to dry completely. This checks for color transfer or texture change.
- Clean in gentle circles. Dampen one cloth with your cleaner-never pour it directly onto the leather. Wipe the entire area, not just the scratch, using light, circular motions. For suede, use the dry brush first to lift dirt, then apply cleaner sparingly with a cloth, brushing gently with the nap.
- Wipe away residue. Use your second, dry microfiber cloth to wipe away any leftover cleaner. You should not see any streaks or film.
A common mistake is using saddle soap on everything. Saddle soap is great for heavy-duty, unfinished leathers like work boots or my old saddle, Mason. For other leather goods—boots, jackets, and even furniture—the care varies and often calls for different cleaners. Using it on delicate leather, such as an aniline leather sofa or suede jacket, can strip away dyes and natural finishes, causing more harm than the original scratch.
The Patience Phase: Let It Dry Completely
This part tests your resolve. You must let the leather dry fully. I mean bone dry to the touch, with no coolness. This usually takes 1-2 hours at room temperature, but thicker leathers can take longer.
Rushing this step is the top reason DIY repairs fail. Applying a conditioner or filler to damp leather means it cannot bond properly. The repair will likely peel or crack later. I always set the item aside and walk away. Check on Scout, my wallet. Organize my tools. The wait is worth it.
Once the piece is completely dry, you have a perfect, clean canvas. Now you are ready to assess the scratch and choose the right repair method.
How to Get Scratches Out of Smooth Leather: A Step-by-Step Guide
Your first job is to run your fingertip over the mark. If your nail doesn’t catch, you’re likely dealing with a surface scuff. If you can feel a groove, that’s a deeper scratch needing more attention. The method changes based on what you find.
For Light Scratches and Scuffs
Many marks aren’t true scratches at all. They are just compressed, dry leather or a transfer of color from another object. A good conditioner replaces lost oils, allowing the leather fibers to plump back up and often making the mark vanish.
Think of it like a wrinkle in your skin after a long bath. Hydration smooths things out. My saddle, Mason, is covered in lines from years of use, but regular conditioning keeps them soft and blended into his rich patina.
The right conditioner nourishes the leather, reducing the visual contrast of a scuff by restoring the material’s natural suppleness.
Here is the simple process I use on pieces like Mason and my jacket, June:
- Clean the area gently with a soft, damp cloth and a drop of pH-balanced leather cleaner. Let it dry completely.
- Apply a small amount of leather conditioner to a clean, soft cloth. Almond or coconut oil-based conditioners work well.
- Rub the conditioner into the scratched area using small, gentle circular motions. Cover a slightly larger area to ensure an even finish.
- Let the conditioner absorb for at least 15 minutes. You will see the leather darken as it drinks in the oils.
- Buff the area firmly with a dry, clean cloth. This removes excess conditioner and brings up a gentle shine. The scuff should now be much less visible.
For Deeper Scratches You Can Feel
When you have a real groove, the goal is to fill it, color it, and protect it. This is how you cover scratches on leather furniture for a lasting repair. Patience is your best tool here. Rushing will leave a lumpy, shiny spot that looks worse than the scratch.
A proper repair builds from the bottom up: you fill the physical gap first, then you match the color, and finally you seal your work.
Follow these steps carefully. Gather a leather filler paste, fine-grit sandpaper (400 grit or higher), a leather dye or colorant pen, and a leather finisher or sealant. We’ll also consider how sealing methods influence durability and color protection.
- Apply a tiny amount of leather filler. Use a small spatula or a toothpick to press the filler paste directly into the scratch. Overfill it slightly, as the filler will shrink as it dries. Smooth it as best you can.
- Let it dry fully. This can take several hours. Do not touch it. A fully dry filler will feel hard and not cool to the touch.
- Sand very gently until smooth. Lightly sand the dried filler with your fine sandpaper until it is perfectly flush with the surrounding leather. Feather the edges. Wipe away all dust with a dry cloth.
- Apply color. Test your dye or colorant pen on a hidden area first. Apply the color in thin layers to the repaired spot only, blending at the edges. Let each layer dry before adding the next. It often takes 2-3 layers to match.
- Seal with a leather finisher. Once the color is dry and matched, apply a thin coat of a matte or satin leather finisher over the entire panel (like the whole seat cushion). This protects the repair and ensures a uniform sheen. Let it cure for 24 hours before use.
This filler-and-color process restores the surface. The key is thin layers and full drying time between each step. I fixed a long scratch on a client’s chair arm this way last year, and you have to look for it to find it now.
Can You Remove Scratches from Suede? Here’s How to Try

Working with suede is different from smooth leather. The soft, brushed surface, called the nap, is the entire character of the material. A mark on suede is often not a cut, but a matting down or crushing of those tiny fibers. Think of it like running your hand over velvet one way to make it dark, and the other way to make it light. You are usually fixing a pile disruption, not sealing a wound.
The first step is always to assess the damage. Gently run your finger over the mark. If the surface feels flattened but the skin itself isn’t torn, you can likely fix it. If you see a clear cut where the fibers are severed, that’s a more permanent injury. For most scuffs and light scratches, the goal is simply to lift the nap back to its original, even texture.
Restoring the Nap on a Scuffed Area
This is the most common repair for suede. I use a simple two-step method: brush first, then erase. You will need a proper suede brush (usually with brass or stiff natural bristles) and a suede eraser, which is a gentle, rubbery block.
- Let the item sit for a day if the mark is fresh. This lets any moisture from the impact evaporate.
- Hold the item firmly and use the suede brush. Brush in one direction over the scuffed area with short, firm strokes. You are physically combing the crushed fibers upright.
- Check your progress. Often, vigorous brushing is all it takes. The mark will seem to disappear as the nap evens out.
- For stubborn, darkened marks, take the suede eraser. Rub it gently back and forth over the spot, as if you’re erasing pencil from paper. You’ll see a light residue appear-this is the eraser lifting dirt and oil from the fibers.
- Finish by brushing the area again with your suede brush to remove the eraser debris and re-align the nap.
This process is like brushing a velvet cushion back to life; you’re not adding anything, you’re just restoring the texture that was already there. Be patient and gentle to avoid damaging the delicate surface.
Addressing Color Loss or Deeper Marks
Sometimes a scuff goes beyond texture and actually removes some dye from the tips of the suede fibers. The area looks lighter or faded. For this, you move from mechanical repair to color repair.
Specialty products like suede repair pencils or spray dyes are made for this. Their formulas are designed to deposit color without soaking and clogging the nap, which would create a hard, shiny spot. A colored cream or standard leather dye will ruin the suede’s handfeel.
Before you touch the visible spot, you must test. Find a hidden area, like an inside seam or the back of a cushion. Apply a tiny amount of the product and let it dry completely. This test tells you two critical things: if the color match is acceptable, and how the product will affect the suede’s texture. Only proceed if you are happy with the test result.
For application, less is more. With a pencil, use light, feathery strokes to build color slowly. With a spray, hold it far away and use short bursts. You can always add more color, but you cannot take it away. After applying, let it dry fully, then gently brush the area with your suede brush to blend the new color into the existing nap.
A deep cut or tear in suede is a serious challenge. The severed fibers cannot be glued back seamlessly like on smooth leather. While a professional might be able to patch it from behind and re-brush the surface, a DIY fix will almost always remain visible. In these cases, prevention through careful use is the best strategy.
Special Cases: Old Scratches, Cars, and Your Favorite Couch
Not every scratch is the same. A fresh mark on a new bag is different from a worn line on a favorite chair. Here is how to handle some common, specific situations.
Repairing a Scratch on Old or Dry Leather
Old, dry leather behaves differently. Think of it like dry, thirsty skin. It can be brittle. Trying to fill a scratch without first adding moisture can sometimes make the problem worse, especially if the leather has been dried too quickly. Slow, careful drying is crucial to maintain its integrity.
My wallet, Scout, is a perfect example. After three years of daily use, its veg-tan leather was tough and dry. A new scratch looked white and deep. I couldn’t just dab on a colored cream. I had to help the leather itself first.
For old leather, the repair process starts with hydration, not color.
- Clean the area gently with a pH-balanced leather cleaner. Old leather is fragile, so use a very soft cloth.
- Apply a generous amount of leather conditioner or balm. Massage it into the scratch and the surrounding area. Let it soak in for a full 24 hours. This softens the fibers and helps them relax.
- After a day, look at the scratch again. Often, the leather plumps up, and the scratch becomes much less noticeable. For deeper marks that remain, you can then use a flexible leather filler or colored cream, following the product’s instructions.
The common mistake is rushing. Giving the leather time to drink up conditioner is the most important step for a lasting fix.
Caring for Scratches on Leather Car Interiors
Your car seats face a harsh life: sun, heat, cold, and constant use. Most automotive leather has a protective topcoat or is even a leather-faced vinyl. This changes your approach when trying to prevent and protect leather car seats from cracking and drying out.
Because car leather is usually coated, you must use products designed for finished leather, not heavy oils or waxes meant for raw hides.
Heavy conditioners can make that shiny coating sticky or gummy. For a scratch on a car seat:
- Use a mild cleaner made for automotive interiors. Wipe the scratch and the area around it.
- Apply a light, non-greasy conditioner meant for finished leather. This maintains flexibility without damaging the surface.
- For color repair, use a liquid or cream leather dye made for automotive use. Color matching is critical here. Sun exposure fades car interiors, so the original color may have changed. Test any colorant in a hidden spot first, like under the seat.
The process is similar to furniture, but the products are different. Always choose the gentlest option for that factory finish.
When a Leather Scratch Repair Hack Isn’t Enough
DIY methods have limits. Knowing when to stop can save you from causing permanent damage. Here are clear signs it is time to call a professional:
- The damaged area is larger than your palm.
- The scratch is actually a deep tear or gouge that has cut through the leather.
- You are working on a high-value or antique piece where perfect color matching is necessary.
- The item has strong sentimental value, and a failed repair would be heartbreaking.
Many people ask if repairing leather furniture is worth the cost. Look at it this way: a quality sofa can last decades. A professional repair can often restore it for a fraction of the replacement cost. For an heirloom or a beloved piece you use every day, that investment makes sense. For a cheap, mass-produced item that is already falling apart, it might not.
If you search for “leather scratch repair near me,” look for specialists, not general upholsterers. A good professional will know how to repair damage from pet scratches and prevent future ones.
- Have a portfolio of before-and-after photos.
- Use high-quality, flexible pigments and fillers.
- Be willing to discuss their process and provide a clear estimate.
- Offer a color-matching service, often creating a custom blend for your specific piece.
There is no shame in calling for backup. My goal is to help you care for your leather in the best way possible, and sometimes that means handing the brush to a master painter.
Keeping Scratches at Bay: Simple Habits for Prevention
Every mark tells a story. I like that. The small scuff on my wallet, Scout, from a day at the beach. The soft grain on Mason the saddle from years of honest work. But not every mark needs to be part of the tale. A little proactive care goes a long way to keeping your leather looking its best for longer.
Shifting your mindset from just fixing problems to preventing them is the single most effective thing you can do for your leather.
For Leather Furniture and Car Interiors
Think of your sofa or car seat like your own skin. Dry, neglected skin cracks easily. Hydrated, cared-for skin is resilient. The same is true for leather over time.
Dust and grit are abrasive; removing them weekly with a soft, dry cloth or a horsehair brush prevents micro-scratches that dull the finish over time.
Follow dusting with conditioning every three to six months. A good, pH-balanced leather conditioner keeps the fibers supple. Supple leather is less likely to crack and more likely to let a minor scratch blend into the grain.
Two more quick habits make a huge difference:
- Keep pets’ nails trimmed. This is non-negotiable for leather furniture owners. A happy pawing motion can cause deep, irreversible gouges.
- Be mindful of sharp objects. Belt buckles, jean rivets, keys, and even rough jewelry can leave pressure marks and scratches. Get in the habit of not sitting on leather with these items in your back pockets.
For Leather Bags, Jackets, and Wallets
Your personal goods face different challenges. They move with you, get stuffed, and rest in all kinds of places.
Proper storage is your first line of defense. Never hang a heavy leather bag by its straps for long periods; this stresses and stretches the leather at the attachment points. Instead, place it on a shelf. For jackets like June, use a wide, padded hanger that supports the shoulders.
Store items in a cool, dry place away from direct sunlight, inside a breathable cotton dust bag. Avoid plastic, as it traps moisture.
Do not overstuff your bags. This is a common mistake. When you force a bag to carry more than its design allows, you stretch the leather permanently and put immense stress on the seams and zippers. The constant tension makes the surface more prone to scratches and creasing.
Give your items a rest. Leather needs to breathe and return to its natural shape. I rotate my daily carry between two bags. My jacket, June, gets worn often but has days off to air out. This rotation prevents concentrated stress and the deep, permanent creases that can start to crack.
Rotating your wear allows the leather’s natural oils to redistribute, maintaining an even handfeel and appearance across the entire piece.
Common Questions
Can I use a regular moisturizer as a leather scratch repair cream?
No. Only use pH-balanced leather conditioners or creams designed for hide care. Household products can damage the finish and attract dirt.
Are vinegar or olive oil hacks safe for fixing leather scratches?
Avoid these hacks. They can acidify or rancidify the leather, causing long-term damage.
When should I search for “leather scratch repair near me” instead of DIY?
Call a professional for large areas, deep tears, or on valuable pieces. A specialist ensures color matching and structural integrity that DIY kits often miss.
How do I repair a scratch on my car’s leather seats?
Use cleaners and conditioners made for automotive interiors. Avoid heavy oils, as they can gum up the protective coating on car leather.
What’s the single best habit to prevent scratches on my leather couch?
Dust weekly with a soft, dry cloth to remove abrasive grit. Combine this with conditioning every few months to keep the leather supple and resilient.
Caring for Your Leather and Suede
Always test your chosen cleaner or repair product on a hidden area first, as this step prevents costly mistakes and ensures the leather’s finish isn’t harmed. With a gentle hand and the right match for your leather type, even deep scratches can become part of the item’s honest, worn-in story.
Regular, thoughtful care respects the material’s origin and keeps cherished goods from being discarded too soon. I still pick up new tricks each time I condition my jacket June, and that continuous learning is what makes caring for leather so rewarding.
Related Guides and Information
- A Guide To Leather Scratch Repair | Light & Deep Scratches | Suede & Nubuck – MAHI Leather
- r/AskACobbler on Reddit: Fixing deep scuffs in suede shoes
- A Guide To Leather Scratch Repair
- Remove Scratches From Leather | Leather Honey Leather Care
Harriet is a avid collector of leather goods such as purses, bags, seat covers, etc and has an extensive background in leather care, recovery, stain removal and restoration. She has worked for a number of years perfecting her leather care techniques and knows the ins and outs of restoring all kinds and types of leather products. With her first hand knowledge in leather care, you can not go wrong listening to her advice.
Fixing Surface Scratches and Scuffs