How Do You Clean Leather Boots and Shoes to Keep Their Finish Looking Great?
Published on: January 21, 2026 | Last Updated: January 21, 2026
Written By: Harriet Nicholson
Hello Tannery Talk. You want to clean your leather footwear, but you’re nervous about damaging that rich color and texture. I understand that fear completely.
This guide will walk you through identifying your leather type, picking the right cleaning tools, a gentle step-by-step method, and how to condition after cleaning.
I share this from my own bench, after years of repairing and conditioning everything from daily work boots to my own jacket, June.
Why Your Cleaning Method Makes or Breaks the Finish
Think of your leather’s surface like a thin, protective varnish on a beautiful wooden table. This finish is what gives your boots their sheen and color. It’s also delicate.
Abrasive scrubbing with a rough cloth or a harsh cleaner acts like sandpaper on that varnish. It scratches the surface and strips away the natural oils that keep the leather supple. This leaves the material underneath dry and vulnerable.
When leather loses its oils, the finish turns dull and lifeless, and the leather itself becomes stiff and prone to cracking. I’ve seen boots where the owner used a stiff brush and strong soap every week, thinking they were being thorough. The result was a pale, rough surface that felt like cardboard.
Gentle, correct cleaning does the opposite. It lifts away dirt and grime without attacking the leather’s structure. This allows the natural character of the hide to shine through and age gracefully. Consistent, kind care builds a richer, deeper patina over the years.
My old English saddle, Mason, is a perfect example. I’ve never scrubbed it hard. A soft brush and a pH-balanced cleaner have kept it clean for eight years of riding. The deep chestnut color has only gotten warmer and more complex, with a soft glow that harsh cleaning would have destroyed.
What Goes in a Trustworthy Leather Cleaning Kit
You don’t need a cabinet full of specialty products. A simple, reliable kit has just a few key items. With these, you can handle most cleaning jobs on any leather boot or shoe.
- A soft-bristle brush (often called a horsehair brush)
- A stiffer brush for soles and heavy debris
- Several clean, lint-free microfiber cloths
- A bottle of pH-balanced leather cleaner
- A bottle of leather conditioner
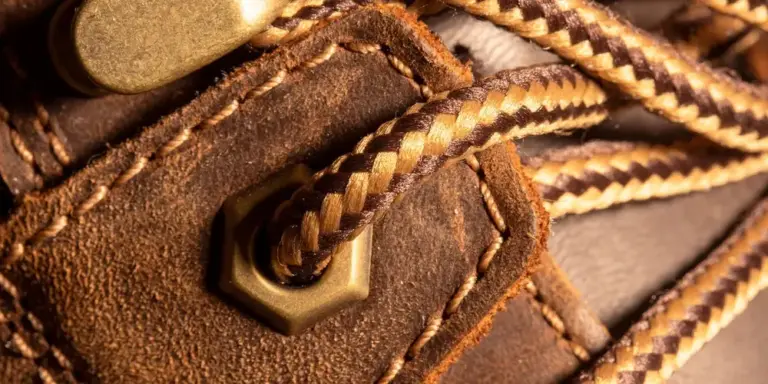
Choosing the right brush is your first line of defense. For the uppers-the main part of the boot-you want a soft-bristle leather boot cleaning brush. It should feel gentle on your palm. For caked-on mud on the sole and welt, a stiffer nylon brush works best without touching the delicate leather above.
You can assemble a great leather boot cleaning diy kit from items you may already have. An old, soft toothbrush can work for seams. A clean cotton t-shirt is a fine cloth in a pinch.
When selecting cleaners and conditioners, ignore marketing and read the label. Look for “pH-balanced for leather” or “neutral cleaner.” Avoid products with strong solvents, silicone, or petroleum high on the ingredient list. A simple, mild soap made for leather is what you want. Understanding the role of pH in leather cleaning explains why neutral cleaners are recommended. We’ll expand on this with a linked resource in the next steps.
Your Toolkit, Broken Down
Let’s look at what each item does.
- Soft Horsehair Brush: Use this for dry brushing before you clean. It removes loose dust and dirt from the surface. A few light flicks across the leather is all it takes. This prevents you from grinding grit into the finish during the wet clean.
- Stiff Sole Brush: This is for functional parts. Scrub the rubber or leather sole and the textured welt (the seam where the sole meets the upper) to remove dirt and salt. Keep this brush away from the smooth leather uppers.
- Microfiber Cloths: You’ll need two. Dampen one to apply cleaner and wipe away grime. Use a second, dry one to buff the leather to a light shine after conditioning. They are lint-free and non-abrasive.
If you prefer a ready-made set, a good local cobbler often sells basic leather boot cleaning kits. You can also find trustworthy kits online by searching for terms that focus on tools, like “horsehair brush and cleaner kit.”
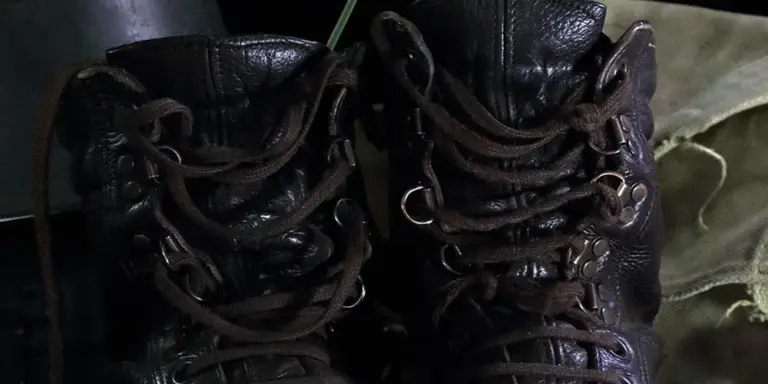
The First Move: How to Prep Any Boot or Shoe for Cleaning
Take the laces out and pull any removable insoles free. I do this with every pair, even my well worn boots. It gives your hands room to work and lets you reach the tongue and interior seams where dirt loves to hide. On my jacket June, skipping this meant ground in grime stiffened the leather under the arms.
Now, grab a soft bristle brush. A horsehair brush or any brush with gentle, flexible bristles is perfect. Brush the entire boot firmly and thoroughly, like you’re dusting a fine wood table. Sweep off all the loose dirt, dried mud, and sidewalk grit. This dry brushing step is non negotiable because grit left on the surface will scratch and dull the leather’s finish during wet cleaning. I learned this with Mason the saddle; a minute of brushing saves hours of polishing later.
For dust that clings, use a clean cotton cloth. Dampen it with cool water and then wring it out until it feels just barely damp to the touch. Wipe the leather in one smooth direction to lift the dust away. A cloth that is only damp cleans the surface without forcing water into the leather, which can cause stains or warping. If you see a dark, wet spot, your cloth is too wet. Let the boot air dry completely before moving on.
How to Clean Smooth Leather Boots and Shoes, Step by Step
Cleaning your boots or shoes is not just about wiping off dirt. It’s a four part process: clean, rinse, dry, and condition. Skipping any step can leave your leather looking dull or feeling stiff. Properly cleaning and conditioning leather is essential for maintaining their durability and appearance.
For a smooth, full grain leather like on my old work boots or June’s calfskin jacket, this universal method works. You need a gentle leather cleaner, two soft cloths (microfiber is perfect), a soft bristle brush, and a good conditioner.
This sequence cleans the surface without stripping away the leather’s natural oils, preparing it to absorb a fresh dose of nourishment.
Step 1: Apply Cleaner with Care
Start with a dry, soft brush to flick away loose dirt and grit. This prevents you from grinding particles into the leather later. Dampen one of your cloths with cool water and wring it out completely. It should be barely damp, not wet.
Apply a small, coin sized amount of a neutral, color safe leather cleaner to the cloth. For anyone wondering how do you clean brown leather boots without fading, a color fast cleaner is the safe choice.
Work the cleaner onto the leather in gentle, overlapping circles. Think of it like washing your face, not scrubbing a floor. Apply light pressure and let the cleaner lift the grime. If you encounter a stubborn salt stain or mud spot, let the cleaner sit on it for a minute before gently working it again.
Never soak the leather or run it under a tap, as waterlogging can weaken the fibers and separate the finish from the hide.
Step 2: Rinse, Dry, and Check Your Work
Cleaning leaves a residue. Take your second clean cloth, dampen and wring it out just like before. Wipe down the entire leather surface to rinse away all the cleaner and dissolved dirt. Rinse your cloth often in clean water.
Now, pat the leather dry with a soft, absorbent towel. Do not rub. Let the boots air dry naturally, away from radiators, direct sun, or hair dryers. Heat can bake the leather and cause it to crack. This is particularly important when learning how to dry leather properly.
To help smooth leather shoes hold their shape as they dry, stuff the toes with crumpled clean paper or a shoe tree. Check the leather with your hand. It should feel cool and slightly supple, not bone dry or stiff. If it feels dry, it’s ready for the most important step.
Step 3: Conditioning is Non-Negotiable
Conditioning is not optional. Cleaning, especially with any water, removes oils. Conditioner puts them back. It’s like putting lotion on dry skin after washing your hands.
Choose a pH balanced leather conditioner or cream. Apply a modest amount to a fresh, dry cloth. Massage it into the leather using the same gentle circular motions, making sure to cover every part. Pay extra attention to high flex areas like the toe creases and ankle.
Let the conditioner absorb for at least 15 minutes. You will see the leather drink it in, turning slightly darker. This is normal. After it soaks in, take a clean part of your cloth and buff the surface. Use firm, fast strokes to create a soft, healthy sheen.
This buffing action not only polishes but also helps seal the conditioner, creating a protective layer that guards the finish against daily wear and weather. Let your boots rest for a few hours before wearing them again.
Special Rules for Suede, Nubuck, and Patent Leather
Cleaning smooth leather is one thing. These three materials ask for a completely different touch. Using the wrong method here can permanently change the texture or cloud the shine. Think of it like this: cleaning your smooth leather jacket, June, involves soaps and conditioners. Cleaning these is more about precision dry-cleaning or gentle polishing.
Caring for Suede and Nubuck Boots
Forget everything you know about liquid cleaners for a moment. Suede and nubuck have a raised, fuzzy surface called a nap. Getting it wet can darken it permanently and mat the fibers flat.
Your only tools for routine care should be a dedicated suede brush and a suede eraser block. Keep them in your shoe care kit, separate from your other brushes.
Here is how to handle a scuff or stain:
- Let the boot dry completely if it’s wet from rain.
- For light dirt, brush the entire boot firmly with the suede brush. Always brush in one direction, following the natural grain of the nap. You will see the color and texture lift.
- For a stubborn mark, use the eraser block. Rub it back and forth over the spot like you’re erasing pencil from paper. It will crumble away, lifting the dirt with it.
- Finish by brushing the area again with the suede brush to restore the uniform, velvety texture.
This process revives the material without risking a water stain. If you face a serious spill, your best move is to take the boots to a professional cleaner who specializes in these delicate leathers, especially when it comes to removing water stains from suede.
Caring for Patent Leather Shoes
How do I clean patent leather shoes? Very, very gently. That high-gloss finish is a thin plastic coating applied over the leather. Scrubbing too hard or using the wrong product can scratch it or cause it to peel.
Start with just a soft, damp microfiber cloth. Often, a simple wipe-down is all you need. For stickier grime, use a drop of mild dish soap in a bowl of water. Dampen (do not soak) a corner of the cloth in the soapy water, wring it out thoroughly, and wipe the surface.
Immediately follow with a clean, damp cloth to remove any soap residue. Dry it right away with a third soft, dry cloth. Letting water sit at the seams can cause it to seep under the coating.
That shine needs protection too. Once or twice a year, use a conditioner made specifically for patent leather. These are usually water-based and non-oily. A thin coat will keep the underlying leather supple and prevent the plastic coating from drying out, which leads to the fine cracking known as crazing.
Fixing Common Problems Without Hurting the Finish
You love your boots, but life happens. Dirt gathers on zippers, rain soaks the leather, and stains appear from nowhere. I handle these issues every week in my workshop. The key is to act gently, preserving that hard-earned patina on your boots, just like the rich chestnut glow on my old saddle, Mason.
A frequent question I get is how to clean dirty zippers on boots and shoes. Grime in the teeth can stiffen the pull and scratch adjacent leather. Here is a safe method.
- Use a soft-bristled brush, like a clean toothbrush, to dry-brush loose dirt from the zipper teeth and fabric tape.
- Dampen a cloth with a mix of cool water and a drop of pH-balanced leather cleaner. Wring it out well.
- Gently wipe the zipper pull, teeth, and the surrounding leather. Avoid soaking the area.
- Use the dry brush again to work any remaining grit from the teeth. Let it air dry completely before using the zipper again.
Forcing a dirty zipper can damage the mechanism and tear the leather, so a two-minute clean saves a costly repair. Water exposure is another common worry, which leads us to our next step.
When Boots Get Wet or Develop Odors
Getting caught in the rain is inevitable. The wrong response can stiffen and crack the leather. Never, ever use direct heat from a radiator or hair dryer. Heat cooks the leather fibers, making them brittle.
Follow this slow-dry process instead. It works for my calfskin jacket, June, after a downpour.
- Wipe the entire boot with a dry, absorbent cloth to remove surface water.
- Stuff the boot firmly with crumpled newspaper or paper towels. Replace the stuffing every few hours as it becomes damp.
- Let the boots dry at room temperature, away from sunlight and heat sources. This can take 24 to 48 hours.
- Once completely dry, condition the leather to replenish lost oils.
Patience here is what separates a cared-for boot from a ruined one. For persistent smells from linings, skip harsh chemical sprays. Use a natural deodorizer. Sprinkle baking soda inside the boots, let it sit overnight, and vacuum it out in the morning. This absorbs odors without harming the leather or your skin.
Handling Stubborn Stains and Scuffs
Some marks tell a story, but others, like salt rings or caked mud, just need to go. Your approach should be as targeted as the stain itself.
For winter salt stains, mix one part white vinegar with two parts cool water. Dampen a cloth with the solution and gently dab the stain. Follow immediately with a clean, damp cloth to rinse the area, then dry and condition. The mild acid in vinegar breaks down salt crystals without the harshness of a strong cleaner. For dried mud, let it fully dry, then brush it off with a soft brush before any cleaning.
A standard, neutral leather cleaner is perfect for general grime and light scuffs. It lifts dirt without stripping oils. You need a specialized cleaner for stubborn issues like oil, grease, or deep dye transfers. If a spot remains after two gentle passes with your standard cleaner, it’s time for a specialized product. Think of it like this: a standard cleaner is your daily shower, while a specialized cleaner is a focused treatment for a specific skin issue. For everyday leather items, consider safe methods to clean and disinfect without harming the finish. This helps maintain hygiene while preserving the leather’s appearance.
Always test any cleaner on a small, hidden area first, like the inside of a tongue. That scuff on your trusty wallet, Scout, might add character, but a harsh chemical stain does not.
How to Shield Your Boots After a Good Clean
A thorough clean sets the stage. Applying a protective product is what seals the deal. Think of it as the lock on the door after you’ve tidied the house. This final layer seals in the conditioner and creates a barrier against whatever comes next, from rain puddles to dusty trails.
Leaving your boots unprotected after cleaning leaves them vulnerable, undoing all your good work at the first sign of weather or wear.
Choosing Your Shield: Wax, Cream, or Spray?
Your choice here depends on what you need from your boots. Is it a high shine for the office or a waterproof barrier for the woods? Each option has a specialty.
For a rich, classic shine and good water resistance, a paste wax or polishing cream is your best bet. It’s what I use on my dressier footwear and for maintaining the sharp edges on Mason, my saddle. You apply it in thin layers with a cloth, let it haze, and then buff it to a glow. This builds a physical, protective shell.
Paste waxes and creams are workhorses that build a durable, shining barrier perfect for smooth-finished leathers you want to polish.
For ultimate, no-fuss water and stain repellency, a dedicated protector spray is the simplest choice. These are fantastic for suede, nubuck, or any rugged boot you don’t intend to polish. One light, even spray coat does the job. It’s invisible protection.
A silicone or fluorocarbon-based spray creates an invisible shield that makes water bead up and roll right off, ideal for rough-out or suede boots.
Here’s a quick guide to help you decide:
| Boot Type / Goal | Recommended Protector | Key Benefit |
| Dress Boots, High-Shine | Paste Wax or Polish | Builds a gleaming, water-resistant finish |
| Work Boots, Hikers | Protector Spray | Easy, full-coverage water and stain guard |
| Suede or Nubuck | Repels stains without altering the texture | |
| All-Round Daily Use | Beeswax-Based Conditioner | Conditions and adds mild protection in one step |
My Routine: Keeping Scout Crisp
I treat my boots the same way I treat Scout, my daily carry wallet. After I clean and condition it, I always give it a light buff with a pure beeswax-based balm. I don’t need a heavy shine on it, but that thin layer of wax protects the veg-tan leather from pocket moisture, coins, and general grime. It’s why after three years of use, its color is still rich and its edges are sharp, not frayed.
A tiny amount of wax applied regularly does more to preserve a finish than one heavy application every few years. The same logic applies directly to your boots. Consistent, light protection is the secret to long-term preservation.
Application: A Simple Two-Step Process
- Ensure your boots are clean and fully dry from any prior conditioning. Any dampness will trap moisture under the protector.
- Apply your chosen product sparingly. For wax, use a soft cloth in small circles. For spray, hold the can 6 inches away and use a steady, side-to-side motion. One thin, even coat is always better than a thick, gloopy one.
Let the product dry completely according to the label instructions before you wear the boots. This usually takes a few hours. Rushing this step can lead to a tacky finish or uneven protection.
Easy Habits to Keep Your Leather Looking Its Best
Think of boot care like brushing your teeth. A quick, consistent routine prevents big, painful problems later. The goal isn’t perfection, but longevity.
The Two-Minute Daily Ritual
When you take your boots off, this is your moment. A simple wipe-down is the most powerful thing you can do.
- Use a dry, soft cloth (an old cotton t-shirt is perfect) to wipe away surface dust and dirt.
- For soles and welts, a quick brush with a stiff-bristled shoe brush knocks off grit that can grind into the leather.
- If they’re damp, stuff them with newspaper or a boot shaper. Never put wet leather near a direct heat source like a radiator.
This tiny habit stops abrasive particles from becoming embedded, which is the main cause of premature finish wear and scratches. My saddle, Mason, gets this treatment every single ride. It shows.
Make Friends with Shoe Trees and Proper Storage
Leather has memory. When it dries creased and folded, those creases become permanent cracks. Shoe trees are not a luxury; they are a first-aid kit.
- Insert cedar shoe trees after every few wears. They absorb moisture and hold the shoe’s shape.
- Store boots in a cool, dry place with some air circulation. A dark closet is better than a sun-baked floor.
- For long-term storage, give them a light conditioning, use trees, and place them in a breathable cotton bag.
Inspect and Treat Early, Like a Scuff on June
Once a week, hold each boot under good light. Look for:
- Small scuffs or scratches (like the one on June’s sleeve from a bike rack).
- Dried-out spots where the leather looks thirsty and pale.
- Dirt buildup in the creases.
Catching a scuff early means a simple rub with a matching colored cream, not a full strip-and-redye job later. For a dry spot, a tiny dab of conditioner worked in with your fingertip is all it needs. Addressing these minor issues as they happen keeps major restoration work at bay for years.
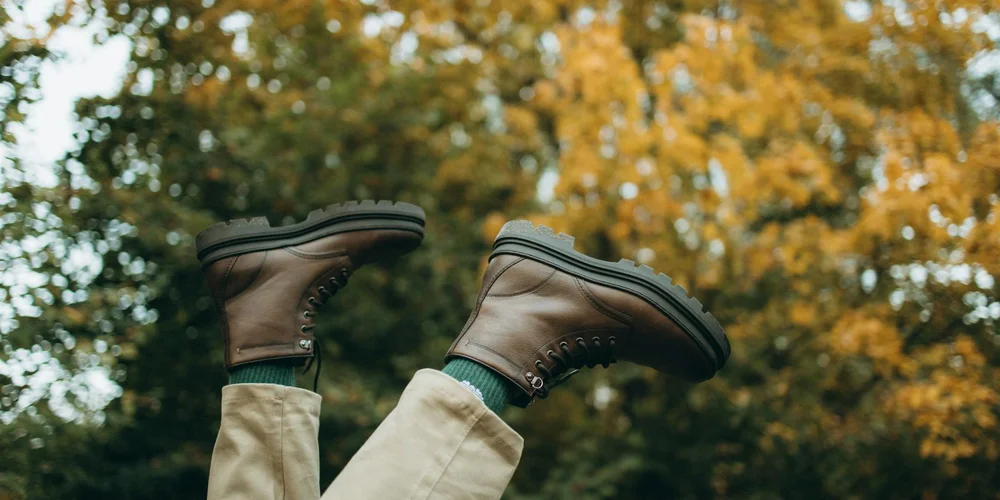
Rotate and Use Footwear for Its Purpose
Leather needs to rest and dry out completely between wears. Wearing the same pair day after day breaks down the fibers faster.
I rotate between three pairs. It feels excessive until you realize each pair will last three times longer. Also, match the boot to the task. Don’t wear your polished dress boots on a muddy hike. The finish isn’t designed for that punishment, and you’ll strip it right off. Using gear for its intended purpose is the ultimate form of care.
This habit of rotation is the secret to avoiding premature breakdown; it gives the materials time to recover their strength. Your boots, like my wallet Scout, become dependable through thoughtful use, not constant strain.
Common Questions
Does the quality of the leather boot cleaning brush really matter?
Absolutely. A cheap, stiff brush will microscratch the finish. Invest in a soft horsehair brush; it’s your first line of defense and will last decades.
What should I look for in a leather boot cleaning kit on Amazon?
Ignore flashy branding. Look for a kit containing the core four: a horsehair brush, a stiff sole brush, a pH-neutral cleaner, and a simple conditioner. That’s all you need.
Is a branded leather boot cleaning kit necessary, or can I assemble my own?
A DIY kit is often superior. Source a quality brush separately, use a clean microfiber cloth, and choose a dedicated leather cleaner and conditioner. You control the quality of every component.
I’m searching for a “leather boot cleaning kit near me.” Where should I go first?
Skip big-box stores. Your local cobbler or a high-quality shoe store will often sell excellent individual tools or basic kits, and you get expert advice thrown in.
Leather Care as a Craft
Keep your boots clean and conditioned. This simple habit is the single best thing you can do for them, turning a reactive chore into a preventative ritual that builds character over time.
This routine care is also a form of respect for the material and the craft, extending the life of your goods and reducing waste. Building your skill with each clean and condition means you’re better prepared to handle the small repairs that keep cherished pieces in service for years.
Industry References
- How to Clean Leather Boots the Right Way: A Step-By-Step Guide
- r/Leather on Reddit: Leather Boots- how do I clean and maintain?
- Caring For Your Leather Boots – Thursday Boot Company
Harriet is a avid collector of leather goods such as purses, bags, seat covers, etc and has an extensive background in leather care, recovery, stain removal and restoration. She has worked for a number of years perfecting her leather care techniques and knows the ins and outs of restoring all kinds and types of leather products. With her first hand knowledge in leather care, you can not go wrong listening to her advice.
Boot and Shoe Care