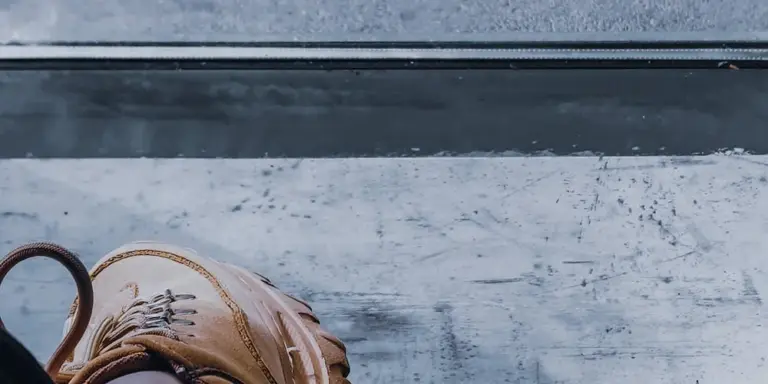
Can You Put Suede Shoes in the Washing Machine? The Expert Guide.
Published on: January 15, 2026 | Last Updated: January 15, 2026
Written By: Harriet Nicholson
Hello Tannery Talk. I hear that question a lot, usually right after a muddy walk or an unfortunate coffee spill. Your heart sinks looking at dirty suede, and the washing machine seems like a quick fix. Let’s talk about that.
This guide will walk you through what really happens to suede in a washer, the safe step-by-step cleaning method I use, and how to protect your suede shoes, boots, trainers, and Vans for the long run.
I give this advice after years of restoring suede bags and jackets that faced similar accidents, learning what this unique material can and cannot handle.
The Straight Answer on Machine Washing Suede
Can you put suede in the washing machine? I need to give you a gentle, but very firm, no. Please don’t. I’ve seen the hopeful posts online and the regretful “after” photos. Putting suede through a wash cycle is one of the fastest ways to permanently change, and often ruin, a good pair of shoes or boots.
Think of suede like your favorite, delicate wool sweater. You wouldn’t throw that in a hot, agitated machine wash, right? You’d hand-wash it carefully to preserve its softness and shape. Suede demands the same thoughtful approach. Its beauty comes from that raised, velvety nap, which is incredibly vulnerable to harsh treatment.
What about faux suede? Can you put faux suede in the washing machine? The material itself, being synthetic, might survive the water. But the construction of the shoe almost never will. The glues holding the sole and lining together are not designed to withstand that kind of soaking and spinning. You risk the entire shoe coming apart at the seams. It’s a very high-risk, low-reward gamble.
Why Your Washing Machine is Suede’s Worst Enemy
A washing machine attacks suede on four main fronts. Understanding this helps explain the devastation.
- Shrinkage: Leather is skin. Hot water and heat make it contract, often unevenly. Your shoes can become painfully tight or warp into a strange shape.
- Stiffening: The natural oils that keep leather supple are stripped away. The suede dries out, becoming stiff, brittle, and prone to cracking.
- Color Loss & Bleeding: Dyes are not permanently locked into the fibers. Agitation in water causes them to run, leading to faded, blotchy color and stained linings.
- Glued Sole Failure: This is the most common catastrophic failure. Water-soluble adhesives soften and let go. You pull out a clean upper, but the sole is half-detached.
The sensory result is heartbreaking. That soft, plush nap you love gets matted down into a flat, hard crust. It loses its depth and character. It feels dead to the touch, like a wet carpet that has dried all wrong. The shoe might be technically “clean,” but it’s lost its soul.
If you search for “washing suede shoes in the washing machine reddit,” you’ll find those horror stories. They happen because the machine’s force is relentless. It’s not just water; it’s the pounding spin cycle that hammers the delicate fibers, the heat that cooks the leather, and the detergent that strips it bare. What seems like a convenient shortcut almost always ends as a lesson learned the hard way.
How to Clean Real Suede Shoes and Boots by Hand
Forget the washing machine. Giving your suede shoes a careful, manual clean is the reliable way to restore them. Think of it like grooming June, my leather jacket; you use the right tools and a gentle touch for the best results.
First, gather what you need. A proper clean starts with the right gear.
- A soft-bristled suede brush or a dry, clean toothbrush.
- A suede eraser (a dry, rubbery block).
- A few clean, dry, white cloths or microfiber towels.
- A good suede-specific cleaner for any tough spots.
Now, follow this simple sequence. It works on everything from trainers to boots.
- Dry Brush First. Before you put anything wet on the shoe, brush the entire surface firmly with your dry brush. Brush in one direction to lift the nap and loosen surface dirt. You’ll often see a cloud of dust come off. This step alone can make a huge difference.
- Spot Clean Stains. For mud or oil spots, let them dry completely. Then, gently rub the stain with your suede eraser. For persistent marks, apply a tiny amount of suede cleaner to a cloth and dab (don’t rub) the area. Let it dry.
- Brush Again. Once the shoe is completely dry, give it a final, vigorous brushing with your dry brush. This re-raises the soft, velvety texture of the suede and blends any cleaned spots.
This three-step process is your foundation for keeping suede looking fresh without the risks of a machine.
Using a Specialist Suede Cleaner
Specialist cleaners are formulated for suede’s delicate, porous surface. They clean without drenching the leather, which is key. Saturated suede can stiffen, discolor, or lose its shape.
These cleaners typically foam up. You apply the foam with the included applicator or a cloth, working it into the stain in a circular motion. The foam lifts the dirt, and as it dries, you brush the residue away. It’s a controlled clean.
Always test any cleaner on a hidden area first, like the inside of the tongue or behind the heel tab. Wait for it to dry fully to check for any color change. This simple test saves heartache. I learned this early on with a pair of nubuck boots; a quick test showed the cleaner was too harsh, so I switched products.
The Truth About Home Remedies: Vinegar & Baking Soda
I get asked about washing suede shoes with vinegar or baking soda all the time. My advice is to skip them. While they might work on other materials, they’re not friends to suede. You can clean suede on sneakers and shoes without damaging the material using other methods.
Vinegar is acidic. That acidity can strip the natural oils from the leather and may alter the dye, leading to permanent discoloration or a brittle feel. It’s too unpredictable.
Baking soda is a mild abrasive that’s nearly impossible to fully remove from suede’s fuzzy nap. You’ll brush and brush, but a fine, chalky residue can get lodged deep in the fibers, leaving a dull, whitish film behind.
For the long-term health of your suede, products designed specifically for the material are the only reliable choice. They balance cleaning power with safety for the leather’s finish. It’s the same principle I use on Scout, my wallet; I wouldn’t clean it with dish soap, I use a leather-specific product. Your suede deserves the same consideration—especially when you know the risks of using household items like vinegar, alcohol, or soap on leather.
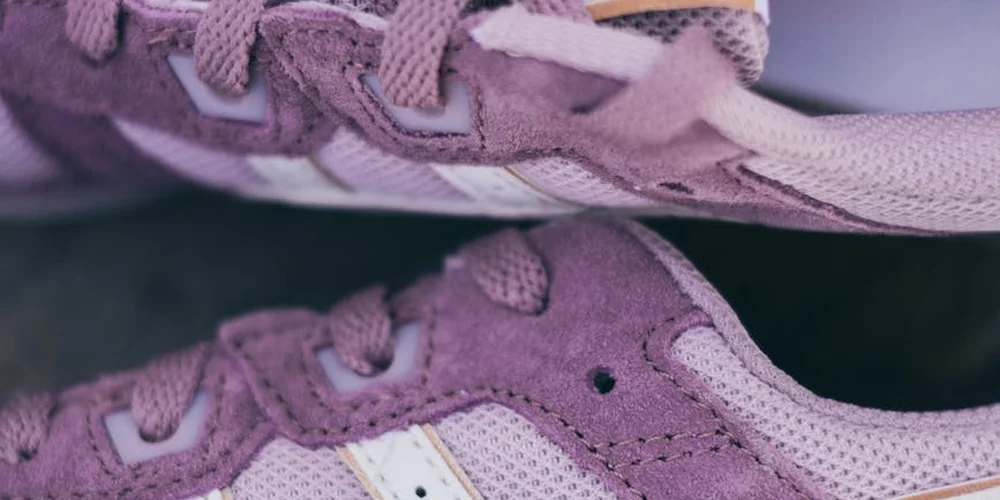
Cleaning Suede Trainers, Vans, and Sneakers
Suede sneakers are a hybrid challenge. You have the delicate nap of suede attached to fabric linings, foam cushioning, and durable rubber soles. This mix of materials is what makes them so comfortable, and also so vulnerable to a washing machine.
Can You Put Suede Sneakers in the Washing Machine?
You should not. The risk is even higher here than with a full-leather boot. Think of my old saddle, Mason. It’s one tough, consistent material. Your sneaker is not.
The machine’s spin cycle forces water deep into the fabric lining and foam. It rarely dries completely, leading to mildew and a permanent, unpleasant smell inside the shoe. The agitation can also separate the glue holding the sole to the upper, a death sentence for the shoe’s structure.
The washing machine is a gamble that almost always damages the shoe’s comfort, smell, and integrity.
A Safe, Hand-Cleaning Method for Suede Panels
Your goal is to treat only the dirty suede, not the whole shoe. This method requires patience, but it preserves your sneakers for years. Next, we’ll look at the best methods and products for cleaning suede shoes and boots.
What You’ll Need
- A soft-bristled suede brush (often brass or nylon)
- A clean, dry microfiber cloth
- A suede-specific cleaner (look for a neutral, water-based foam or spray)
- A small bowl of cool, clean water
- A sturdy shoe tree or crumpled newspaper
The Step-by-Step Process
-
Dry Prep. First, remove the laces. Brush the entire suede area firmly with your dry suede brush to lift the nap and dislodge surface dirt. This alone can make a world of difference, like brushing dust off a photo frame — but remember, for tricky spots like water stains, it’s important to clean them carefully.
-
Spot Test. Apply a tiny dot of your suede cleaner to a hidden area, like inside the heel collar. Wait for it to dry completely to check for any discoloration.
-
Clean the Panel. Dampen your microfiber cloth with cool water and wring it out until it’s just barely damp. Apply a small amount of suede cleaner to the cloth-not directly to the shoe. Gently rub the soiled suede panel in a circular motion. Work on one small area at a time.
Focus your cleaning effort only on the stained suede, avoiding the stitch lines where suede meets other materials as much as possible.
-
Rinse and Dab. Dampen a clean section of your cloth with plain water. Gently go over the area you just cleaned to rinse off any cleaner residue. Then, use a dry part of the cloth to blot the area and absorb excess moisture.
-
Dry Slowly. Stuff the shoe firmly with shoe trees or newspaper to help it hold its shape. Let them dry at room temperature, away from direct heat or sunlight. This can take a full 24 hours. Do not speed it up with a hairdryer.
-
Final Brush. Once completely dry, go over the cleaned suede with your brush again. Brush in one direction to restore a uniform, velvety nap.
Common Mistake & Simple Fix
A common error is using too much cleaner or saturating the suede. This causes a water stain or a stiff, dark patch when it dries. If this happens, don’t panic. Let the shoe dry fully. Then, use your suede brush and gently but persistently brush the affected area for several minutes. Often, you can brush the stain out and lift the compressed nap back to life.
Fixing Stains on Suede Without Water Damage
Acting fast is the most important rule in suede care. The longer a stain sits, the deeper it bonds with the delicate nap. A quick, gentle response today is far better than a harsh, desperate clean next week.
Here is how to handle the most common offenders.
Grease and Oil Stains
The principle is simple: you must absorb the oil before you try to clean anything else. Rubbing will only grind it in and spread the stain.
First, gently scrape off any excess food or substance with the dull edge of a butter knife. Then, cover the spot with a generous layer of cornstarch or talcum powder. This powder acts like a sponge, pulling the oil up and out of the fibers.
Let the powder sit for at least several hours, or ideally overnight, so it can fully absorb the grease.
After waiting, vigorously brush the powder away with a suede brush. For a persistent mark, you can apply a specialized suede stain eraser, working in small circular motions followed by vigorous brushing to restore the nap. Different stains need different approaches, so you can tailor methods for oil, ink, or water marks on suede. The next steps will outline stain-specific tips for removing these from suede material.
Ink Stains
For ink, your goal is to lift it without letting it bleed. Immediately blot-never wipe-the fresh stain with a clean, dry cloth to pull up as much liquid as possible.
Next, apply a tiny drop of a dedicated suede cleaner or a very mild, clear dish soap diluted with water onto a clean white cloth. Dab gently at the stain, working from the outside edge toward the center to prevent spreading.
Blot constantly with a dry part of your cloth to lift the ink and cleaner mixture before it can soak in deeply.
Let the area air dry completely away from direct heat. Once dry, brush the nap gently to fluff it back up. This method works for pen marks on a bag like Scout, too.
Salt Stains (from winter roads)
Salt is corrosive and can leave a white, crusty ring. First, let the shoe dry completely. Once dry, use a dry suede brush or a soft toothbrush to scrub away as much of the white residue as you can. If you are dealing with leather boots instead of suede, use a different method specifically designed for leather.
For remaining marks, make a solution of one part white vinegar to one part water. Dampen a cloth with the solution and dab very lightly at the stain. The mild acidity helps neutralize the salt.
Use a second cloth dampened with only clean water to dab the area and rinse. Stuff the shoe with paper towels to hold its shape and let it dry at room temperature. Finally, give the suede a good brushing.
Water Marks and Rings
Uniform wetting is better than a splotch. If you get a water spot, the worst thing you can do is try to spot-clean it with more water. Instead, let the entire shoe dry naturally.
Once fully dry, use a suede eraser over the entire affected panel, not just the ring. This evens out the nap. Follow with a thorough brushing in one direction.
For a stubborn ring, lightly steam the area by holding the shoe over a boiling kettle (not too close) and then brush the nap while it’s warm and damp.
This technique uses moisture and heat to relax the fibers, allowing you to brush them back into a uniform direction, much like reviving the collar on a jacket like June.
Drying Suede Correctly to Avoid Ruin

This is where patience is everything. You have cleaned the spot or the whole shoe. Now, the biggest mistake you can make is to rush the drying.
Heat is the enemy of suede. Direct heat makes the fibers brittle. It can bake in stains and cause the material to shrink or crack.
The Wrong Way to Dry Suede
Never use these methods. They are a shortcut to ruined shoes.
- Placing them on or near a radiator or heating vent.
- Putting them in direct sunlight for a long time.
- Using a hairdryer, even on a cool setting (the air is often still too warm).
- Tossing them in a clothes dryer. This is the worst idea.
These methods force dry the suede, stripping its natural oils and permanently damaging its soft, fuzzy texture.
The Right Way: Air, Paper, and Patience
The correct method is gentle and slow. Gather some white, unprinted paper-newspaper is perfect. Crumple it up.
- Take your damp suede shoes or boots.
- Gently stuff the toes and the ankle areas firmly with the crumpled paper. You want to fill the shape.
- This paper will wick moisture away from the inside and help the shoe keep its form as it dries.
- Place the shoes in a well-ventilated room at normal room temperature. A breezy spot, but not in a direct draft or sunbeam, is ideal.
- Now, walk away. Let them sit for a full 24 hours. For boots or heavily saturated areas, give them 36 to 48 hours.
The “Feel” Test for True Dryness
How do you know they are ready? Time is your first clue, but feel is your final test.
After a full day, remove the paper stuffing. Press your fingers against the suede, especially in the previously wet areas.
If it feels cool to the touch, it is still damp inside. Stuff it with fresh, dry paper and wait another 12 hours.
True dryness feels room temperature, and the nap of the suede will feel uniformly soft, not stiff or crusty in any spot.
Only when it passes this test is it safe to move to the final step: brushing. I learned this with June, my leather jacket. Rushing the dry after a rain spot left a stiff patch. Waiting the full time after another cleaning let the nap bounce right back.
Why Machine Washing Fails This Test
This careful, controlled drying is impossible with a washing machine. The spin cycle violently forces water out, stressing the fibers. Then, people often make the second error of using a dryer or direct heat to finish the job.
The machine process offers no gentle wicking with paper, no monitoring by feel. It is a recipe for stiff, misshapen, and damaged suede. Your shoes deserve the slow, safe care that preserves them for years, just like the steady care that keeps Mason’s saddle supple or Scout’s wallet fitting perfectly in a pocket.
Simple Habits to Keep Suede Protected
The best way to care for suede is to stop problems before they start. This is about building a simple, gentle routine. Think of it as giving your suede a fighting chance against the world, so you don’t face a crisis clean later.
Your First Defense: A Protector Spray
A quality suede protector spray is not a magic shield, but it is your most important tool. It creates a water and stain-resistant barrier that gives you precious seconds to blot a spill before it soaks in.
Applying it correctly is simple, and it’s a step I never skip on a new pair, just like I did for my old suede boots that have seen many rainy days. Here is how to do it right.
- Start with completely clean, dry suede. Any dirt sealed under the protector will stay there forever.
- Take the shoes outside or to a very well-ventilated area. Shake the can well for a full minute.
- Hold the can about 6 inches away and apply a light, even mist over the entire surface. Do not soak it. A common mistake is spraying too close, which can leave dark spots.
- Let the shoes dry for 10-15 minutes, then apply a second light coat for full coverage.
- Let them dry completely, away from direct heat, for at least 24 hours before wearing. The protection is now active.
Reapply this spray every few months, or more often if you wear the shoes frequently in wet conditions. It wears off gradually.
Brushing is Breathing Life Back Into the Nap
Suede’s soft feel comes from its raised nap. Dirt, dust, and scuffs mat that nap down, making stains set in and colors look dull. A dedicated suede brush is designed to lift and reset those tiny fibers.
Make a habit of giving your suede a light, one-minute brush after every few wears, like you’d wipe down a counter. This prevents grime from building up. For a deeper clean on scuffed areas, use a slightly firmer brushing motion. Always brush in one direction to train the nap to lay evenly.
If a brush alone isn’t reviving a flattened spot, a suede eraser can work wonders. Rub it gently over the mark, then brush away the eraser crumbs. It’s a simple fix that feels like a small miracle.
Suede Grows More Characterful, Not Worn Out
With this gentle care, something wonderful happens. Suede does not stay pristine, nor should it. Like the soft creases in my jacket June, it develops a personal history. The color may soften slightly in high-wear areas. The nap will show the paths of your movement.
This is not damage; it is a record of your adventures, made possible because you protected the material itself. A cared-for suede shoe becomes uniquely, undeniably yours, growing more comfortable and characterful with every careful step.
Common Questions
I’ve seen tips about washing suede shoes with vinegar or baking soda. Do they work?
No, they are more likely to cause harm. Vinegar can strip oils and alter dyes, while baking soda leaves a chalky residue trapped in the nap that you cannot fully remove.
If I absolutely must, can I machine wash faux suede shoes?
I strongly advise against it. While the synthetic material may survive, the water and agitation will almost certainly compromise the adhesives holding the shoe together, leading to sole separation.
My suede shoes got soaked in the rain. How should I dry them?
Immediately stuff them with crumpled paper to absorb moisture and hold their shape. Let them air-dry at room temperature for at least 24 hours, away from any direct heat source like a radiator or hair dryer.
The Final Word on Machine-Washing Suede
The most reliable advice is always the simplest. Reserve the washing machine for extreme cases and make hand-cleaning with a brush and proper suede eraser your consistent, gentle habit. This approach preserves the delicate nap and color of your suede far better than any spin cycle ever could.
Responsible leather care is a sustainable practice, extending the life of your goods and honoring the material. Building your skills in gentle maintenance and minor repairs, like refreshing the nap or stitching a loose sole, is the most direct way to reduce waste and cherish what you own.
Expert Resources and Citations
- r/CleaningTips on Reddit: Can I put shoes with a Suede top into the washing machine?
- How to Clean Suede Shoes. Nike.com
- How to clean suede shoes effectively?
- How to Clean Suede | Whirlpool
Harriet is a avid collector of leather goods such as purses, bags, seat covers, etc and has an extensive background in leather care, recovery, stain removal and restoration. She has worked for a number of years perfecting her leather care techniques and knows the ins and outs of restoring all kinds and types of leather products. With her first hand knowledge in leather care, you can not go wrong listening to her advice.
Suede and Nubuck Care