How to Clean, Maintain, and Repair Your Car’s Leather Seats
Published on: January 14, 2026 | Last Updated: January 14, 2026
Written By: Harriet Nicholson
Hello Tannery Talk. That worry over a new stain or crack in your car’s leather? I understand it, and you can fix it.
This guide walks you through selecting the right products for genuine and faux leather, establishing an easy maintenance habit, and handling common repairs yourself.
I’ve spent years restoring leather, learning what works through hands-on care for pieces like my trusted saddle Mason and everyday jacket June.
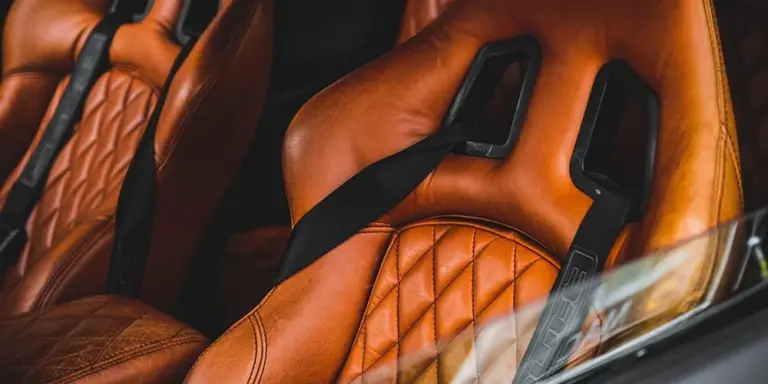
First, Know Your Leather: Genuine vs. Faux Automotive Interiors
Think of your car seats as long distance travelers. They face sun, spills, and constant use. Caring for them starts with knowing what they are made of. Genuine leather is a living, breathing material. It is porous and needs oils to stay supple. Faux leather, often called vinyl or leatherette, is a plastic coating over fabric. It does not absorb conditioner. It needs protection from cracks and stains.
Most car leather is not like my jacket June. Automotive leather is almost always coated or finished for durability. A common type is semi-aniline leather. It has a light pigment layer on top but lets some natural grain show through. This coating makes it more stain resistant but also less absorbent. It feels firmer and cooler to the touch than an unlined jacket. Knowing this tells you your goal: for genuine, you clean and feed the hide; for faux, you clean and shield the plastic layer.
Identifying your interior is simple. Try these steps in order.
- Check your vehicle’s owner manual. It often lists interior materials.
- Do a water test. Place one drop of water on an inconspicuous spot. On genuine leather, it will darken the spot as it soaks in slowly. On faux leather, the bead will sit on top.
- Feel the surface. Genuine leather has a variable grain you can see and feel, with subtle imperfections. Faux leather feels perfectly uniform and often smoother.
When we talk about genuine leather, source matters. I believe in using leather from animals raised for meat, where the hide is a byproduct. This respectful sourcing honors the animal and creates a durable material meant to last decades, like my saddle Mason.
Building Your Essential Car Leather Care Kit
Assembling your kit is like choosing tools for a trusted craft. You do not need many items, but the right ones make all the difference. Here is what I keep in my own detailing caddy.
- A gentle, pH-balanced leather cleaner. This safely lifts dirt without stripping natural oils. Avoid harsh degreasers.
- A soft horsehair detailing brush. Its fine bristles agitate dirt in stitching and grain without scratching.
- Three or four clean, color-free microfiber cloths. Use one for applying cleaner, one for buffing, and a fresh one for conditioner.
- A dedicated leather conditioner. Look for products labeled for automotive use. Conditioners like leather milk or balms work well. They replenish oils that sun and heat zap away.
- A spray bottle of UV protectant. Sun is the biggest enemy of any car interior. A protectant forms a barrier against fading and drying.
Your kit changes slightly for faux leather interiors. Swap the leather cleaner and conditioner for a dedicated vinyl and plastic cleaner. Follow it with a vinyl protectant. These products are formulated to clean the surface and add flexibility to the plastic coating, preventing cracks.
You might see pre-made car leather care kits for sale. A good kit will have all the core items listed above from the same brand, ensuring compatibility. Building your own kit lets you choose higher quality brushes or a conditioner you prefer. From my bench, I often mix and match. A pre-made kit is a fine start, but assembling your own gives you control over every step of the process.
How to Clean Leather Car Seats, Step-by-Step

Think of cleaning your car’s leather like giving my old saddle, Mason, a proper groom. You are not just removing dirt. You are preserving the material’s strength and its future patina. Follow this order to do it right.
Step 1: Vacuum Thoroughly
Start with a soft brush attachment on your vacuum cleaner. Go over every seam, crease, and perforation. Grit and sand are like tiny blades that will grind into the leather’s finish during the next steps. This one task prevents most surface scratches, especially when followed by proper cleaning methods.
You cannot clean dirt off leather if you are just rubbing it in.
Step 2: Test Your Cleaner
Find a hidden spot, like under the seat cushion or behind a headrest. Apply a small amount of your chosen leather cleaner. Use a clean, white microfiber cloth to gently buff it after 30 seconds. Check for any color transfer onto the cloth or a change in the leather’s texture. If anything seems off, try a different product—especially if you’re dealing with stubborn stains like ink or coffee. This five-minute check saves heartache.
Step 3: Apply Cleaner in Sections
Work on one seat cushion or backrest at a time. Spray your pH-balanced leather cleaner onto a microfiber cloth until it is damp, not wet. Wipe the leather using gentle, overlapping circles. For stubborn grime in grain, use a soft-bristled detailing brush. Let the cleaner dwell for a minute to break down oils. This method is part of a general cleaning routine that’s safe for natural leather.
Remember my jacket, June. Soaking leather weakens its fibers. A damp cloth is perfect. A soaking wet one causes problems.
Step 4: Wipe Away Dirt and Residue
Take a second, clean microfiber cloth. Dampen it with plain water and wring it out completely. Wipe over the section you just cleaned. This lifts away the dissolved dirt and any leftover cleaner. Rinse this cloth often. You will see the grime coming off. This is the most satisfying part.
Step 5: Dry Completely
Immediately dry the area with a third, dry microfiber cloth. Buff gently until the surface feels cool and dry to the touch. Before conditioning or using the seat, roll down a window or run the climate control to circulate air. Trapped moisture is leather’s enemy. I let Mason air dry in the shade, and I treat my car seats the same way.
Leather must be bone dry before you apply any conditioner or protectant.
Cleaning White or Light-Colored Leather
White leather needs a faster response. For spills, blot immediately with a dry cloth. Do not rub. Use a cleaner specifically made for light leathers to avoid yellowing. The process is the same, but you might need to repeat steps 3 and 4 for an even clean. Think of it like cleaning a light-colored shirt. Prompt care makes all the difference, especially when maintaining white leather items.
Nourishing and Protecting with the Right Conditioner
Think of your car’s leather seats like your own skin. Sunlight, heat, and dry air pull out their natural oils. Without those oils, the fibers stiffen, shrink, and eventually crack. Conditioning is not an optional shine treatment. Conditioning genuine leather is a necessary act of rehydration to keep the material flexible and strong for years.
How to Apply Conditioner to Car Seats
You must start with a clean surface. Any cleaner or dirt left behind will get sealed in. After you’ve wiped the seats down with a dedicated leather cleaner and let them dry, follow these steps.
- Perform a spot test. Apply a small dab of conditioner to a hidden area, like the backside of a seat bolster. Wait an hour. Check for any unwanted darkening or texture change.
- Use the right tools. A clean, lint-free microfiber cloth or a foam applicator pad works best. Avoid old rags that might scratch.
- Work in a thin, even layer. Apply a modest amount of conditioner to your cloth, not directly onto the seat. Use circular motions to work it into the leather, focusing on one section at a time-like a seat cushion or backrest.
- Let it absorb fully. This is the most important step. The leather should drink it in. A good rule is to wait at least 30 minutes. If the surface still feels tacky or looks wet, buff it gently with a fresh, dry microfiber cloth.
- Repeat if needed. For leather that hasn’t been conditioned in years, like my saddle Mason was when I found him, a second light application after the first has dried can be beneficial.
A common mistake is using too much product. Over-saturating the leather can clog the pores and leave a greasy residue that attracts more dirt. A thin layer that disappears is your goal.
Understanding Conditioner and Shine
Not all conditioners leave the same finish. Your choice depends on the look you want for your car’s interior.
| Conditioner Type | Best For | Final Look |
|---|---|---|
| Matte or Natural Finish | Most modern car leathers, aniline, and semi-aniline leathers. It preserves the original, soft handfeel. | No added shine. The leather looks rich and supple, not glossy. |
| Light Luster | Protected or pigmented leathers common in cars. It often contains mild waxes. | A soft, satin glow that enhances color without looking slippery. |
| High-Gloss | Heavily coated or vintage leathers where a shiny finish is desired. Often labeled as “conditioner and protector.” | A pronounced, reflective shine. Can feel more sealed and less natural. |
A Model for Technique: Using a Product Like CPR Leather Care
Many people ask how to use a specific cleaner-conditioner like CPR. The process mirrors the best practice above. These 2-in-1 products clean and condition in a single step, which is convenient for regular upkeep.
Shake the bottle well. Apply a small amount to your cloth and work it into the leather in sections. The key is to let the product dwell for several minutes so the cleaning agents can lift grime and the conditioners can penetrate. Then, buff it off thoroughly with a clean, dry cloth. For a heavily soiled interior, a dedicated cleaner first is still the better choice.
The Critical Rule for Faux Leather (Vinyl or PU)
Faux leather is a plastic coating over fabric. It does not have porous fibers that absorb oils. Applying a leather conditioner to faux leather will do nothing at best, and at worst, create a slippery, sticky film that attracts dust.
Your maintenance for faux leather is simpler. Clean it with a mild soap solution or a cleaner made for vinyl. Your primary job is protection from the sun’s UV rays, which cause fading and plasticizer loss, leading to cracks. Use a protectant spray or wipe designed for synthetic materials. It creates a barrier against UV light and makes future cleaning easier. Doing clean care for faux leather helps keep it looking new and prevents cracking over time. Regular maintenance with a gentle cleaner and a proper protectant extends its life.
Fixing Common Damage: DIY Leather Seat Repair
Small marks on your car seats can feel like a big deal. I get it. You want to fix it yourself. The good news is, many minor issues are totally manageable. Think of it like the first scuff on my veg-tan wallet, Scout. It’s not a disaster, it’s a chance to learn a simple skill.
With the right kit and a calm approach, you can make small scuffs and shallow scratches virtually disappear. The key is to start small and simple. If you’ve never done this before, practice on a hidden area first, like the backside of a seat bolster.
Handling Small Scuffs and Scratches
For shallow surface marks that haven’t broken the leather’s top coat, a repair dye pen is your best friend. This is a two-part tool: one end has a cleaner/prep solution, and the other has the color-matched dye. It’s perfect for fixing scuffs and marks on leather shoes and boots.
- Clean the area with the prep solution on the pen. This removes any dirt or oils so the dye can stick properly. Let it dry completely.
- Shake the dye pen well. Test the color on a piece of cardboard or a hidden spot.
- Apply the dye with light, feathering strokes. Don’t glob it on. Build the color up in several thin layers, letting each one dry for a few minutes.
- Once the color is matched and dry, follow up with a tiny dab of a pH-balanced leather conditioner just on that spot to reintegrate the finish.
A common mistake is rushing. Applying thick, wet layers of dye will look blotchy and can peel. Thin and patient wins the race here.
Repairing Fine Cracks and Worn Areas
When the leather starts to dry out and develop fine lines or small cracks, you need a filler. This is more involved but still doable. You’re essentially giving the leather a new, flexible surface.
A flexible leather filler acts like a liquid patch, bonding to the damaged fibers and creating a new base for your color. The process has a few more steps, but each one is straightforward.
- Clean the cracked area thoroughly with a neutral leather cleaner. You must remove all conditioner and dirt from the crack itself.
- Using a small spatula or a plastic card, press a flexible leather filler into the crack. Overfill it slightly, as it will shrink as it dries.
- Let the filler cure completely. This can take a few hours. Check the product label for exact times.
- Once rock-hard, use very fine grit sandpaper (like 600-grit or higher) to sand the filler down until it’s perfectly flush with the surrounding leather. Wipe away all dust.
- Apply your color-matched dye or leather paint over the repaired area, feathering it out into the good leather. Multiple thin layers are essential.
- Finish with a dedicated leather topcoat or sealant from your repair kit to protect the new color and blend the sheen.
When to Call a Professional
Knowing your limits is a sign of a good craftsman. Some damage means it’s time to seek expert help. If you see any of the following, put the DIY kit down.
- A tear or gash where you can see the foam or backing material underneath.
- Large sections (bigger than a credit card) where the leather’s top coating is completely flaking off.
- Deep, structural cracks that run across a seam or a high-stress area like the seat’s side bolster.
- Any repair on a perforated leather seat. Getting filler out of those tiny holes is nearly impossible.
A professional has the tools, materials, and experience to perform a section repair or reupholster that a DIY kit simply cannot match for major damage. Investing in a pro fix can save you money and heartache in the long run by preventing the problem from spreading.
A Note on Faux Leather and Vinyl
Faux leather is a different beast. While cleaners and protectants work well, repairs are trickier. The plastic coating can reject dyes and fillers. A small scratch can often be colored with a vinyl dye pen. However, a tear or crack in the material itself is very difficult to fix convincingly. The repair often lacks flexibility and may re-crack quickly. For sizable damage on faux leather, replacement of the panel or seat cover is usually the most durable solution.
Keeping Your Seats Looking New: Daily Habits and Long-Term Care
Consistency is your most powerful tool. A good routine prevents small problems from becoming big, expensive ones. Think of it like brushing your teeth, it’s simple maintenance that saves you from major discomfort later.
A Practical Care Schedule You’ll Actually Follow
Forget complicated charts. This schedule is based on protecting your seats from real-world use, not just the calendar.
- Weekly (or after a messy trip): A quick, dry wipe-down with a soft, clean microfiber cloth. This lifts dust and grit before it gets ground into the grain. It takes two minutes.
- Monthly: A light clean with a damp (not wet) microfiber and a pH-neutral leather cleaner. This removes body oils and light grime. Follow with a light application of conditioner for genuine leather.
- Seasonally (Every 3-4 months): A thorough deep clean. This is when you take your time, use a soft brush for crevices, fully clean, and then condition every inch of the genuine leather. For faux leather, a deep clean and protectant application is key here.
My own rule is to condition my jacket, June, every season, and my wallet, Scout, gets a light oiling twice a year; your car seats live in a much harsher environment than my jacket pocket.
Proactive Habits That Make All the Difference
Most damage happens slowly. These simple habits build a shield around your interior.
- Fight the Sun: Use a windshield sunshade every single time you park. UV rays are the number one cause of fading and cracking, for both real and synthetic materials.
- Act Fast on Spills: Blot liquids immediately with a clean, absorbent cloth. For sticky spills, use a barely-damp cloth with a tiny drop of cleaner. Never rub, you’ll just spread it.
- Mind Your Belongings: Keep keys, tools, and rough objects in a bag or console. The sharp rivets on jeans can also wear down the leather over time.
- Ventilate: In humid climates, run the air conditioning to pull moisture from the cabin. Stagnant, damp air is not a friend to leather.
How Extreme Weather Wears on Your Seats
Your car’s interior faces weather extremes your favorite leather bag never does. Heat makes leather and vinyl expand and lose moisture, leading to dryness and cracks. Cold makes them contract and become brittle.
Parking in a garage is the best defense. If you must park outside, a sunshade is non-negotiable, and using a leather conditioner more frequently in hot, dry months helps replenish lost oils. In constant cold, the material needs to stay pliable, so conditioning before winter sets in is a smart move.
I’ve seen what a few summers of Arizona heat can do to an untreated steering wheel, and it’s a dry, cracked texture that’s very hard to reverse.
Genuine Leather vs. Faux Leather: The Long-Term Reality
Many think faux leather is “maintenance-free.” That’s not quite true. It’s just a different type of care.
| Care Need | Genuine Leather | Faux Leather (Vinyl/PU) |
|---|---|---|
| Primary Enemy | Drying out & losing oils. | UV degradation & cracking. |
| Core Maintenance | Regular conditioning with products designed for automotive leather. | Regular cleaning and application of a UV-protectant spray. |
| How It Ages | Can develop a patina. Proper care keeps it supple for decades. | Does not patina. It tends to fade or crack suddenly when the coating fails. |
| Repairability | Scratches can often be diminished with conditioner; deeper damage can be professionally colored and sealed. | Cracks and peeling are very difficult to repair seamlessly. Often requires seat cover replacement. |
Neither material is easier, they just have different needs. Ignoring genuine leather lets it starve. Ignoring faux leather lets it bake. Both end in the same place, a damaged seat.
Special Care for Faux Leather and Vinyl Interiors
Faux leather, vinyl, and other synthetic materials are much simpler to clean than genuine leather. You do not need to worry about drying out natural fibers. The real challenge with these materials is not dirt, but preserving their flexible plastic coating from sun damage and chemical breakdown. They degrade in a completely different way.
How to Clean Synthetic Interiors Correctly
Think of the surface like a plastic raincoat. Your goal is to clean the coat without damaging its waterproof layer. Using the wrong product can strip this coating, leaving a dull, chalky, or sticky finish.
- Vacuum the seats thoroughly to remove grit.
- Mix a mild, pH-neutral cleaner designed for vinyl or plastics with warm water in a spray bottle. Automotive interior cleaners are a safe bet.
- Spray the solution onto a soft, clean microfiber cloth-never directly onto the seat. This prevents liquid from seeping into seams.
- Wipe the surface using gentle, overlapping strokes. For textured grain, use a soft-bristled brush (like a detailing brush) to agitate grime gently.
- Immediately wipe the area dry with a second clean, dry microfiber cloth. Letting cleaner air-dry can leave streaks or residue.
This method works for spills, dust, and general grime. For stubborn stains like ink, a dedicated vinyl cleaner or a dab of isopropyl alcohol on a hidden spot first is my go-to test.
The #1 Rule: Fight the Sun
Heat and UV rays are the arch-enemies of vinyl and faux leather. They break down the plasticizers-the chemicals that keep the material soft. Without them, your seats become hard and brittle, leading to irreversible cracking.
UV protection is not an optional step for synthetic interiors; it is the single most important part of maintenance. Apply a protectant formulated for vinyl and plastics every 4 to 6 weeks during sunny months. Look for products that mention “UV inhibitors” or “UV block.” A quick spray and wipe creates an invisible shield that reflects harmful rays and slows the fading process dramatically.
A Critical Warning About Products
This is the most common mistake I see. Conditioners, oils, and creams made for genuine leather will ruin faux materials. My jacket June loves a good conditioning, but those same oils would disaster for a vinyl seat.
Leather conditioners penetrate and nourish. On a non-porous plastic surface, they cannot soak in. They sit on top, attracting dust and forming a greasy, sticky film that is very difficult to remove. If you accidentally use a leather product, clean it off immediately with a dedicated vinyl cleaner to prevent a lingering, tacky mess.
Stick to the simple routine: clean with a vinyl-safe cleaner, and protect with a UV-blocking spray. Your synthetic interior will look newer, feel better, and last years longer without the heartbreak of premature cracks.
Common Questions
Can I use the same care kit for both genuine and faux leather?
No. Genuine leather needs absorbent conditioners, while faux leather requires non-absorbent UV protectants. Using a leather conditioner on faux materials will create a sticky, dust-attracting film.
What’s the deal with 2-in-1 cleaner-conditioners? Are they a good choice?
They are fine for light, routine maintenance on genuine leather to remove light soils and add a small amount of oil. For a thorough clean or a severely dried-out interior, use dedicated, separate products for each step.
How often should I realistically condition my car’s leather?
For most climates, a full clean and condition every 3-4 months is ideal. In extreme heat or dryness, increase to every 2 months. The leather should feel supple, never dry or greasy. Additionally, you might wonder how often you should condition leather boots and what the best application method is. We’ll cover those details in the next steps.
What does a “good” car leather care kit absolutely need to include?
A pH-balanced cleaner, a soft brush for grain, multiple microfiber cloths, and a dedicated automotive leather conditioner. For faux leather, swap the cleaner and conditioner for a vinyl-specific cleaner and a UV protectant spray.
Is that “Black Bottle” leather conditioner I see online any good?
It’s a popular 2-in-1 product. It works adequately for routine cleaning and light conditioning on coated automotive leathers. For deep nourishment on dry leather, a dedicated, richer conditioner is a better choice.
Your Car’s Leather, For The Long Haul
The best advice I can give is this: clean gently and condition consistently. A soft brush and a pH-balanced leather cleaner are your first line of defense, followed by a quality conditioner applied to supple, clean leather every few months.
Regular care is the most responsible choice you can make, as it honors the material and vastly extends the life of your interior. Seeing this maintenance not as a chore, but as a simple, respectful practice, is the real skill that keeps your car’s character intact for years.
Citations and Authoritative Sources
- r/cars on Reddit: Tips for owning leather car seats?
- How to Clean and Protect Leather Car Seats | Chemical Guys
- Revitalize Your Car’s Interior: We Test the Top Car Leather Cleaners
- The Best Way to Clean Leather Car Seats | How to Clean Car Seats
- HOW TO: Maintain your leather seats so they never crack or age.
Harriet is a avid collector of leather goods such as purses, bags, seat covers, etc and has an extensive background in leather care, recovery, stain removal and restoration. She has worked for a number of years perfecting her leather care techniques and knows the ins and outs of restoring all kinds and types of leather products. With her first hand knowledge in leather care, you can not go wrong listening to her advice.
Car Interior and Auto Leather Care