How to Clean Suede Shoes and Boots: A Practical Care Guide
Published on: January 6, 2026 | Last Updated: January 6, 2026
Written By: Harriet Nicholson
Hello Tannery Talk. That fresh scuff or water spot on your suede doesn’t have to be permanent, and I can show you how to handle it without fear.
We will cover why suede needs a different approach than smooth leather, the few specific tools that work best, a reliable cleaning routine for dirt and stains, and how to choose products that nourish without damaging the delicate nap.
My years spent repairing and conditioning leather, from Mason’s saddle to everyday boots, have given me a deep respect for materials like suede.
Why Suede Feels Different and Needs Special Care
Let’s get our hands on the material first. Suede is not a different animal. It comes from the same hide as smooth leather. Think of a piece of full-grain leather, like the leather on my old saddle Mason. Its surface is like a smooth, paved road. To make suede, we split the hide and use the soft, fibrous underside. This creates that signature velvety texture, which we call the nap. Its surface is more like a lush, carefully mowed lawn.
That beautiful nap is why suede needs a gentler touch. All those tiny fibers love to grab onto dust and dirt. A splash of water doesn’t bead up and roll off like it does on a smooth surface. Instead, it soaks right into the fibers, darkening the spot and often leaving a visible ring as it dries.
Caring for suede is about working with that nap, not fighting it, using methods that lift dirt without crushing the fibers.
When sourced responsibly, suede is a valuable byproduct of the meat industry. Using it honors the whole animal. That’s a perspective I carry from the tannery, and it makes taking good care of these pieces feel even more meaningful.
The Simple Toolkit You Need Before You Start
You don’t need a cabinet full of potions. A few dedicated tools make all the difference. Using the wrong brush is like trying to clean a delicate sweater with a wire scrubber. You’ll do more harm than good.
Here are the core items you should have ready:
- A Dual-Bristle Suede Brush: This is your main tool. Look for one with stiff brass bristles on one side and softer nylon or rubber bristles on the other. The brass is for scrubbing out stubborn marks. The soft side is for daily dusting and raising the nap.
- A Suede Eraser (or Gum Block): This is a dense, rubbery block. It’s perfect for scuff marks, oily spots, or stains that brushing alone won’t lift. Think of it as a super-powered pencil eraser for your shoes.
- A Clean, Dry Microfiber Cloth: For gentle blotting and wiping away eraser debris.
A quality suede brush and a good eraser are truly the foundation of the best suede cleaner routine you can have. With just these, you can handle most common issues.
A few optional items can help with bigger jobs:
- A Suede-Specific Cleaning Solution: For deeper cleaning or stubborn stains. Always test it on a small, hidden area first.
- A Soft-Bristled Toothbrush: Ideal for getting into the tight seams and stitching around the sole.
- A Suede Protector Spray: This creates an invisible barrier against water and stains. It’s a great preventive measure applied to clean, dry suede.
Gather these, and you’re ready. Remember, the goal is to be gentle and patient. That’s how you preserve that soft, luxurious feel for years.
Your Gentle, Step-by-Step Routine for Cleaning Suede
Think of suede like the velvet of the leather world. It needs a soft touch and a patient hand. Rushing or using the wrong tools can mat the nap permanently. This routine is the one I use on my own suede pieces, and it works because it respects the material.
Step 1: The Dry Clean – Lifting the Loose Dirt
Never start with water or liquid. Always begin with a dry clean. Your goal here is to lift away the dry, loose stuff without grinding it deeper into the fibers.
- Take a dedicated suede brush or a very soft-bristled brush (like a horsehair detailing brush).
- Hold the shoe firmly and brush gently in one direction, following the natural grain of the nap. You can feel this; stroke your finger across the suede. One direction will feel smoother. That’s the way you brush.
- Use short, light strokes. Brush the entire shoe, focusing on seams and welts where dust loves to hide.
- Tap the soles together over a trash can to dislodge any dirt you’ve brushed free.
This first dry brush removes surface dust and can often make a pair of shoes look 50% cleaner without any products at all.
Step 2: Tackling Scuffs with an Eraser
After brushing, you’ll likely see darker scuffs or oily spots. This is where your suede eraser comes in. I think of it as a very fine, dry sandpaper for stains.
- Examine the mark. For a light scuff, use the clean, soft side of the eraser.
- For a more stubborn spot, use the gritty, gum-like side.
- Rub the eraser back and forth over the mark gently, using light pressure. You’re abrading the very top of the stained fibers away.
- Stop and brush the area with your suede brush to remove the eraser crumbs and lifted grime. Check your progress.
A suede eraser is excellent for surface-level marks, but it won’t remove deep-set oil or liquid stains, so manage your expectations. For a deep grease spot on a boot toe, you might need to repeat this step a few times over different cleaning sessions.
Step 3: The Damp Cloth Method for Deeper Cleaning
If dry tools aren’t enough, it’s time for a tiny bit of moisture. The key word is tiny. We’re not soaking or scrubbing.
- Use a white or light-colored microfiber cloth. Colored cloths can bleed dye.
- Dampen only one corner of the cloth with clean, cool water. Wring it out so it’s barely damp to the touch-it should not drip.
- Test on a small, hidden area first, like the inside of the tongue.
- Wipe the soiled area gently with the damp corner, moving in one direction with the nap.
- Let the area air dry completely, away from direct heat or sunlight. This can take a few hours.
I used this method on an old pair of suede chukkas that had light mud splatter. The damp cloth lifted the dirt, and after drying, a quick brush brought the nap right back.
The Golden Rule: Patience in Drying
This is where most suede repairs come from. Impatience.
Never, ever use a hair dryer, radiator, or space heater to dry suede. Intense heat cooks the leather, making it brittle, and can set stains permanently. It also shrinks leather dramatically. Let your shoes dry at room temperature, stuffed with newspaper or shoe trees to help them keep their shape. They must be 100% bone-dry before you brush them again or wear them, even when you dry clean and restore wet suede in emergencies. Walking in damp suede stretches it and sets wrinkles you can’t fix.
Step 4: The Final Brush-Out
Once your shoes are completely dry, the nap might look a little flat or matted from the cleaning. This is an easy fix.
Take your clean suede brush and give the entire shoe a confident, gentle brushing. Go with the nap. You’ll see the fibers lift and separate, restoring that soft, velvety texture. This final brush is what makes the shoe look cared for, not just cleaned—especially after you’ve cleaned and removed mold from the suede.
This final brushing revives the texture and evens out the nap, making the entire shoe look uniform and fresh. It’s the satisfying last step that brings it all together.
How to Tackle Common Stains on Suede Footwear
Seeing a new mark on your suede boots can feel like a disaster. I felt that way with a pair I had years ago. But take a breath. Suede is more resilient than it looks, and stains are almost always manageable if you act calmly and correctly.
The key is to match the method to the mess. Using the wrong fix can set a stain permanently. Here’s how to handle the three most common offenders.
Mud and Dirt
This is the most frequent issue. Your first instinct might be to wipe it with a wet cloth. Resist that. Water will turn dirt into a paste and drive it deeper into the nap.
The right way is counterintuitive: let the mud dry completely. Let your boots sit for a few hours until the mud is fully crusty and pale. Patience is your best tool here.
- Take a dry, soft-bristled suede brush (a brass-bristle brush works well for tougher dirt) and brush the area firmly. You’ll see most of the dried mud turn to dust and fall away.
- For any leftover, gritty residue, use a suede eraser. Rub it back and forth over the spot like you’re erasing a pencil mark.
- Finish by brushing the entire area again with your soft brush to lift the nap and restore the texture.
For mud and dirt, always let it dry first, then brush-never attack it while wet.
Oil and Grease
An oil spot looks dark and saturated. Unlike dirt, you need to pull the oil out before it bonds with the leather. This is where a common kitchen item saves the day.
Yes, baking soda can clean suede shoes, specifically for oil-based stains. Plain cornstarch works just as well. These powders absorb oil without harsh chemicals.
- Immediately sprinkle a generous amount of cornstarch or baking soda over the stain. Completely cover it. You want the powder to do the absorbing, not your leather.
- Let it sit overnight, or at least 8 hours. The powder will slowly pull the oil to the surface and turn clumpy or darker.
- Gently brush away all the powder with your soft brush. You may need to repeat this process once or twice for heavy stains.
Avoid the temptation to use dish soap or a spot cleaner. These can strip natural oils and leave a visible, cleaned ring that’s harder to fix than the original stain. Rubbing alcohol can dry out and discolor suede terribly.
Water Stains and Rings
A splash from a puddle leaves a dark, uneven patch. Panic sets in. But usually, this isn’t a true stain. Can you clean suede shoes with water? Not to clean them, but water stains often fix themselves. The darkness is just the nap laying flat and clumping together when wet.
The fix is beautifully simple. Let the boot dry naturally, away from direct heat like a radiator or hair dryer. Heat can cook the stain into the leather and shrink it. Once the suede is completely dry to the touch all the way through, take your soft brush.
Brush the stained area gently in one direction. Then brush it again from a different angle. You are re-training the tiny suede fibers to stand up evenly. Like brushing Scout the wallet’s edges to keep them neat, you’re just grooming the surface. Most of the time, the dark ring will vanish.
A water mark is usually just a bad hair day for your suede’s nap. A thorough, gentle brushing once dry is often the only cure it needs.
Choosing the Right Suede Cleaner and When to Use It
For light dust and surface scuffs, a good suede brush is often enough. A dedicated cleaner steps in when you face a real stain-mud, grease, a stubborn scuff, or a dark water spot that just won’t brush out. These are formulated to lift grime without flattening the delicate nap or leaving a harsh residue.
Most dedicated cleaners come as a spray or a foam. They work by applying a cleaning agent that you then gently work into the fibers and blot away, taking the dirt with it. You only need to reach for a cleaner when a basic brush-down fails to remove a noticeable spot or general grime.
Always Start With a Patch Test
This step is non-negotiable. Suede can react unpredictably to moisture and chemicals, and color transfer from dyes is a real risk.
- Pick a hidden spot. Look inside the shoe’s collar, under a tongue, or on an inside seam of a bag.
- Apply a small amount of your cleaner as directed.
- Let it dry completely.
Check for any color change, staining, or stiffening. If the test spot looks good, you’re clear to proceed. I learned this the hard way years ago with a light suede bag; a small test would have saved a large headache.
Liquid Cleaner vs. Foam: Managing Moisture
The biggest risk when cleaning suede is over-wetting it, which can leave watermarks or cause the material to stiffen as it dries.
Liquid sprays can be effective for targeted spots, but they require a very careful, light touch. It’s easy to apply too much. Foam-based cleaners are often the safer choice, especially for beginners. The foam consistency gives you more control, reducing the chance of soaking the leather and causing water damage. You apply the foam, let it sit for a minute to break down the stain, then gently blot and brush. For water stains on leather furniture upholstery, use a gentle, targeted approach that lifts the mark without over-wetting. With the right technique, you can remove water stains from leather furniture upholstery and preserve the surface finish.
Think of it like watering a plant; a gentle mist is better than a flood.
Selecting a Cleaner for Different Items
Not all suede items are created equal. The best cleaner depends on the item’s delicacy and use.
For Delicate Suede Sneakers or Lightweight Garments:
Prioritize gentleness. Look for a pH-balanced, foam-based cleaner labeled for delicate materials. These often have milder formulas. Apply the foam with a soft applicator or cloth, never pour or spray directly. Work in tiny circles on the stain only, especially when cleaning suede on sneakers to avoid damage.
For Sturdy Boots or Work Gloves:
These items are built for tougher conditions. A stronger liquid or foam cleaner is suitable. You can be more liberal in your application on the soiled areas. After cleaning and drying, vigorous brushing with a suede brush will be key to restoring the lifted nap.
For a Car Seat, Purse, or Furniture:
Here, application method is everything. A foam is again less risky for large areas. Use a very soft-bristled brush or white cloth to apply and work the foam. Blot, don’t rub, to lift the dirt without grinding it deeper into the base of the fibers. For purses, treat any stains individually instead of cleaning the whole piece, unless it’s uniformly dirty.
My friend June has a suede jacket she loves. For a small oil spot, she used a tiny drop of a white vinegar solution (a common home remedy) on a cotton swab, blotted it, then brushed the area. For overall city grime, she uses a specific suede foam. Knowing the difference saved the jacket’s soft handfeel.
Should You Use a Suede Protector Spray?
Think of a suede protector spray like an umbrella for your shoes. It does not make them waterproof, but it gives you crucial time to get out of the rain. These sprays create an invisible, breathable barrier on the surface of the suede. This barrier helps repel water and oil-based stains before they can soak in and set.
Applying a protector is a simple step that can save you from many headaches later, but you must do it correctly for it to work.
How to Apply Suede Protector Correctly
This is not a step to rush. Doing it right means the protector can do its job. Here is my method, the same one I used on June’s suede bag last fall.
- Start with shoes that are perfectly clean and completely dry. Any dirt or moisture trapped under the spray will be sealed in.
- Take the shoes outside or to a very well-ventilated area. The fumes are not something you want to breathe in.
- Hold the can 6 to 8 inches away from the shoe. This is about the length of your hand and forearm. Any closer and you risk spraying too much, which can darken or stiffen the suede.
- Spray using a steady, sweeping motion. Cover the entire surface evenly with a light, misty coat. Do not soak the material.
- Let the shoes dry naturally, away from direct heat, for at least 24 hours. The protector needs this time to cure and become effective.
Setting Realistic Expectations
A protector spray is not permanent armor. It is a shield that wears down with use. Friction from walking, exposure to water, and even just the passage of time will slowly break down the protective layer.
You should reapply a protector spray after every deep clean, and consider reapplying it every few months for shoes you wear frequently in wet or messy conditions. It is not a one-time treatment. Think of it like reapplying sunscreen on a long day outside.
The Pros and Cons for Your Lifestyle
Is a protector spray right for you? Let’s weigh the simple facts.
- Pros: It provides a vital first line of defense against common accidents like rain splashes, coffee spills, or sidewalk salt. It gives you minutes to blot a spill away before it becomes a stain. For daily wear boots or light-colored suede, this peace of mind is often worth it.
- Cons: It is an extra cost and an extra step in your care routine. Some people notice a very slight change in the suede’s color or handfeel, though a good application minimizes this. If your suede shoes are only for special, dry-weather occasions, you might skip it.
My own suede pieces, like June, get a fresh coat of protector at the start of each rainy season. For me, the pros win.
Finding the Right Product for You
Many people search for the “best suede cleaner and protector” combo. These 2-in-1 products can be convenient for light, routine maintenance. For serious stains or a new pair of shoes, I still recommend a dedicated cleaner first, followed by a dedicated protector. This two-step process ensures a perfectly clean base for the protector to adhere to, giving you the strongest possible defense. Whether you choose a combo or separate products, the application rules remain the same: always to a clean, dry surface.
Keeping Your Suede Looking Good Between Deep Cleans
Think of suede care like brushing your teeth. A quick brush every day is better than a frantic, harsh scrubbing once a year. The goal is to stop problems before they set in.
Give Them a Quick Brush After Every Wear
This is your number one habit. When you take your shoes off, pick up a suede brush or a clean, dry microfiber cloth. Give the entire shoe a firm, one-directional brush. You’ll feel the nap lift and see the dust come off.
A quick, consistent brushing redistributes the fibers of the nap, keeping that velvety look and preventing dirt from getting ground in. It takes thirty seconds but makes all the difference. My boots, Scout, get this treatment every time. It keeps their dark brown color even and rich.
Store Them the Right Way
Where your shoes live when you’re not wearing them matters. Never just kick them into a dark closet.
- Cool & Dry: Heat and dampness are suede’s enemies. Store them somewhere with good air circulation, away from radiators or damp basements.
- Support Their Shape: Use cedar shoe trees or stuff them firmly with plain, acid-free paper. This absorbs lingering moisture and prevents ugly creases from setting in permanently. I use shoe trees in my June jacket’s boots to keep their ankles from collapsing.
- Give Them Space: Let them breathe. Don’t cram them tightly against other shoes where the nap can get crushed.
Let Them Rest Between Wears
Leather needs to breathe, especially after a day on your feet. Wearing the same pair of suede shoes day after day traps sweat and salts from your skin inside the material.
Rotate your shoes, giving each pair at least 24 hours to fully air out and dry from the inside. This simple practice prevents two major issues: salt stains from crystallized sweat and the breakdown of the leather’s fibers from constant moisture. Mason, my saddle, taught me the value of proper drying time. Leather remembers mistreatment.
Simple Care Prevents Harsh Cleaning
If you brush off dust now, you won’t need a heavy cleaner later. If you let moisture evaporate, you’ll never see a salt stain. This routine is your best defense.
I see many suede items brought in for repair that just needed consistent, gentle care. The leather becomes compromised from aggressive cleaning that could have been avoided. Frequent, light maintenance preserves the integrity of the suede and keeps harsh chemical cleaners out of the picture. Your shoes will last longer and look better with less effort over time.
Cleaning Methods and Home Remedies to Avoid
When a pair of suede shoes gets dirty, the urge to grab whatever is under the kitchen sink is strong. I get it. But suede is not like other leathers. Think of its nap like the pile on velvet, delicate and easily matted. Using the wrong cleaner is like using a sledgehammer to fix a watch.
Here are the most common mistakes that can permanently change your suede’s look and feel.
The Usual Suspects: Water, Soap, and Harsh Chemicals
Excessive water is the number one enemy. Pouring water on a suede stain will spread it and leave a dark, hard water ring as it dries. The nap will clump together into an unsightly patch.
Household soaps, dish detergents, and general-purpose cleaners are just as risky. These formulas are designed to cut through grease on dishes, not to care for delicate leather fibers. Cleaning suede with general-purpose soap strips away its natural oils, leaving the material dry, brittle, and prone to cracking.
Harsh chemicals like bleach or abrasive cleaners will simply destroy the dye and the fiber structure. The damage is immediate and irreversible.
Why the Washing Machine is a Death Sentence
Throwing suede shoes or boots in the washing machine is almost always a catastrophic idea. The combination of agitation, spinning, heat, and detergent is a perfect storm. The nap will be completely matted, the leather structure can warp and shrink, and the interior glue holding the shoe together can dissolve. You might pull out a shapeless, felted mess.
The Problem with Popular DIY Solutions
Well-meaning advice often suggests using household items like rubbing alcohol or white vinegar for spot cleaning. Please do not do this. Cleaning suede with alcohol or vinegar can set stains deeper into the fibers and rapidly dry out the leather, damaging its supple handfeel. These substances are too aggressive and unpredictable for suede’s delicate surface.
Trust Your Tools, Not Guesswork
I learned this lesson early on. Trying to fix a friend’s suede bag with a “magic” homemade solution left a permanent, chalky stain. The risk with DIY methods is high, and the fixes are often more difficult than the original problem.
The reliability of proper tools is unmatched. A dedicated suede brush, a gum eraser, and a pH-neutral suede cleaner are designed to work in harmony with the material. They lift dirt, restore the nap, and clean without causing side effects. It is the difference between hoping for the best and knowing what you are doing.
Caring for Specific Suede Items: UGGs, Birkenstocks, and More
The best method for cleaning your suede depends on what you’re cleaning. My shearling-lined boots get treated differently than my san sandals. Let’s break it down.
Shearling-Lined Boots (Like UGGs)
Boots with a soft, fuzzy interior need a gentle touch. The biggest risk is getting that lining wet, which can lead to matting and a long drying time. Your goal is to clean the suede exterior without letting moisture seep inside.
For general upkeep, a dry suede brush is your best friend for brushing off dust and reviving the nap after every few wears.
If you have a salt stain or light dirt spot:
- Let the boot come to room temperature if it’s cold.
- Use a very slightly damp microfiber cloth (wrung out completely) to dab at the spot. Do not rub.
- Immediately brush the area gently with your dry suede brush to lift the nap as it dries.
- Stuff the boot with crumpled paper to help it hold its shape and absorb any stray moisture. Let it air dry away from direct heat.
Avoid spray-on suede cleaners unless the label confirms they are safe for shearling. Often, the less product you use here, the better.
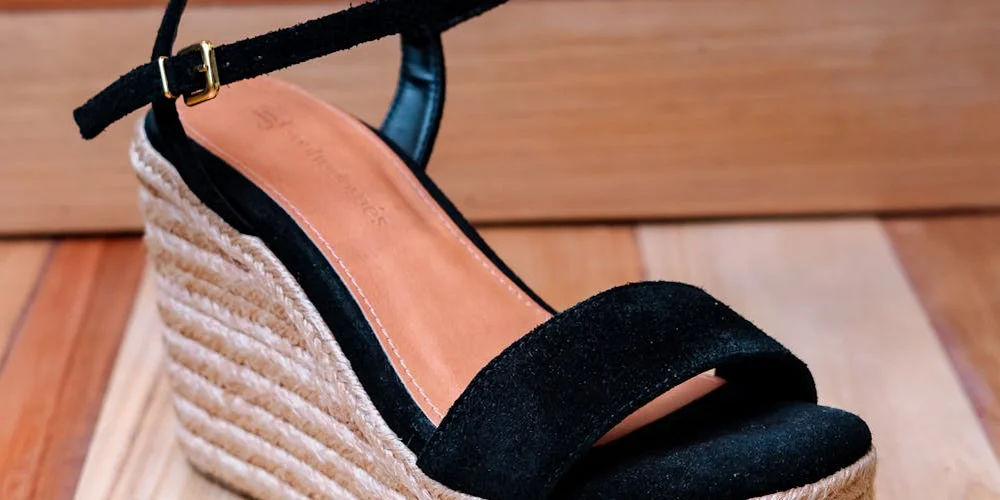
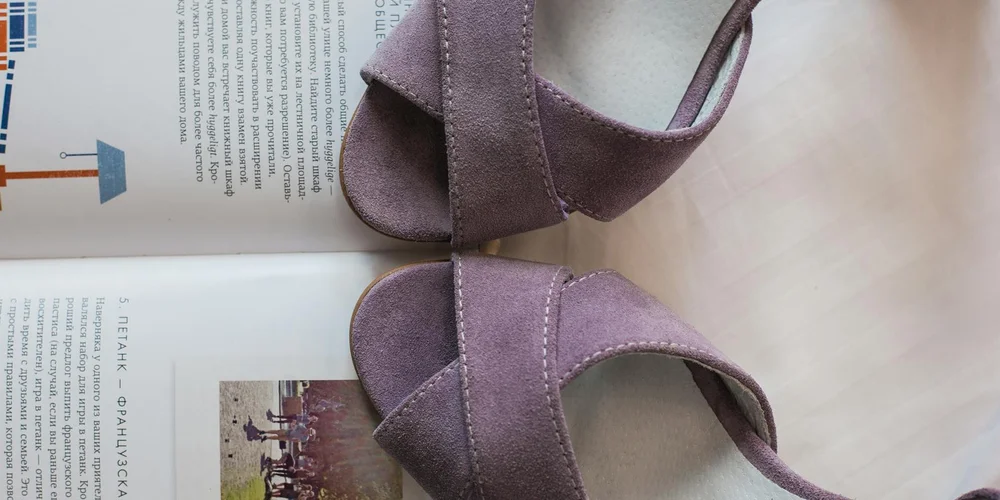
Suede Sandals (Like Birkenstocks)
Suede straps on sandals face unique challenges: sunscreen, sweat, and focused dirt. You cannot submerge them, so spot cleaning is the only way.
Act quickly on stains, and focus your cleaning only on the stained section of the strap to prevent water marks.
For a dirty strap:
- Use a pencil eraser or suede eraser block for dry, scuff-like marks.
- For oil or sweat, apply a tiny drop of a pH-neutral leather cleaner for delicate materials onto a clean cloth. Test it on an inconspicuous spot first.
- Dab (don’t rub) the stain, working from the outside in.
- Use a barely damp cloth to dab away any cleaner residue.
- Let it air dry completely, then brush lightly with a suede brush.
For the suede footbed, regular brushing is key. If it gets heavily stained, the same spot-cleaning method applies, but be extra cautious with moisture.
Suede Sneakers
Suede sneakers mix materials, so your cleaning must be precise. You’re dealing with suede, rubber soles, and often a fabric or mesh lining. For detailed, brand-specific guidance on how to clean and care for suede trainers, follow a simple, material-aware routine. This approach keeps every component looking and lasting longer.
Start by removing the laces. Clean your rubber midsoles and outsoles with a mild soap and water mix and an old toothbrush. Keep that soapy water away from the suede.
Always clean the different materials of a sneaker separately to prevent dyes or cleaners from transferring onto the delicate suede.
For the suede upper:
- Dry brush the entire upper to remove loose dirt.
- Use a dedicated suede cleaner or a very mild soap solution applied with a soft-bristle brush, working in small circles.
- Wipe away foam or residue with a barely damp cloth.
- Air dry thoroughly away from heaters.
- Once dry, brush the nap back up.
A protective spray designed for suede can be a good final step here, as sneakers face more weather and spills.
Your FAQ, Answered Practically
The “best” cleaner isn’t a magic potion. It’s the one used correctly for your specific item.
For shearling-lined boots, a dry-cleaning method is often safest. Rely on brushes and erasers first. If you must use a cleaner, choose one specifically marketed as safe for suede and sheepskin, and always, always do a spot test.
For suede sandals and straps, you need precision. A targeted, pH-neutral spot cleaner and a patient hand will do more than any all-over spray. Look for cleaners meant for delicate or light-colored leathers.
The common mistake with all these items is using too much water or product. Suede is thirsty. It will soak up moisture quickly, which can cause stains to spread and the material to stiffen. More is not better. Start dry, be patient, and let time and air do the hard work of drying.
Common Questions
Is there one “best suede cleaner” that works for everything?
No. The best product depends on the item’s delicacy and the type of soil. For sturdy boots, a stronger foam or liquid is fine; for a delicate purse or car seats, a gentler, foam-based formula applied with a soft cloth is safer to control moisture.
What should I look for in a cleaner for my suede car seats or upholstery?
Use a cleaner specifically formulated for automotive or upholstery suede, not a shoe product. These account for different dyes and backing materials. Always, without exception, perform a spot test in a hidden seam first. This approach also covers removing pen ink stains from suede items such as shoes, jackets, and other materials.
How do I choose between a dedicated cleaner and a cleaner-protector combo?
For a thorough clean or a new stain, use a dedicated cleaner first. A 2-in-1 product is suitable only for light, routine maintenance on already-clean items, as a protector needs a perfectly clean surface to adhere to properly.
My suede purse got a stain. Should I clean the whole bag?
Almost never. Spot-clean only the affected area to prevent uneven color or texture changes. Over-cleaning can do more harm than the original stain.
Are cleaners safe for suede items with other materials, like shearling linings in UGGs?
Proceed with extreme caution. Many cleaners can mat shearling or degrade adhesives. For shearling-lined items, dry brushing and erasers are your primary tools; only use a cleaner if it explicitly states it is safe for both suede and sheepskin.
Caring for Your Suede Footwear
The most reliable method for cleaning suede is gentle, consistent care with the right tools, starting with a suede brush to lift the nap before any liquid touches the leather. This simple habit prevents deep-set stains and keeps the material looking its best for years.
I see maintaining leather as a way to honor the material and the animal it came from, which is why using gentle, targeted products matters. Building your skills with each clean and condition turns routine care into a sustainable practice that extends the life of every piece you own.
Industry References
- Cleaning Suede Is Easier Than You Think. Here’s How to Do It Yourself.
- How to Clean Suede Shoes – Step-by-Step Guide 2025 – Cobbler Union
- How To: Clean Suede Shoes & Sneakers | Jason Markk
- How to clean suede without damaging it
Harriet is a avid collector of leather goods such as purses, bags, seat covers, etc and has an extensive background in leather care, recovery, stain removal and restoration. She has worked for a number of years perfecting her leather care techniques and knows the ins and outs of restoring all kinds and types of leather products. With her first hand knowledge in leather care, you can not go wrong listening to her advice.
Suede and Nubuck Care