How Do You Care for Suede and Nubuck Shoes, Boots, and Bags?
Published on: December 28, 2025 | Last Updated: December 28, 2025
Written By: Harriet Nicholson
Hello Tannery Talk. That soft, velvety texture you love on suede and nubuck can make spills or scuffs feel like a crisis. I get it, and I’m here to help.
This guide walks you through gentle cleaning, reliable waterproofing, safe stretching, and simple daily care to keep your favorite pieces in great shape.
My advice comes from years at the workbench, hands-on with everything from delicate nubuck bags to tough boots like my old saddle, Mason.
What Are Suede and Nubuck, Really?
Let’s clear up the confusion. Think of a piece of full-grain leather like my old saddle, Mason. It has a tough, smooth top layer. Suede and nubuck are made by changing that surface.
Suede is made from the underside of the hide. Imagine turning a thick wool sweater inside out. That soft, fuzzy texture you feel is like suede. It’s breathable and has a beautiful, matte finish.
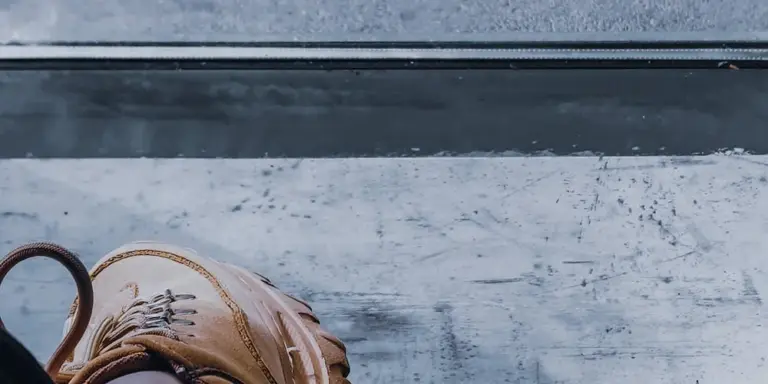
Nubuck is different. It starts as the premium top grain, like the leather on a high-quality belt. Then, it’s gently sanded or buffed on the surface. This creates a velvety nap, but it’s much more durable than suede. If suede is the inside of the sweater, nubuck is like a pair of premium raw denim jeans that’s been carefully brushed to a soft feel.
You see these materials everywhere once you start looking. Classic Adidas Sambas often use soft suede panels. Many work boots and hiking boots feature rugged nubuck for a tough but tactile look. That great suede jacket you found on sale? Now you know what makes it special.
Both materials share one critical trait. They lack the protective, sealed topcoat found on smooth leathers. This open pore structure gives them their lovely feel but makes them quick to absorb water, oils, and stains. Caring for them isn’t hard, but it requires a different approach than polishing a pair of smooth dress shoes.
Your Daily Care Kit: The Simple Tools You Need
You don’t need a workshop full of gear. With just a few dedicated tools, you can keep suede and nubuck looking fresh for years.
The Essential Three
- A Good Brush: This is your most important tool. You’ll find two main types. A brush with stiff brass bristles is for heavy cleaning and reviving flattened nap on sturdy nubuck. A brush with softer rubber or nylon bristles (often called a suede eraser brush) is gentler, perfect for daily dusting and light marks on delicate suede. I keep both in my kit.
- A White Vinyl Eraser: This isn’t for paper. A plain white eraser is fantastic for lifting scuff marks, dirt, and even some oil spots off the nap. It works like a gentle abrasive. Always test on a small, hidden area first.
- A Clean, Dry Cloth: A simple microfiber or soft cotton cloth is for blotting, not rubbing. If you get caught in the rain, your first move is to gently blot away moisture.
Understanding Care Kits
You can easily find all-in-one suede and nubuck care kits online or in shoe stores. A typical kit includes a specialized cleaner, a protector spray, and often a two-sided brush (one brass, one rubber).
The key is to always follow the instructions on the kit you buy, as formulas can vary. Generally, you’ll brush the item clean, apply the cleaner with the included tool or a cloth, let it dry, and then finish with the protector spray to add a water-resistant barrier.
When choosing a kit, look for one with clear instructions and positive reviews. The core tools and steps are similar, but a well-regarded brand often means a more reliable formula for the cleaner and protector. You’re paying for peace of mind that the chemicals are safe for your specific leather.
How to Clean Suede and Nubuck Step-by-Step
This is where hands-on care makes all the difference. Unlike smooth leathers, you cannot just wipe these surfaces. You need to work with the nap, that soft, raised texture. Think of it like caring for a very short, delicate velvet.
Step 1: The Gentle Brush-Out
Your first tool for every clean is a soft-bristled suede brush or a clean, dry microfiber cloth. Before you do anything else, use it.
Find the direction of the nap by gently stroking the surface. One way will feel smoother, the other slightly rougher. You always want to brush in the smooth direction. Brushing against the nap grinds dirt deeper into the fibers. Brushing with it lifts the dirt to the surface so you can flick it away.
It’s exactly like petting a cat the right way to keep its fur smooth, not ruffled and messy.
Make this a weekly habit for shoes you wear often. A quick 30-second brush after wearing keeps grime from building up and maintains that soft, uniform look. I do this for my own suede boots, and it stops small problems from becoming big ones.
Step 2: Erasing Scuffs and Marks
You will get scuffs. A lighter-colored mark where the nap has been flattened or dirt has been pressed in is common. Don’t panic.
For these, a simple white pencil eraser (the kind you used in school) is a miracle worker. Why white? A colored eraser could transfer dye onto your delicate suede or nubuck. Gently rub the eraser back and forth over the scuff. You are not scrubbing. You are using the eraser’s mild abrasion to lift the dirt out of the fibers.
You will see eraser crumbs and dirt residue form. Stop rubbing, and gently brush the area with your suede brush to remove all the debris. The mark should lighten or disappear as the nap is lifted back up. Different stains require different approaches. In the next steps, we’ll cover how to remove different types of stains from suede material.
This simple trick handles about 80% of the scuffs and dirt marks you will encounter on dry suede.
Step 3: Tackling Spills and Stains
This is the moment that makes people nervous. The key is speed and the right action.
For liquid spills (water, coffee, wine), grab a clean, absorbent cloth immediately. Place it over the spill and press down firmly. Do not rub. Blotting pulls the liquid up into the cloth. Rubbing grinds it deeper and spreads the stain. Keep blotting with dry areas of the cloth until no more liquid transfers.
Blot, never rub, is the golden rule for suede and nubuck.
For dry stains like mud or salt, the rule changes. Let the mud or salt stain dry completely. Once it is fully dry, use your suede brush to gently brush it away. Trying to clean wet mud will create a smeary, set-in stain.
If a stain persists after brushing and erasing, you can use a specialty suede cleaner. These are usually foam or spray solutions. Always, always test the cleaner on a small, hidden area first (like inside a strap or on the back of the tongue on a boot). Apply a tiny amount, let it dry, and check for any color change or damage. If it looks good, apply a small amount to a clean cloth and gently dab at the stain, working from the outside in. Let it air dry, then brush the nap to restore the texture.
Step 4: Drying the Right Way
If your item gets wet from a spill or the weather, proper drying is critical. Heat is the enemy. Never use a hair dryer, radiator, or place them in direct sunlight. Intense heat can bake stains into the fibers, cause the leather to become brittle, and can permanently shrink or distort the shape.
Wipe off any excess moisture with a dry cloth, then let the item air dry at normal room temperature, away from heaters and sun. For boots and shoes, use shoe trees or stuff them with crumpled newspaper to help them keep their shape as they dry. For a bag, fill it with crumpled paper or clean towels to maintain its structure.
Patience is your best tool here; let them dry slowly over a day or two in a well-ventilated spot.
Avoid storing them in a stuffy closet while damp, as this can encourage mold. Once completely dry, give them a thorough brushing with your suede brush to lift and re-align the nap over the entire surface.
How to Waterproof Suede and Nubuck Properly
Let’s talk about protection. When we say “waterproof” for suede or nubuck, we’re really aiming for excellent water resistance. Think of it like a raincoat for your leather, not a submarine hull. A good protector forms an invisible barrier that causes liquids to bead up and roll off, giving you precious time to blot a spill away before it soaks in.
The goal is to shield the delicate nap, not to change the handfeel or appearance of your favorite pieces. With my jacket June, for instance, the protector keeps morning dew from spotting the soft calfskin without making it feel stiff or waxy.
Getting Ready: The Right Start
This step is non-negotiable. You must begin with a perfectly clean and completely dry item. Any dirt or old conditioner left on the surface will get sealed in by the protector spray, and moisture trapped inside the leather can lead to mildew. I always clean my items and then let them air-dry for a full 24 hours in a room-temperature spot, away from direct heat.
Work in a well-ventilated area, like a garage with the door open or on a balcony. The aerosols in protector sprays are not something you want to breathe in. Lay your item on a flat surface protected by newspaper or a drop cloth.
The Application: A Gentle Mist, Not a Soaking
Shake the can of protector spray vigorously for at least a minute. This mixes the formula thoroughly. Hold the can about 6 inches (15 cm) from the surface of the leather.
Apply the spray using steady, even, sweeping motions across the entire item, making sure not to concentrate on one spot. Imagine you are applying a very light, even coat of dust. You want to see a faint, even dampness, not a shiny wet look. Pay special attention to seams and stitching, as these are often where water finds a way in.
The Golden Rule: Multiple Light Coats
This is where most mistakes happen. One heavy, soaking coat will likely darken the leather unevenly and can stiffen the nap. It might even fail to dry properly.
The correct method is simple:
- Apply one light, even coat over the entire item.
- Let it dry completely. This usually takes 1-2 hours. Don’t rush it.
- Apply a second light coat.
- Let it dry completely again.
Two or three light, dry coats build a far more effective and consistent barrier than one drenched layer ever could. It’s the difference between applying two thin coats of paint versus one globby, uneven mess. For heavy-use items like boots, a third coat can be wise for extra peace of mind.
Keeping the Shield Strong
Protector isn’t permanent. Friction from wearing, exposure to the elements, and even cleaning will slowly wear it down. For items you use regularly, like boots or a daily bag, plan to reapply the protector every 2-3 months.
You should also always reapply it after you give the item a deep clean. The cleaning process removes not just dirt, but the protective layer too. Think of it as a fresh start. If you get caught in a downpour, blot the item dry and let it rest, then check its beading action with a few drops of water. If the water soaks in instead of beading, it’s time for a fresh application.
Can You Stretch Suede or Nubuck Safely?
Let’s be honest. We’ve all bought footwear that felt fine in the shop, only to feel a pinch later. Suede and nubuck can be unforgiving. The very best plan is to get the right fit from the start. A shoe that’s too small won’t magically become a full size larger without risking the material.
But if you need just a little more room across the top of the foot or to soften a stiff heel counter, you have safe options.
The Gentle, Natural Method
Patience is your most important tool. The safest way to encourage a bit of give is to let the leather adapt to your foot’s shape slowly.
- Put on a pair of thick socks. The kind you’d wear for a winter hike are perfect.
- Put on the suede or nubuck shoes or boots.
- Wear them around your house for 30 to 60 minutes at a time.
- Do this for several days in a row.
The pressure and warmth from your foot will gently relax the fibers, allowing the material to mold to you without force. This is how I broke in a pair of nubuck hiking boots years ago. It took a week of evenings, but they became perfectly comfortable without any damage to the soft surface.
When to Call a Professional
For boots that are genuinely tight in a specific spot, like the toe box, a professional cobbler can help. They have mechanical stretchers that apply controlled, even pressure. They can even add a stretch to a precise area. If you go this route, tell them the material is suede or nubuck so they can use the correct attachments.
Avoid any DIY method that involves heat, like using a hairdryer while wearing the shoes. Heat can fry the delicate nap, leaving it brittle and discolored. I’ve seen boots where this left a permanent, shiny scar, especially when polishing or touching up suede.
Finding That Snug-But-Comfortable Fit
This question usually comes from someone wanting their boots to feel secure without pain. That ideal fit is a partnership between you and the leather. Your job is to give it time to adjust. Think of it like a conversation, not a command. The thick-sock method whispers to the leather. Heat and aggressive stretching yell at it, and the material rarely responds well.
A small amount of gentle, repeated wear is the most reliable path from “snug” to “comfortable” for suede and nubuck. It’s the same principle as my old saddle, Mason. The leather didn’t conform to the horse in one ride. It took consistent, careful use. Your footwear is no different.
What Absolutely Not to Do With Suede and Nubuck
Think of suede and nubuck like the softest velvet or your favorite wool sweater. Their beauty is in the surface, the nap. Using the wrong technique is like washing that sweater in dish soap and putting it in a hot dryer. It strips the life right out.
Here is your must-avoid list, straight from the workbench.
No Household Cleaners or Harsh Soaps
Window cleaner, dish soap, hand sanitizer. I have seen people try them all. These cleaners are far too aggressive. They are designed to cut through grease and grime on hard surfaces, not on delicate leather fibers. DIY leather cleaning dangers include common household items like vinegar, alcohol, and soap that can dry out, discolor, or weaken leather. That’s why many people turn to purpose-made cleaners and conditioners designed for leather.
Using them will strip the natural oils from the leather, leaving it dry, stiff, and prone to cracking, and they often leave a discolored, stained ring where they were applied. It is the same result as using dish soap on your hair every day.
No Harsh Scrubbing
When you see a scuff, the instinct is to rub at it hard. Resist. Suede and nubuck are textured surfaces. Aggressive rubbing with a rough cloth or brush will permanently mat the nap down in that one spot.
You will be left with a smooth, shiny patch that stands out against the soft, brushed finish around it. Instead, you always brush gently and lift stains.
No Soaking or Drenching
Never run these materials under a tap or submerge them. Water soaks in quickly and unevenly, leading to two big problems. First, dreaded water spots and dark rings as it dries. Second, it can cause the leather to shrink and stiffen as it loses its natural oils.
If they get caught in the rain, let them dry slowly at room temperature away from heat, then gently brush the nap once fully dry.
No Direct Heat From Dryers or Radiators
Placing wet suede boots by a heater or blasting them with a hairdryer seems like a quick fix. It is a surefire way to ruin them. Intense, direct heat bakes the leather. It makes the fibers brittle and can cause severe, irreversible shrinkage. For long-term appearance and durability, proper cleaning and care of Blundstone suede boots matters. A simple routine can help preserve color and texture.
The leather can become as hard as cardboard. Patience is your only tool here. Stuff them with paper towels and let time do the work.
No Waxes, Oils, or Conditioners for Smooth Leather
This is the most common mistake. The rich oils and waxes I use on Mason my saddle or June my jacket would be a disaster on suede. Products like mink oil or leather conditioner are meant to be absorbed and polish to a shine.
On suede, they will immediately darken the material dramatically and clog the porous nap, creating a sticky, blotchy, and flat surface. You must use products specifically formulated for suede and nubuck, which are designed to protect without altering the texture or color.
Long-Term Care and Smart Storage
Think of storage as giving your suede and nubuck a good rest. It keeps them ready for years of use.
Use shoe trees for boots and dust bags for handbags. Cedar shoe trees soak up moisture and hold the boot shape, preventing ugly creases. Soft dust bags stop dust from settling into the delicate nap of bags. Without these, leather can lose its form and texture.
Simple supports like shoe trees and dust bags fight everyday wear to keep your items looking their best.
Always clean items before you put them away for a season. A quick clean stops stains from setting in. Here is how I do it:
- Brush suede gently with a soft-bristle brush. This lifts the nap and removes surface dirt.
- For nubuck, use a rubber eraser bar on scuffs. Rub lightly to smooth them out.
- If there are spots, dab with a cloth dampened with water and a drop of pH-neutral cleaner. Never rub or soak the leather.
- Let the item air dry completely in a shady, well-ventilated spot. This can take three to four hours.
Cleaning before storage is a small step that prevents big, permanent stains.
Keep your stored items in a cool, dry place away from direct light. Heat and humidity can make leather crack or grow mold. Sunlight fades rich colors over time. I store my leather goods in a closet that stays temperate, similar to where I keep Scout, my wallet, safe from harm. Long-term storage solutions prevent mold, cracking, and color fading. These practices keep leather goods looking great for years.
A stable, dark environment preserves the strength and color of your suede and nubuck.
Even with great care, some accidents need expert help. For major spills like red wine or deep grease, professional cleaning is the best move. Home attempts can often push the stain deeper or damage the surface. When in doubt, take it to a cleaner who knows leather inside and out.
Professional cleaners have the tools and knowledge to handle messes that home care cannot fix.
Answers to Common Suede and Nubuck Worries
These questions come up all the time in my workshop. Let’s work through them together.
My suede got wet and stained. Now what?
Don’t panic. Water spots happen to June on drizzly days. The key is to let the item dry completely away from direct heat, then revive the nap.
For fresh water stains, a thorough brushing after drying is often all you need to restore the uniform look of the suede.
For persistent dark spots, a suede eraser is your best friend. Here’s the simple process I use:
- Let the item dry fully at room temperature for 24 hours.
- Use a clean suede brush to vigorously brush the entire panel, not just the spot. This lifts the flattened fibers.
- For a remaining stain, gently rub the area with a suede eraser (a gum or rubber block) using circular motions.
- Brush the area again to remove eraser debris and blend the nap.
If a stain remains after this, a specialized suede cleaner applied with a soft cloth can help. Always test any cleaner on a hidden seam first.
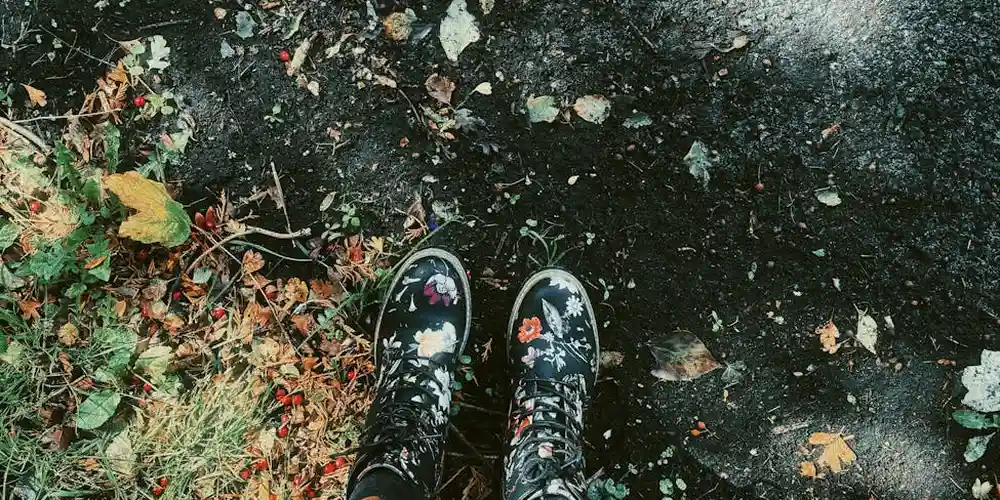
Can I use this on my Adidas or UGGs?
Yes, the core principles of gentle brushing, careful spot cleaning, and using a waterproofer made for napped leather apply to brand-name items.
Your first and most important step is always to check the manufacturer’s care tag inside the item. Some brands use special coatings or treatments that need specific care. If the tag says “Do Not Use a Brush,” follow that. When in doubt, treating your suede sneakers or boots with the same gentle respect you’d give a fine suede jacket is a safe path. With suede trainers and sneakers, a brand-agnostic ‘do clean care suede trainers sneakers brand’ mindset helps you apply the same gentle routine across styles. This approach also sets you up for easy, brand-specific tips in the next steps.
My item is peeling. Is it ruined?
Peeling can mean different things. True suede and nubuck should not peel. They may thin with extreme wear, but the layer should be consistent.
What you’re often seeing is a bonded material or a synthetic coating separating from its base. Minor peeling on a seam or edge can sometimes be stabilized with a flexible leather adhesive by a professional, but widespread peeling is usually a sign of material failure.
Think of it like plywood versus solid wood. A high-quality, full-grain leather is solid. A lower-quality material might be a thin layer glued to a backing. Once that bond fails, a full repair is very difficult. For a cherished item, consult a professional restorer for an honest assessment.
I have a care kit. What’s next?
Great! Having the right tools is half the battle. Here’s how to use a typical kit, linking each tool to the core care steps:
- Brush: Use this for every single cleaning and maintenance session. Brush before you clean to lift dirt, and brush after any treatment to restore the nap.
- Eraser/Gum Block: This is for spot cleaning dried stains, as described above. Use it gently after brushing.
- Cleaning Solution: If your kit has a liquid cleaner, apply a small amount to a clean cloth (not directly to the suede) and dab stains. Let dry completely.
- Waterproofer/Protector Spray: This is your final shield. After the item is perfectly clean and dry, apply an even coat from about 6 inches away in a well-ventilated area. Let it dry for the time specified on the can.
The order is simple: Brush, Clean (if needed), Protect. Then brush again to finish.
Common Questions
I see a lot of “suede care kits” on Amazon. How do I know which one is any good?
Look for kits that include a dedicated cleaner, a protector spray, and a dual-sided brush with stiff and soft bristles. Prioritize kits with clear ingredient lists and positive reviews that specifically mention not darkening or damaging the leather. Thinking about the best products and methods for cleaning leather helps you compare options clearly. It also sets up a smooth transition to the next steps with related care guides.
The instructions in my care kit seem vague. What’s your rule of thumb for using them?
Always follow the order of operations on your specific kit, as formulas vary. The universal principle is to start perfectly clean and dry, apply any liquids sparingly, and finish with a thorough brushing to resurrect the nap.
I’d rather buy a care kit in person. Where should I look “near me”?
Check shoe repair shops (cobblers) first, as they stock professional-grade products. You can also find reputable kits in the shoe care aisles of department stores, specialty leather goods stores, or large sporting goods retailers.
What should I look for in a suede care kit review to know it’s trustworthy?
Trust reviews that mention using the kit on a similar item (like boots vs. a bag) and note the long-term result. Be wary of reviews claiming a single application fixes major stains; good care is about maintenance, not miracles.
I have the kit. How do I incorporate it into my routine?
Use the brush for regular upkeep and the eraser for spot cleaning as issues arise. Reserve the full cleaning and waterproofing process for a seasonal refresh or after an accident, always ensuring the item is bone-dry first.
Keeping Your Suede and Nubuck Fresh
Your most important job is to care for the nap. Brush it often with the right tools, clean stains gently when they happen, and protect it with a dedicated spray before it gets wet. A simple, consistent routine makes all the difference.
Caring for your leather well is an act of responsibility. It prolongs the life of a beautiful material, honors the craft behind it, and builds your own skills for mindful ownership.
Expert Resources and Citations
- Suede and Nubuck care guide
- Nubuck & Suede Care Guide – Auclair Sports
- Suede & nubuck routine care guide – Saphir Médaille d’Or France
Harriet is a avid collector of leather goods such as purses, bags, seat covers, etc and has an extensive background in leather care, recovery, stain removal and restoration. She has worked for a number of years perfecting her leather care techniques and knows the ins and outs of restoring all kinds and types of leather products. With her first hand knowledge in leather care, you can not go wrong listening to her advice.
Suede and Nubuck Care