How Do You Identify and Repair Patent Leather? A Practical Care Guide
Published on: October 30, 2026 | Last Updated: October 30, 2026
Written By: Harriet Nicholson
Hello Tannery Talk. That sudden scuff or fine crack on a glossy patent leather item can feel alarming, but I assure you, a careful repair is within reach.
We will cover how to spot real patent leather, its specific vulnerabilities to drying and scratches, and clear solutions for cleaning, conditioning, and repairing the finish.
My years of hands-on care, from maintaining Mason’s saddle to fixing wear on June’s jacket, have taught me the precise methods patent leather needs.
What Exactly is Patent Leather?
Think of patent leather as leather wearing a raincoat. It starts as a base layer of leather, usually calfskin. Then, it gets multiple coats of a lacquer or plastic resin. This creates that famous, glass-like shine, making it distinct from other types of leather for shoes, bags, and jackets.
I like to compare it to a piece of hard candy. The glossy, colored shell is the patent finish. The soft fruit inside is the traditional leather, like the grain on my saddle Mason. You can see and feel the difference immediately.
This sealed shell is why patent leather care is so different from caring for your other pieces. Conditioners and oils made for Mason or my jacket June can’t penetrate that plastic-like topcoat. They just sit on the surface, creating a greasy, sticky mess. Your goal is to care for the coating itself.
How to Spot Damage on Your Patent Leather
Finding damage early is the best way to stop a small problem from becoming a big one. Here’s what to look for.
Fine Scratches
These are shallow marks on the glossy surface. They catch the light wrong and look like tiny, shiny lines. You can often feel them with a fingertip. They haven’t broken through the color layer.
For fine scratches, a good cleaning and a specialized patent polish can often fill and mask them completely. This is a surface-level fix, similar to buffing a light scratch on a car’s clear coat.
White Scuffs
A white scuff means the very top clear layer of the finish has been scraped. The colored layer underneath is still intact, but the abrasion scatters light, making it look white. This is common on patent leather shoes from rubbing against a curb or another shoe.
You can test a white scuff by putting a tiny drop of water on it. If the white disappears when wet, the damage is only in the top clear coat. This is good news for a simple repair.
Peeling Layers
This is a more serious issue. You’ll see the glossy top layer starting to lift or bubble away from the leather base. It looks like chipped nail polish. The edges might be curled.
Peeling happens from repeated flexing in one spot, like on the toe of a shoe, or from prolonged exposure to moisture getting under the coating.
Once peeling starts, you cannot glue it back down seamlessly. The fix is a full, professional refinishing of that panel. For now, your job is to prevent the peel from spreading by keeping the area clean and dry.
Deep Cracks
These are the worst. Deep patent leather cracking looks like dark lines or fissures where the colored coating has split all the way through, sometimes revealing the pale leather underneath. The crack will feel like a ridge or gap.
Cracking is caused by the leather base drying out and shrinking over years, while the brittle plastic coating on top cannot flex with it. This is often a sign of age and neglect.
A true crack cannot be “fixed” to look new again. It requires a complete color match and touch-up by a specialist, which is a cosmetic cover-up, not a true reversal of the damage.
Your Step-by-Step Guide to DIY Patent Leather Repair

Think of patent leather’s shiny coating as a thin, protective layer of glass. You must work with it, not against it. Your first move is always the same, no matter the damage. The science of leather aging explains why it cracks. Understanding this helps you combat cracking and preserve the finish.
The Essential First Step: A Gentle Clean
You must start with a clean surface. Any dirt or grease will get sealed in during a repair, creating a cloudy, permanent blemish.
- Take a clean, soft, lint-free cloth (like microfiber). Dampen it with cool water and wring it out thoroughly.
- Gently wipe the entire piece of patent leather to remove surface dust and grime. Do not soak it.
- Use a second dry, soft cloth to immediately buff the surface until it is completely dry and streak-free.
Never use regular leather cleaner, saddle soap, or conditioning oils on patent leather; they will permanently dull the glossy finish.
Tiered Repair: Match the Method to the Damage
After cleaning, assess the damage. Here is how to handle the most common issues, from easiest to most complex.
For Light Scuffs and Surface Marks
These are marks on the shine, not in the leather. My June jacket gets these from brushing against a table. The fix is simple.
- Take a clean, ultra-soft cloth (an old t-shirt works perfectly).
- Using very light pressure, buff the scuffed area in small, quick circles.
- The friction and gentle warmth from your hand can often redistribute the surface coating to cover the scuff.
For a little extra help, you can breathe lightly on the scuff to create a faint mist before buffing, which can help the surface layer become more pliable.
For Scratches and Small Peeled Areas
This is when the clear topcoat is scratched through or a tiny flap has lifted. You will need a quality patent leather repair kit.
- Color Matching is Everything. Use the kit’s color guide to find the closest match. Test the paint on a hidden area first, like an inside seam.
- Apply the colored paint with the included fine brush or applicator. Use several thin layers, letting each dry completely as directed.
- Seal the Deal. The final, clear sealant in the kit is not optional. It recreates the glossy, protective topcoat. Apply it smoothly over your repaired area.
For Cracks and Gashes
This is structural damage where the leather itself is split. It’s more intensive, like fixing a torn page. You will need leather cement, a small matching leather patch (preferably one that matches well), and touch-up paint.
- Gently clean inside the crack with a cotton swab dipped in rubbing alcohol to remove oils. Let it dry.
- Apply a thin layer of flexible leather cement to both sides of the crack and to your patch. Wait until it becomes tacky.
- Press the leather together from the back, then apply the patch over the area on the inside for strength. Apply firm pressure.
- Once the cement is fully cured, use the steps from the repair kit above to color and seal the visible crack line on the front.
Common Mistakes You Must Avoid
- Using Regular Leather Conditioner: It will soak in and create permanent, dark, oily stains. Patent leather is coated and does not need conditioning.
- Applying Direct Heat: Never use a hairdryer or place it in sunlight to dry. Heat can warp the leather and bubble the plastic coating.
- Using Harsh Chemicals: Avoid acetone, nail polish remover, or all-purpose cleaners. They will melt or discolor the finish instantly.
- Over-applying Paint or Glue: More is not better. Thick layers will dry lumpy and look much worse than the original scratch.
Your Patent Leather Repair FAQs
Where do I find a patent leather repair kit?
Look in shoe care aisles of department stores, or search online for “patent leather repair kit.” A good kit includes color paint, a clear topcoat, and applicators. However, to know how to use the kit effectively, especially for scuffs, cracks, and sole separation repairs, it’s best to follow a detailed guide.
How do I use the paint effectively?
Patience creates the perfect finish. Shake the bottle well. Apply the tiniest amount to your brush. Use light, feathery strokes to build color slowly. Let each layer dry fully before adding the next. Rushing will cause streaks and smudges.
When Should You Call a Professional?
Knowing when to stop is a skill. My rule is simple: if the damage stresses you out just looking at it, or if the piece is priceless to you, get a quote from a pro.
Scenarios Where DIY Isn’t the Answer
- Large Areas of Peeling or Flaking: If more than a few square inches of the topcoat is lifting, a DIY kit will struggle to blend seamlessly.
- Structural Damage on Load-Bearing Items: A significant crack on a patent leather handbag strap or shoe upper needs internal reinforcement a patch might not provide.
- Valuable or Sentimental Heirloom Pieces: For a vintage handbag or special occasion shoes, the risk of a DIY job going wrong is too high.
Professional restorers have the tools and materials to strip, recolor, and entirely recoat a panel, making the repair virtually invisible, which is beyond the scope of any home kit.
Finding the Right Help
If you search “patent leather repair near me,” you might not find a specialist right away. Expand your search.
- Look for local cobblers or shoe repair shops. They often work on all leathers and can handle patent.
- Search for “**leather restoration**” or “**handbag repair**” services in your area. These specialists understand high-gloss finishes.
- When you contact them, ask directly: “Do you have experience specifically with repairing scuffs and peeling on patent leather?” Send them clear photos of the damage for the best assessment.
How to Keep Your Patent Leather Looking New
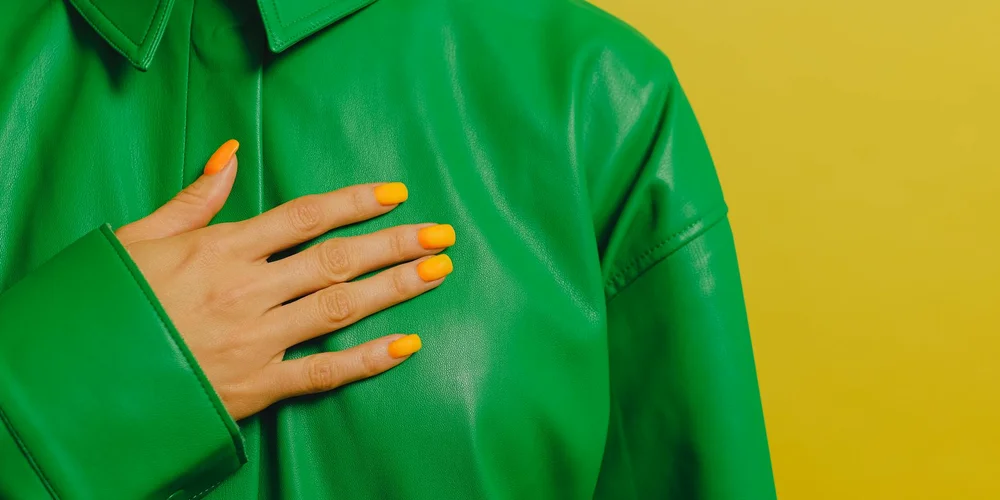
Think of that shiny coating on patent leather like a thin sheet of glass. Your goal is to keep that surface clear and uncracked for as long as possible. The good news is it’s simpler than caring for a full-grain piece like my saddle, Mason. It’s all about respecting the finish.
Prevention is Your Best Tool
Most damage to patent leather happens when you aren’t even wearing it. The coating can easily pick up scuffs and, more critically, permanent creases if stored poorly, especially when exposed to unfavorable humidity and temperature.
- Use a Soft Dust Bag: Never let it rub against zippers or coarse fabrics in a closet. A simple cotton pillowcase works perfectly.
- Avoid Pressure Folds: Stuff bags with acid-free tissue paper to help them hold shape. For shoes, always use shoe trees or soft forms.
- Keep it Cool and Dry: Heat is the enemy. Never store patent leather near a radiator, in a hot car, or in direct sunlight. It can cause the coating to become sticky or even melt slightly.
This simple habit of mindful storage prevents 90% of the headaches I see with worn patent leather goods.
The Right Way to Clean Patent Leather
You don’t need special potions. Regular, gentle cleaning removes the oils and dirt that can eventually dull the high-gloss surface. I do this with my patent items every few weeks.
- Start with a dry, ultra-soft microfiber cloth. Gently wipe the entire surface to lift any loose dust.
- For fingerprints or light soil, dampen a corner of a second microfiber cloth with distilled or filtered water. Wring it out completely-it should only be barely damp.
- Wipe the soiled area with light pressure. Never soak the leather.
- Immediately dry and buff the area with the dry side of your cloth.
For stubborn marks, use a drop of a pH-neutral cleaner made for coated or synthetic materials on your damp cloth. Test it on a small, hidden area first.
What You Must Never Use
This is where people make the biggest mistake. They treat patent leather like any other leather, and that ruins it. Beware of myths about leather care that could ruin your goods. We’ll cover the debunked 5 common myths about leather care that could ruin your goods in the next steps.
- Traditional Leather Conditioners and Oils: Products made for nourishing full-grain or suede leather, like the ones I use on Scout my wallet, will not absorb into patent leather. They will sit on top of the plastic coating, creating a greasy, cloudy film that attracts dirt.
- Silicone-Based Sprays and Shines: These can break down the coating’s chemistry over time, leading to cracking and yellowing. They create a temporary, artificial shine that does more harm than good.
- Harsh Chemicals: Avoid anything with ammonia, alcohol, or acetone. They will strip the shine and can dissolve the coating.
Patent leather doesn’t need to be fed or moisturized from the outside; its care is purely about protecting the surface seal.
Long-Term Care to Prevent Cracking
Over years, the plasticizer in the coating can dry out, leading to the tiny spider-web cracks we all fear. You can slow this down dramatically.
Once or twice a year, after a gentle clean, apply a tiny amount of a product formulated specifically for patent leather or high-gloss plastics. These are usually water-based, non-oily creams or lotions. Use a microfiber cloth to apply the thinnest possible layer, buffing until no residue is visible. This helps maintain the coating’s flexibility, especially when conditioning patent leather to prevent cracking or clouding.
The rule is: less is more. Think of this as applying a protective, flexible film, not a deep conditioning treatment. I check my patent pieces seasonally, the same way I check June’s jacket for wear, to see if they need this minimal intervention.
Common Questions
How do I find someone who can truly repair patent leather near me?
Don’t just search “patent leather repair.” Look for a skilled cobbler or a handbag restoration specialist and ask them directly about their experience with high-gloss coatings. A true pro will show you examples of their refinishing work on similar materials. For vintage patent leather bags, ask how they would safely clean and restore without dulling or cracking the gloss. This helps you spot a specialist who prioritizes safe, damage-free results.
Can I fix a spot where the patent leather has peeled off completely?
For a clean, peeled spot where the leather beneath is exposed, you must use a repair kit to rebuild the finish. Carefully build up thin layers of color-matched paint, followed by the clear sealant, to recreate that glossy shell. Given the delicate job, it’s important to paint and repaint leather furniture properly to restore its color and finish.
How long will a DIY paint repair on patent leather last?
A proper, thin-layered touch-up with a quality kit can last years on low-flex areas. On a high-flex spot like a shoe toe, expect it to be a temporary cosmetic fix, as the new coating will be less flexible than the original.
What’s the absolute best way to prevent patent leather from cracking?
It’s about environment, not product. Keep it away from heat sources and extreme cold, which make the coating brittle. Store it with shape support to avoid deep, permanent creases that turn into cracks.
Caring for Your Patent Leather
The core principle is to focus on the protective topcoat. Your repair work should always aim to seal and protect that glossy film first. Think of conditioning as a secondary, careful step for the leather hiding beneath it.
Proper care respects the animal and the craft by extending a garment’s life for years. Each careful repair, no matter how small, builds your skill and deepens your connection to the material.
Expert Resources and Citations
- Patent leather care guide
- r/Leather on Reddit: Can you please spell it out for me how to clean, moisturize, polish, and waterproof my fancy patent leather shoes?
- How to Clean Patent Leather Shoes | KirbyAllison.com
- Patent leather care guide – Saphir Médaille d’Or Shop
Harriet is a avid collector of leather goods such as purses, bags, seat covers, etc and has an extensive background in leather care, recovery, stain removal and restoration. She has worked for a number of years perfecting her leather care techniques and knows the ins and outs of restoring all kinds and types of leather products. With her first hand knowledge in leather care, you can not go wrong listening to her advice.
Patent and High-Gloss Leather Care